

Installing grease fittings is a crucial maintenance task that ensures the longevity and efficient operation of mechanical components. These small fittings, also known as Zerk fittings or grease nipples, allow for the easy application of lubricants directly into the parts that need it most, reducing friction and wear. Whether you’re working on cars, industrial machines, or agricultural equipment, understanding how to properly install and maintain grease fittings is essential for optimal performance and preventing costly breakdowns. This guide will provide you with a step-by-step approach for how to install grease fittings, ensuring you have the knowledge needed to keep your machinery running smoothly.
Benefits of Properly Installed Grease Fittings
Properly installed grease fittings offer numerous benefits that enhance the performance and lifespan of mechanical systems. Firstly, they ensure efficient lubrication by providing a direct path for grease to reach critical areas that require regular maintenance. This reduces friction between moving parts, minimizing wear and tear and thereby extending the operational life of the equipment. Additionally, regular lubrication made possible by these fittings helps in preventing rust and corrosion, protecting metal surfaces from environmental damage.
By maintaining optimal lubrication levels, grease fittings also contribute to improved energy efficiency, as well-lubricated machinery operates more smoothly and with less effort. In the long run, the use of grease fittings reduces maintenance costs, as it prevents unexpected breakdowns and prolongs the intervals between major repairs or replacements. Overall, grease fittings are a small but essential component in maintaining the reliability and efficiency of mechanical systems.
Understanding Grease Fittings
Grease fittings, often referred to as Zerk fittings, are small but integral components in a wide range of machinery. They are designed to allow the introduction of lubricants into bearing housings and other mechanical assemblies easily and efficiently. Made primarily from metals such as stainless steel, brass, or steel, grease fittings are known for their durability and resistance to pressure and temperature fluctuations. Typically, they come in various shapes and thread sizes to accommodate different applications and machinery types.
The design usually involves a one-way valve mechanism that prevents contaminants from entering the lubrication system while allowing grease to flow in when applied under pressure. Understanding the types, materials, and specifications of grease fittings is crucial for selecting the right one for your needs and ensuring effective lubrication. This knowledge empowers mechanics and maintenance professionals to keep machines operating smoothly and extending their service life.
Tools and Materials Needed
To successfully install grease fittings, you’ll need a few essential tools and materials to ensure the job is done efficiently and effectively. Here’s a list of what you’ll need:
- Grease Gun: This is the primary tool used to apply lubricant through the fittings. Choose a grease gun that is compatible with the type of fittings and grease you will be using.
- Wrenches or Socket Set: You’ll need these for installing or removing fittings, especially if you’re dealing with different thread sizes.
- Drill and Drill Bits: In cases where you need to install a new fitting from scratch, a drill and appropriate bits will be required to create the necessary holes.
- Thread Tap: This tool is used to cut threads in a hole to prepare it for receiving a new grease fitting.
- Replacement Grease Fittings: Ensure you have the correct size and type of fittings suitable for your machinery.
- Grease: Select the appropriate lubricant for your specific machine requirements, taking into account factors like temperature range and load conditions.
- Cleaning Cloths or Rags: These are needed to clean the area around the fitting before and after installation to prevent contamination.

Having these tools and materials on hand will prepare you for a smooth and successful installation of grease fittings, optimizing the performance and maintenance of your machinery.
10 Methods on How to Install Grease Fittings
1. Identify the Correct Grease Fitting for Your Equipment
Start by confirming the size and style of the grease fitting your equipment requires. There are various types, including standard straight, 45-degree, or 90-degree fittings. Using the wrong size or style can result in leaks or improper lubrication.
Tip: Always reference the manufacturer’s manual to find compatible fittings. Common sizes include 1/4″-28 or M6 metric.
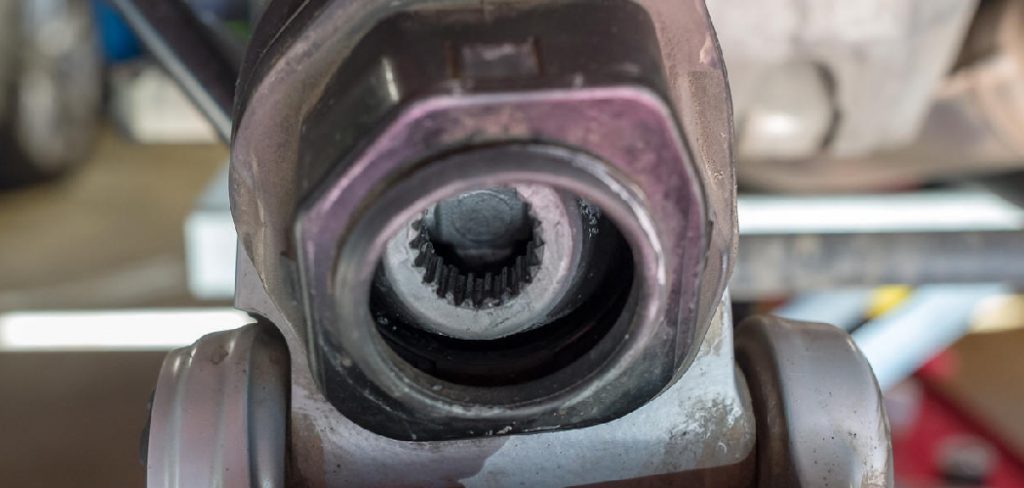
2. Inspect the Threads of the Connection Point
Before installation, inspect the hole or connection point where the grease fitting will be mounted. Ensure the threads are clean and not stripped. Dirt or damaged threads can prevent a secure fit and lead to grease leakage.
Use a degreaser or compressed air to remove debris. For threaded holes, tap them lightly with a thread chaser before proceeding for a snug fit.
3. Use a Thread-Tapping Tool for New Holes
If your equipment lacks a grease port, you’ll need to create one. Drill a hole of the appropriate size and then thread it using a grease fitting tap (usually the same size as your fitting). This process allows your fitting to screw in securely.
Pro Tip: Use cutting oil while tapping threads to reduce friction and heat buildup, ensuring clean and precise threading.
4. Hand-Tighten the Fitting First
Avoid over-tightening the grease fitting right away. Begin by threading it into place by hand to prevent cross-threading. Once it’s securely set, use a wrench or grease fitting tool to tighten it further.
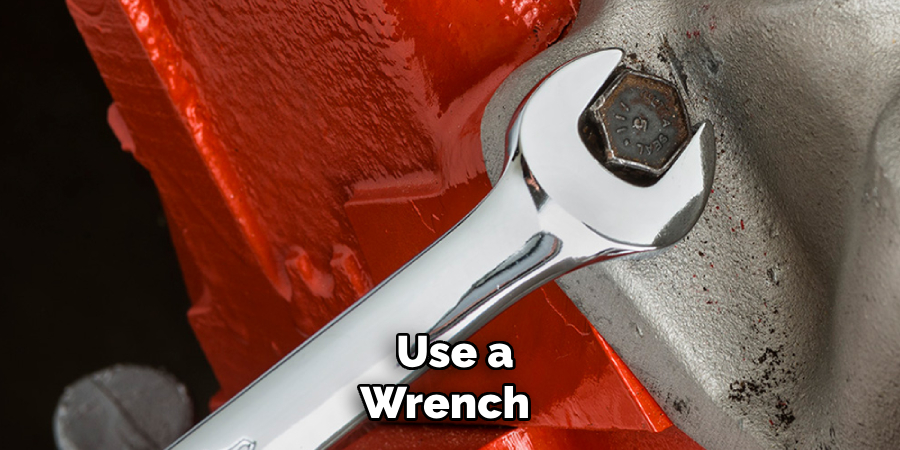
Try snugging it rather than cranking it down as over-tightening can damage threads.
5. Apply Thread Sealant for Leak Prevention
If you’re installing fittings in hydraulic components or pressurized systems, a thread sealant ensures no grease leaks. Use a small amount of thread sealant or Teflon tape around the threads before screwing in the fitting.
Note: Be careful not to block the opening of the grease fitting with tape or excessive sealant.
6. Check for Obstructions Inside the Fitting
Before installation, check that the fitting is free from any manufacturing debris or blockages. Any obstruction can prevent grease flow. Use a thin pin or cleaning tool to remove clogs.

Once installed, test the fitting with a grease gun to ensure grease flows freely through it.
7. Install Push-to-Fit or Drive-Type Fittings for Press-Fit Applications
Some equipment uses push-to-fit or drive-type fittings instead of threaded ones. These fittings require light tapping with a hammer to press them into place.
Tip: Use a brass or rubber mallet to avoid deforming the fitting during installation.
8. Consider Swivel-Head Fittings in Tight Spaces
Struggling with an awkward angle? Swivel-head fittings can rotate 360 degrees, making them a perfect choice for hard-to-reach areas. Replace any fixed fittings in tight spots with a swivel variety for convenient lubrication access.
Example: These are especially handy in automotive applications, like lubricating universal joints.
9. Use a Grease Fitting Tool to Extract and Replace Damaged Fittings
If you’re dealing with stubborn or damaged fittings, investing in a grease fitting tool can save you time. These tools allow for easy removal and replacement without damaging the surrounding area.
For jammed fittings, use an extractor tool to remove them neatly. Clean the threads and reinstall a new fitting.
10. Test After Installation
Once the grease fitting is installed, test it with your grease gun. Apply pressure to ensure the fitting allows grease to flow smoothly into the component. If any resistance or leaks occur, remove the fitting and recheck the installation process.
Pro-Tip: Use quality grease that matches your equipment’s specification. Proper lubrication prevents early wear and tear of components.
Things to Consider When Installing Grease Fittings
When installing grease fittings, several factors should be taken into account to ensure effective lubrication and maintenance of machinery. Firstly, compatibility is key—ensure that the fittings, and the grease used, are suitable for the specific type of equipment and its operational environment. Consider the environmental conditions, such as temperature and exposure to contaminants, which may affect the performance of the grease. Moreover, accessibility to the fittings is crucial for routine maintenance; select fittings and locations that facilitate easy access for greasing. It’s also important to regularly inspect fittings for wear or damage. Defective fittings can lead to lubrication failure and subsequent damage to mechanical components.

Common Mistakes to Avoid
When installing grease fittings, there are several common pitfalls that can compromise the effectiveness of your lubrication system. One frequent error is using the wrong type or size of fitting, which can lead to leaks or insufficient lubrication. Ensure that each fitting matches the manufacturer’s specifications and is suitable for the intended application. Another mistake is neglecting to clean the connection point before installation. Dirt and debris can prevent a proper seal and lead to premature wear. Additionally, over-tightening the fittings is a common issue; it can damage threads and make future removal difficult. When applying thread sealant, avoid excessive use, as this might obstruct the grease flow. Lastly, skipping the testing phase after installation can lead to undetected issues.
Conclusion
Installing grease fittings is a critical process in the maintenance and longevity of machinery. By adhering to proper installation techniques and using the correct fittings for specific applications, one can ensure efficient lubrication and prevent equipment failures. Each step, from identifying the right fitting to conducting thorough post-installation tests, plays an integral role in maintaining the integrity and functionality of mechanical systems. So, there you have it – a quick and easy guide on how to install grease fittings.
Edmund Sumlin is a skilled author for Metal Fixes, bringing 6 years of expertise in crafting a wide range of metal fixtures. With a strong background in metalwork, Edmund’s knowledge spans various types of fixtures, from decorative pieces to functional hardware, blending precision with creativity. His passion for metalworking and design has made him a trusted resource in the industry.
Professional Focus:
- Expert in Metal Fixtures : Edmund aesthetic specializes in creating durable and innovative metal fixtures, offering both appeal and functionality. His work reflects a deep understanding of metalworking techniques and materials.
- Sustainability Advocate : He is dedicated to using sustainable practices, ensuring that every fixture is crafted with eco-friendly methods while maintaining high-quality standards.
In his writing for Metal Fixes, Edmund provides valuable insights into the latest trends, techniques, and practical advice for those passionate about metal fixtures, whether they are professionals or DIY enthusiasts. His focus on combining artistry with engineering helps others discover the true potential of metal in design.