

Painting metal cans is a creative and practical way to repurpose everyday items into beautiful, functional pieces of art. Whether you’re aiming to create decorative containers, planters, or storage solutions, painting gives you the flexibility to customize cans to fit your aesthetic style.
This guide on how to paint metal cans will walk you through the essential steps and tips needed to achieve a professional-looking finish, ensuring that your painted cans not only look fantastic but are also durable and long-lasting.
Materials You Will Need
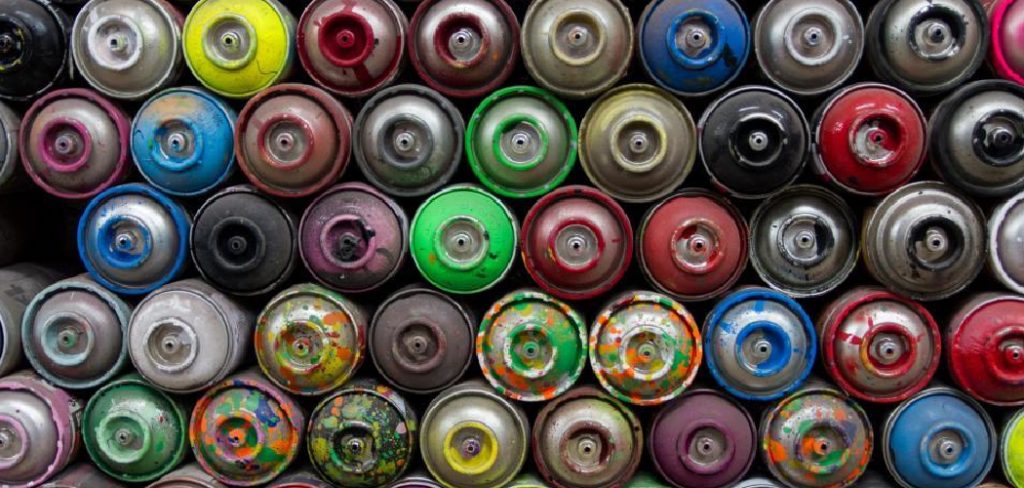
Metal Cans:
To begin, you will need metal cans of your desired size and shape. Cans made of tin or aluminum are the most commonly used for painting projects due to their durability and ease of painting. You can save empty food cans or purchase new ones from a craft store.
Primer:
A primer is essential for preparing metal surfaces for painting. It helps paint adhere better, prevents rusting, and creates a smooth base for your topcoat.
Spray Paint or Acrylic Paint:
Both spray paint and acrylic paint work well on metal surfaces. Spray paint provides a quick and easy application process, while acrylic paint gives you more control over the design and can be easily applied with a brush.
Paintbrushes:
If using acrylic paint, you will need paintbrushes in various sizes to achieve different strokes and designs.
Painter’s Tape:
Painter’s tape is useful for creating clean edges and preventing unwanted paint drips or smudges.
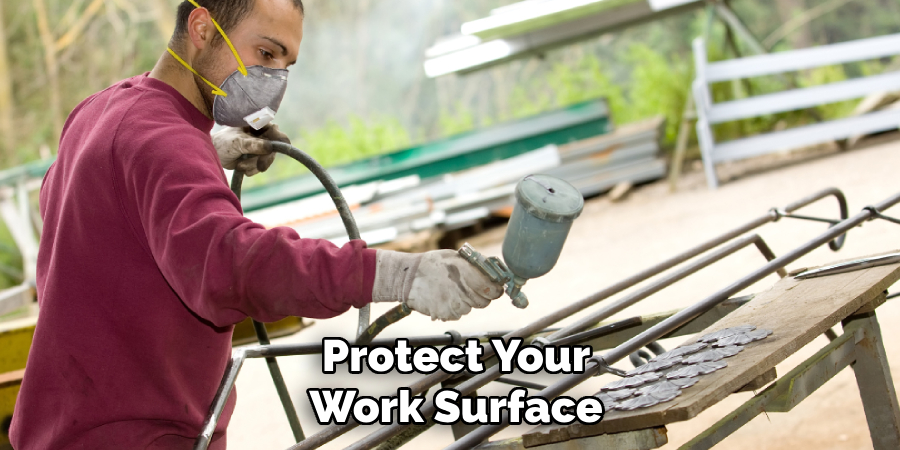
Newspaper or Drop Cloth:
To protect your work surface from any potential spills or overspray, lay down a few sheets of newspaper or a drop cloth before starting the painting process.
8 Step-by-step Guidelines on How to Paint Metal Cans
Step 1: Clean the Cans
Before starting the painting process, it’s crucial to thoroughly clean the metal cans. Begin by washing them with warm, soapy water to remove any labels, adhesive residue, and debris. Use a scrub brush or sponge to gently scrub the surface and ensure all dirt and grease are removed.
Rinse the cans well and allow them to dry completely. For an extra measure of cleanliness, you can wipe them down with rubbing alcohol or mineral spirits to remove any lingering oils, ensuring the primer and paint will adhere smoothly and effectively.
Step 2: Prepare Your Work Area
Creating a suitable workspace is essential for both efficiency and safety. Start by selecting a well-ventilated area, such as an open garage or outdoor space, to ensure that paint fumes dissipate quickly. Lay down several sheets of newspaper or a drop cloth to shield your surfaces from accidental spills or overspray.
Organize all your materials nearby so they are within easy reach; this includes your cleaned metal cans, primer, paintbrushes, spray paint or acrylic paint, and painter’s tape. Having a tidy and prepared workspace helps streamline the painting process, allowing you to focus solely on crafting stunning, professional-looking metal cans.
Step 3: Apply Primer
Using a primer is crucial for ensuring the best possible finish on your painted metal cans. Without a primer, the paint may not adhere well or result in an uneven and dull finish. Using a spray-on primer is the most convenient way to prime metal cans, as it provides even coverage and quick drying time.
Spray the primer evenly over the surface of the cleaned metal can, holding the can approximately 6-8 inches away from the surface. Allow it to dry completely before moving on to the next step.
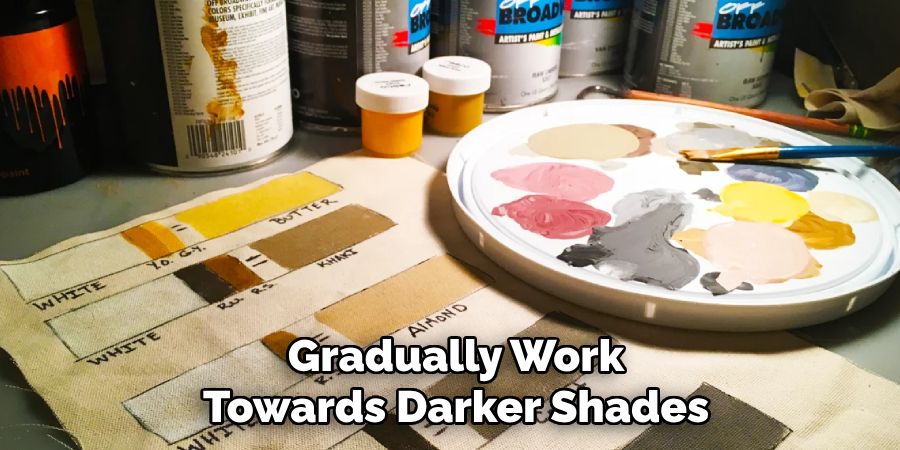
Step 4: Create Your Design
Now comes the fun part – creating your design! If you’re using spray paint, hold the can about 8-10 inches away from the surface and apply thin, even coats in a back-and-forth motion. Start with lighter colors as your base and gradually work towards darker shades or add details with stencils.
If you’re using acrylic paint, use various brush sizes to achieve different strokes and designs. You can also mix different colors to create custom shades for a unique look.
Step 5: Add Layers
Adding layers of paint can enhance the richness and depth of your design on the metal cans. After applying your initial design, allow it to dry completely before adding any additional layers.
This drying time ensures that each layer remains distinct without unwanted blending or smudging. For spray paint, apply multiple thin layers for a more vivid and durable finish.
Wait a few minutes between coats for proper drying. If using acrylic paint, build up layers gradually, allowing for creative techniques like shading or highlighting.
Experiment with different colors and patterns to achieve dynamic visual effects that reflect your personal style and vision. Whether opting for a solid color scheme or intricate designs, the layered approach allows for versatility and precision in your artistic expression.
Step 6: Remove Painter’s Tape
If you use painter’s tape to create clean edges or protect certain areas from paint, carefully remove it once the paint has dried but is still slightly tacky. Removing the tape too early can cause smudging or bleeding of colors and designs.
But waiting too long can result in the tape sticking to the paint and peeling it off. It’s best to remove the tape within an hour or two of painting for optimal results.
Step 7: Allow Paint to Cure
After completing your design, allow the paint to cure completely before using the metal cans. Depending on the type of paint used, this can take anywhere from a few hours to a few days. Most spray paints require about 24 hours of curing time before handling, while acrylic paints may need up to three days.

During this time, avoid any contact with water or heavy objects that could damage or smudge the paint. Once cured, your painted metal cans are safe to use without any risk of chipping or peeling.
Step 8: Display and Enjoy Your Artwork
Your beautifully painted metal cans are now ready to be displayed and enjoyed! Whether using them as decorative pieces in your home, for storing art supplies, or as unique gift containers, these personalized creations are sure to make a statement.
With proper care and handling, they can last for years to come, showcasing your creativity and artistic talent. So go ahead and proudly display your artwork for all to see!
The possibilities for painting metal cans are endless, and with these step-by-step guidelines, you can easily transform plain metal cans into works of art. So gather your supplies, unleash your creativity, and let your imagination soar as you embark on this fun and rewarding painting project!
How Much Will It Cost?
Painting metal cans can be an affordable and fulfilling creative project with a few necessary expenses. The total cost will depend on the materials and tools you choose to use. Here’s a rough breakdown of potential costs:
Metal Cans:
If you don’t already have metal cans to repurpose, consider purchasing them from a craft store or online retailer. Prices vary, but expect to pay about $1 to $3 per can.
Cleaning Supplies:
You’ll need soap, water, and possibly rubbing alcohol or mineral spirits, which you may already have at home. If not, these supplies will generally cost under $10.
Primer:
Spray-on primer is required to ensure paint adhesion. A single can will typically cost between $5 and $10, depending on the brand and quantity.
Paint: The cost of paint will vary based on the type and quantity. Spray paints are often priced around $5 to $10 per can. Acrylic paints can range from $1 to $5 per bottle. If you’re planning on using multiple colors, it can add up, potentially costing $15 to $30 for a selection of paints.
Tools and Accessories: You might needpainter’s’ tape, brushes, and drop cloths. These can be purchased inexpensively, with total costs being around $10 to $20.
Overall, the project can cost anywhere between $30 to $70, depending on the materials chosen and the scope of the design. By shopping smart and using existing supplies, you could further reduce costs, making this an accessible project for any budget.
Frequently Asked Questions
Q: Can I Use Any Type of Paint on Metal Cans?
A: It’s best to use a primer and spray paint or acrylic paint specifically designed for metal surfaces. These types of paint adhere better and provide a more durable finish.
Q: How Long Will the Paint on My Metal Cans Last?
A: With proper care and handling, the paint on your metal cans can last for several years. Avoid exposing them to harsh chemicals or heavy objects, and handle them gently to prevent chipping or peeling.
Q: Can I Use Stencils on Metal Cans?
A: Yes, stencils are a great way to add intricate designs and patterns to your metal cans. Just be sure to use a light touch when applying paint with stencils to avoid bleeding or smudging. So go ahead and unleash your creativity! Keep painting and creating beautiful works of art using these tips and techniques.

Conclusion
Painting metal cans may seem like a simple task but following the above step-by-step guidelines can help you achieve professional-looking results. From properly preparing the surface with primer to adding layers for depth and design, each step plays a crucial role in creating stunning and durable painted metal cans.
So gather your materials, set up your work area, and let your creativity flow as you turn ordinary metal cans into unique and personalized pieces of art. Remember to take proper precautions and allow for appropriate drying and curing time to ensure the best possible outcome. Thanks for reading this article on how to paint metal cans.
Edmund Sumlin is a skilled author for Metal Fixes, bringing 6 years of expertise in crafting a wide range of metal fixtures. With a strong background in metalwork, Edmund’s knowledge spans various types of fixtures, from decorative pieces to functional hardware, blending precision with creativity. His passion for metalworking and design has made him a trusted resource in the industry.
Professional Focus:
- Expert in Metal Fixtures : Edmund aesthetic specializes in creating durable and innovative metal fixtures, offering both appeal and functionality. His work reflects a deep understanding of metalworking techniques and materials.
- Sustainability Advocate : He is dedicated to using sustainable practices, ensuring that every fixture is crafted with eco-friendly methods while maintaining high-quality standards.
In his writing for Metal Fixes, Edmund provides valuable insights into the latest trends, techniques, and practical advice for those passionate about metal fixtures, whether they are professionals or DIY enthusiasts. His focus on combining artistry with engineering helps others discover the true potential of metal in design.