

Maintaining a well-functioning lawnmower is crucial for achieving a clean and even cut on your lawn. One of the key aspects of lawnmower maintenance is ensuring that the blade is in good condition and correctly sized for your mower.
Accurately measuring your lawnmower blade is essential when replacing it or checking for wear and tear. This guide will walk you through the step-by-step process of how to measure lawnmower blade, helping you make informed decisions for proper maintenance and optimal lawn care.
Benefits of Accurate Measurements
Accurately measuring your lawnmower blade has multiple benefits that significantly contribute to the overall performance of your lawnmower. Firstly, it ensures that the new blade you purchase is the perfect fit, preventing operational issues such as vibration, inefficient cutting, or even damage to the mower.
This precision in measurement extends the lifespan of both the blade and mower by reducing unnecessary wear and tear. Additionally, a correctly sized blade promotes a consistent and well-manicured lawn appearance, as it can make clean and precise cuts.
Accurate measurements also improve the safety of your mowing activities, as an ill-fitting blade can pose risks to both the machine and the operator. Ultimately, taking the time to measure the blade accurately leads to better lawn maintenance and cost savings over time.
Common Scenarios
There are several scenarios where knowing how to measure your lawnmower blade accurately is particularly important. One common situation is when it’s time to replace a worn-out blade. Over time, blades can become dull, nicked, or bent, impacting their ability to cut effectively.
Knowing the correct measurements ensures that any replacement purchased will fit seamlessly. Another scenario is when you’ve decided to switch to a different type of blade, such as a mulching blade for better clippings management, requiring exact specifications to ensure compatibility with your mower.
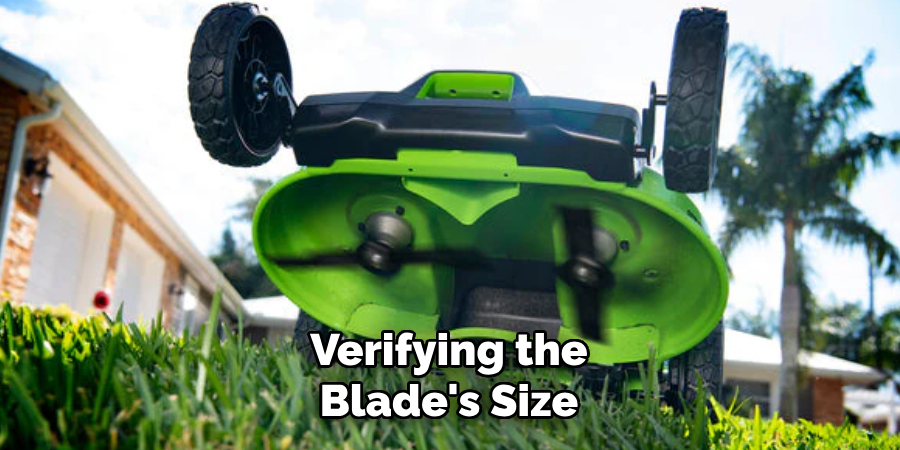
Additionally, if you’ve acquired a used lawnmower, verifying the blade’s size will help confirm that it matches the recommended dimensions for that particular model. Whether it’s for replacement, upgrade, or verification, accurate blade measurement is essential for maintaining optimal lawn care standards.
10 Methods How to Measure Lawnmower Blade
1. Understand the Blade Dimensions
Before you begin measuring, it’s essential to know the key dimensions of a lawnmower blade. These include the length, width, thickness, and center hole diameter. The length is the blade’s overall distance from tip to tip, while the width refers to the distance from one edge to the other.
The thickness is the depth of the metal, and the center hole diameter is the size of the hole that fits over the mower’s spindle. Understanding these dimensions ensures that you can select the correct replacement blade if needed.
2. Disconnect the Power Source
Safety should always be the first priority when working with a lawnmower. Before removing or measuring the blade, ensure the mower is turned off, and disconnect the power source. For gas-powered mowers, remove the spark plug wire to prevent accidental starting. For electric models, unplug the mower or remove the battery. This prevents any risk of the mower accidentally turning on while you are handling the blade.
3. Remove the Blade from the Mower
To get accurate measurements, you need to remove the blade from the mower. Place the mower on a stable surface, such as a workbench, and use a wrench or socket set to remove the bolts or nuts securing the blade.

Take note of how the blade is installed, including the orientation, as this will help when reattaching it. Carefully remove the blade and place it on a flat surface to begin the measurement process.
4. Measure the Blade Length
The blade length is one of the most important measurements to get right when replacing or assessing the condition of a lawnmower blade. Use a measuring tape or ruler to measure from the tip of one side of the blade to the tip of the other side.
If the blade is curved or has multiple sections, measure along the longest part of the blade’s edge. Ensure you measure both sides of the blade evenly to get an accurate length. Compare this length with the specifications of the mower model to ensure compatibility.
5. Measure the Blade Width
The width of the blade is another crucial measurement. Using a ruler or tape measure, determine the distance from one edge of the blade to the other, across the widest part. Lawn mower blades generally range in width from 2 to 3 inches, but this can vary depending on the model.
The width affects the blade’s cutting performance, so if you’re replacing the blade, make sure the width of the replacement is consistent with the original.
6. Measure the Blade Thickness
The thickness of the blade refers to how deep or thick the metal is. While this dimension doesn’t change as frequently as the length and width, it is still important to ensure the blade is sturdy enough for the mower’s engine and cutting performance. Use a caliper or ruler to measure the blade thickness at the center of the blade. Most lawnmower blades are between 0.125 inches and 0.25 inches thick. If you are unsure, refer to the mower’s user manual for specifications.
7. Measure the Center Hole Diameter
The center hole diameter is critical for ensuring the blade fits securely onto the mower’s spindle. Use a caliper or tape measure to measure the diameter of the central hole in the blade. Measure across the hole from one side to the other to determine its diameter accurately.

Be sure to measure both edges of the hole to account for any wear or rust that might have affected the blade’s fit. The diameter of this hole needs to match the size of the spindle that holds the blade in place.
8. Check the Blade’s Mounting Style
Lawnmower blades come in different mounting styles, and it’s important to account for this when measuring. Some blades may have a round hole, while others might feature a star-shaped, square, or other specialized hole shapes.
Identify the shape of the mounting hole in your blade and ensure that the blade is compatible with the mower’s spindle. To measure the mounting style, use a caliper or ruler to check the length and shape of the hole and cross-check it with your mower’s specifications to determine if the blade is a good match.
9. Measure the Blade’s Lift or Curvature
The lift or curvature of the blade is another important feature, as it directly impacts grass cutting performance. Blades may have a slight upward or downward curve designed to lift the grass for a cleaner cut. To measure this, simply lay the blade flat on a surface and check its curvature with a straight edge.
Use a protractor or angle gauge to determine the angle of the curve. While this measurement might not be as critical for replacement, it’s important to know if you’re looking to replace a specific type of blade, such as a high-lift blade designed for better air circulation and grass collection.
10. Use a Template for Precision
If you have difficulty measuring the blade’s dimensions accurately with a tape measure or ruler, you can create or purchase a blade measurement template. Templates can help ensure that each aspect of the blade, including length, width, and hole size, is measured with precision.
Simply place the blade on the template to compare measurements or use the template to trace the shape of the blade for further analysis. This method is especially useful for individuals who work with multiple blades and want to standardize the measuring process.
Common Mistakes to Avoid
When measuring and replacing lawnmower blades, it’s essential to avoid common pitfalls that can lead to improper fit or ineffective cutting. One frequent mistake is neglecting to turn off the mower and disconnect its power source before beginning the process, which poses a safety hazard. Another typical error is failing to clean the blade thoroughly before measurement, as dirt and grass buildup can skew the dimensions.
Additionally, using the wrong tools such as a ruler instead of a caliper for certain measurements can result in inaccuracies. Ignoring the variance in blade mounting styles or assuming that all blades are universally compatible can lead to purchasing the incorrect replacement.
Lastly, rushing through the measuring process without double-checking each dimension against the manufacturer’s specifications can lead to a poor fit or reduced performance. Taking the time to follow each step carefully can ensure a smooth and successful blade replacement.

Conclusion
Properly measuring and understanding the specifications of your lawnmower blade is essential for optimal performance and efficiency. By following the outlined steps, from disconnecting the power source to using measurement templates for precision, you can ensure that your mower operates safely and cuts effectively.
Accurate blade measurements help you select the correct replacement, maintaining the quality of your lawn care. Whether you’re replacing an old blade or just assessing its condition, these measurement practices contribute to the longevity and reliability of your lawnmower. So, there you have it – a quick and easy guide on how to measure lawnmower blade.
Edmund Sumlin is a skilled author for Metal Fixes, bringing 6 years of expertise in crafting a wide range of metal fixtures. With a strong background in metalwork, Edmund’s knowledge spans various types of fixtures, from decorative pieces to functional hardware, blending precision with creativity. His passion for metalworking and design has made him a trusted resource in the industry.
Professional Focus:
- Expert in Metal Fixtures : Edmund aesthetic specializes in creating durable and innovative metal fixtures, offering both appeal and functionality. His work reflects a deep understanding of metalworking techniques and materials.
- Sustainability Advocate : He is dedicated to using sustainable practices, ensuring that every fixture is crafted with eco-friendly methods while maintaining high-quality standards.
In his writing for Metal Fixes, Edmund provides valuable insights into the latest trends, techniques, and practical advice for those passionate about metal fixtures, whether they are professionals or DIY enthusiasts. His focus on combining artistry with engineering helps others discover the true potential of metal in design.