

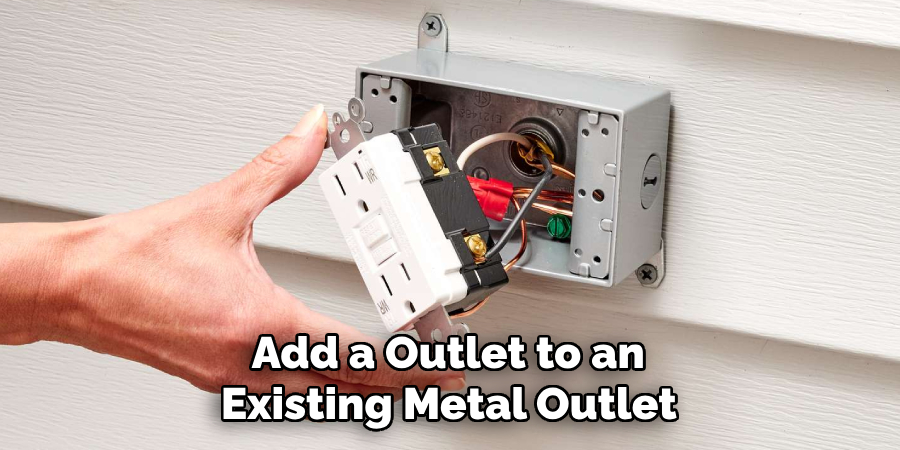
Adding an outlet to an existing metal outlet can be a useful and practical project, whether you’re looking to expand the functionality of a space or meet increased electrical needs. While the process requires careful handling and a basic understanding of electrical systems, it is achievable with the right tools and safety precautions.
This guide on how to add a outlet to an existing metal outlet will walk you through the steps to ensure the job is done effectively and safely. Before starting, always ensure that you adhere to local electrical codes and turn off the power to the circuit you’re working on.
Why Add an Outlet to an Existing Metal Outlet?
There are several reasons why adding an outlet to an existing metal outlet might be necessary or beneficial. Some common reasons include:
Increased Electrical Needs:
As technology continues to advance and our reliance on electronic devices increases, you may find that your current outlets can no longer keep up with the demand. Adding an outlet can provide more power and prevent overloading, which can be a safety hazard.
Convenience:
Having more outlets in a room means you won’t have to rely on extension cords or power strips, which can clutter up the space and pose tripping hazards.
Home Remodeling Projects:
If you’re remodeling your home, adding new outlets is a great opportunity to update the electrical layout and make it more functional for your needs.
Materials Needed
To add an outlet to an existing metal outlet, you will need the following materials:
New Outlet:
Make sure it matches the amperage and voltage of the existing circuit. You can also choose to use a GFCI (ground-fault circuit interrupter) outlet for added safety.
Screwdriver:
Remove the cover plate and unscrew the existing outlet.
Wire Strippers:
For cutting and stripping wires to connect them to the new outlet.
Electrical Tape:
To secure wire connections and prevent any accidental contact with live wires.
Voltage Tester:
Ensure that the power is off in the circuit you’re working on before starting.
10 Step-by-step Guidelines on How to Add a Outlet to an Existing Metal Outlet
Step 1: Turn off the Power
Safety should always be the first priority when working with electricity. Locate the circuit breaker panel in your home and identify the breaker that supplies power to the outlet you’ll be working on. Switch the breaker to the “off” position.
To ensure there is no electricity flowing to the outlet, use a voltage tester to check all wires in the outlet box. Only proceed to the next steps if the voltage tester confirms that the power is completely off.
Step 2: Remove the Outlet Cover Plate
Using a screwdriver, carefully remove the screws securing the outlet’s cover plate. Once the screws are removed, gently pull the cover plate away from the wall to expose the existing outlet and its surrounding box.
Set the cover plate and screws aside in a safe place where they won’t get lost, as you’ll need them later to reassemble the outlet. Take care to avoid touching any wires during this process to ensure maximum safety.
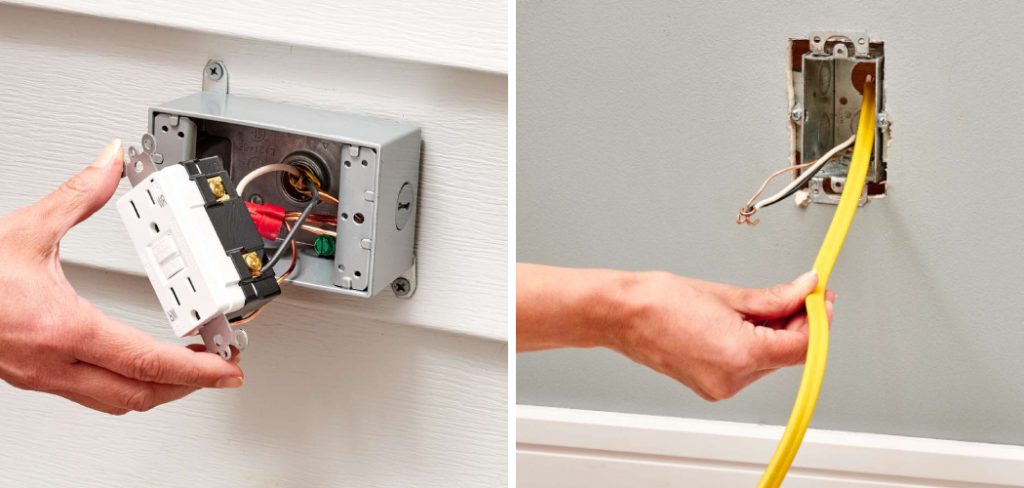
Step 3: Disconnect Old Outlet
Using a screwdriver, carefully remove the screws securing the outlet to the box. Gently pull out the outlet from the box and disconnect all wires attached to it. Make sure to keep track of which wire goes where, as you’ll need this information when connecting the new outlet.
But before disconnecting the wires, take a picture or make a diagram of the existing wiring for reference later on. This will help ensure that you connect the new outlet correctly.
Step 4: Prepare Wires
After removing the old outlet, inspect the wires inside the outlet box to ensure they are in good condition. If any of the wire ends are frayed or damaged, use wire cutters to trim them, and then use wire strippers to remove about ¾ inch of insulation from the ends of the wires.
This will provide clean, exposed wire for secure connections to the new outlet. Arrange the wires neatly within the box, separating the hot (black), neutral (white), and ground (green or bare copper) wires to avoid accidental contact. Double-check that the wires are the correct length and strip them further if necessary to ensure proper connection to the new outlet.
Step 5: Connect the New Outlet
Using your diagram or photo as a guide, connect the black wire to the brass-colored screw on the new outlet, the white wire to the silver-colored screw, and the green or bare copper wire to the green-colored screw. Make sure all connections are secure by gently tugging on each wire.
The hot (black) wire connects to the brass screw; the neutral (white) wire connects to the silver screw, and the ground (green or bare copper) wire connects to the green screw.
Step 6: Secure Outlet in the Box
With all wires connected, carefully tuck them back into the outlet box. Align the new outlet with the mounting holes on either side of the box and use screws to secure it in place. Avoid over-tightening as this can damage the outlet or cause issues with future maintenance.
But before screwing the outlet in place, make sure that all wires are neatly tucked into the box and avoid any contact with metal parts or screws.
Step 7: Reconnect the Outlet Cover Plate
Once the new outlet is securely in place, carefully reattach the cover plate using the same screws you removed earlier. Make sure it sits flush against the wall and there are no gaps or loose edges. The cover plate should be tight enough to prevent any movement but not so tight that it cracks or breaks.
It is always a good idea to check that there is no contact between the outlet cover and any metal parts or screws.
Step 8: Test New Outlet
With the cover plate back in place, switch the circuit breaker back on. Use your voltage tester to confirm that there is power flowing through the new outlet. If everything looks good, you can then test it by plugging in a small electronic device like a phone charger.
Suppose the device powers on; this indicates that the new outlet has been installed correctly and is ready for use. But if something doesn’t work as expected, switch off the power again and double-check all connections before testing again.
Step 9: Consider Adding the GFCI Outlet
If the outlet will be installed in a kitchen, bathroom, or outdoor area, it is recommended to use a GFCI (ground-fault circuit interrupter) outlet. This type of outlet automatically shuts off when it detects a ground fault or any current leakage, making it safer for use around water.
To install a GFCI outlet, follow the same steps as above, but make sure to connect the “line” and “load” wires correctly as indicated by the manufacturer’s instructions.
Step 10: Clean Up
Once everything is working perfectly with your new outlet, switch off the power again and tidy up any loose wires or tools that may have been used during installation. Properly dispose of any old, damaged outlets and packaging from the new ones.
Congratulations! You have successfully added a new outlet to an existing metal outlet. Just remember to always prioritize safety when working with electricity, and if in doubt, consult a licensed electrician for assistance. Happy crafting!
Additional Tips
Double-Check All Tools and Materials:
Before beginning the installation, ensure that you have all the necessary tools and materials, such as screwdrivers, pliers, wire strippers, voltage testers, and the new outlet. Working efficiently is easier when everything is prepared in advance.
Label Circuit Breakers:
Suppose your circuit breaker panel is not labeled; take the time to label each breaker that corresponds to each room. This will make it easier for future maintenance and repairs.
Consider Upgrading Outlets:
If you have an older home, your outlets may not have ground wires. Consider upgrading to modern three-pronged outlets with grounding capabilities for added safety and convenience.
Know When To Call a Professional:
While changing a metal outlet is relatively straightforward, it is important to know when to call in a professional electrician. If you encounter any issues or do not feel comfortable working with electricity, it’s always best to seek expert help rather than risking injury or causing damage. Safety should always be the top priority when dealing with electrical work. So, it is best to stay safe and call a professional if needed.
Frequently Asked Questions
Q: Can I Install a New Metal Outlet if I Have Little to No Experience With Electrical Work?
A: It is not recommended for individuals with little to no experience in electrical work to attempt this task. Working with electricity can be dangerous and should only be done by those who are trained and knowledgeable about proper safety procedures. If you are unsure or uncomfortable with the installation process, it is best to consult a licensed electrician.
Q: Can I Use an Old Outlet for Replacement Instead of Buying a New One?
A: It is highly recommended to purchase a new outlet rather than using an old one for replacement. Old outlets may have worn out connections or other issues that can cause safety hazards. Investing in a new outlet will ensure a safer and more reliable electrical connection.
Q: How do I Tell if My Outlet Needs to be Replaced?
A: Signs that indicate it may be time to replace your outlet include discoloration, cracks, or charring on the outlet itself, repeated trips of circuit breakers, or a burning smell. If you notice any of these signs, it is best to replace the outlet as soon as possible to avoid potential hazards.
With these steps on how to add a outlet to an existing metal outlet, you can now confidently update or add new outlets in your home. Just remember to prioritize safety and consult a professional if needed. Happy crafting!
Conclusion
Adding a new outlet may seem like a daunting task, but with the right tools and preparation, it can be done easily and safely. Just remember to take your time, double-check al connections, and prioritize safety at all times.
By following the steps on how to add a outlet to an existing metal outlet outlined above, you can confidently add a new outlet to an existing metal outlet and enhance your home’s functionality. Happy crafting!
Edmund Sumlin is a skilled author for Metal Fixes, bringing 6 years of expertise in crafting a wide range of metal fixtures. With a strong background in metalwork, Edmund’s knowledge spans various types of fixtures, from decorative pieces to functional hardware, blending precision with creativity. His passion for metalworking and design has made him a trusted resource in the industry.
Professional Focus:
- Expert in Metal Fixtures : Edmund aesthetic specializes in creating durable and innovative metal fixtures, offering both appeal and functionality. His work reflects a deep understanding of metalworking techniques and materials.
- Sustainability Advocate : He is dedicated to using sustainable practices, ensuring that every fixture is crafted with eco-friendly methods while maintaining high-quality standards.
In his writing for Metal Fixes, Edmund provides valuable insights into the latest trends, techniques, and practical advice for those passionate about metal fixtures, whether they are professionals or DIY enthusiasts. His focus on combining artistry with engineering helps others discover the true potential of metal in design.