

Welding machines are powerful tools that require a dedicated electrical outlet to ensure safety and optimal performance. In this comprehensive guide, we will explore the importance of wiring a dedicated welding outlet and provide step-by-step instructions on how to do it correctly. Whether you are a DIY enthusiast or a professional welder, understanding the electrical requirements and proper installation of a welding outlet is crucial.
Different types of welding machines, such as MIG, TIG, or Stick welders, often require specific outlets with higher voltage and amperage capacities, typically 240V and 50A or higher. Wiring a dedicated outlet for your welding machine eliminates the risk of overloading existing circuits and ensures a stable power supply, enabling your welding equipment to operate efficiently and reliably.
This article’s purpose is to guide you through the process of wiring a welding outlet, emphasizing safety measures, explaining the necessary tools, and providing detailed step-by-step instructions. By following this guide, you will be able to wire a welding outlet correctly, creating a safe and convenient power source for your welding operations.
So, let’s dive in and learn how to wire a welding outlet properly to enhance the safety and performance of your welding equipment.
Understanding the Electrical Requirements for a Welding Outlet
Understanding the electrical requirements of a welding outlet is essential to ensuring a safe and efficient welding setup. This knowledge allows you to select the appropriate outlet, wire it correctly, and provide the necessary power for your welding machine.
Voltage and Amperage Requirements
Welding machines like MIG, TIG, or Stick welders typically have specific voltage and amperage requirements. These machines often operate on higher voltages, typically 240V, to provide the necessary power for welding applications. Additionally, they require higher amperage capacities, usually 50A or higher, to accommodate the current demands of the welding process.
Typical Voltage Requirements for Common Welding Machines
MIG, TIG, or Stick Welders: These welding machines commonly require a voltage rating of 240V to deliver optimal performance and power output.
Amperage Requirements Based on Size and Type of Welding Machine
The amperage requirements for welding machines vary depending on their size and type. Most household welders operate effectively with a 50-amp circuit. However, larger industrial-grade welders may necessitate higher amperage capacities to meet their power demands.
NEMA Outlet and Plug Standards
The National Electrical Manufacturers Association (NEMA) has defined specific outlet and plug configurations for welding applications, ensuring the correct connection between the welding machine and the power source. Common NEMA configurations for welding outlets include NEMA 6-50 and NEMA 14-50.
These NEMA outlet configurations match the welding machine plugs, enabling a secure and proper electrical connection. Adhering to these standards is crucial to ensuring the compatibility and safety of the electrical components involved in your welding setup.
By understanding your welding machine’s voltage and amperage requirements and selecting the appropriate NEMA outlet configuration, you can ensure a reliable and safe power supply for your welding operations.
Tools and Materials Needed for Wiring a Welding Outlet
To properly wire a welding outlet, you will need the following tools and materials:
Tools Required:
- Screwdrivers
- Wire stripper
- Wire cutters
- Needle nose pliers
- Voltage tester
- Electrical tape
- Drill with bits (for outlet box installation)
- Multimeter to test voltage and continuity
- Conduit and connectors (if necessary for a complete setup)
Materials:
- Welding outlet receptacle (according to your welding machine’s plug type, such as NEMA 6-50 or NEMA 14-50)
- Proper gauge wire (usually 6/3 or 8/3, depending on the amperage requirements of your welding machine)
- Circuit breaker (typically 50A for most welders)
- A junction box or outlet box is used to mount the receptacle.
Ensure that you have the necessary tools and materials to safely and effectively wire a welding outlet that meets the electrical demands of your welding machine. Remember to follow proper safety procedures and consult a professional electrician if needed.
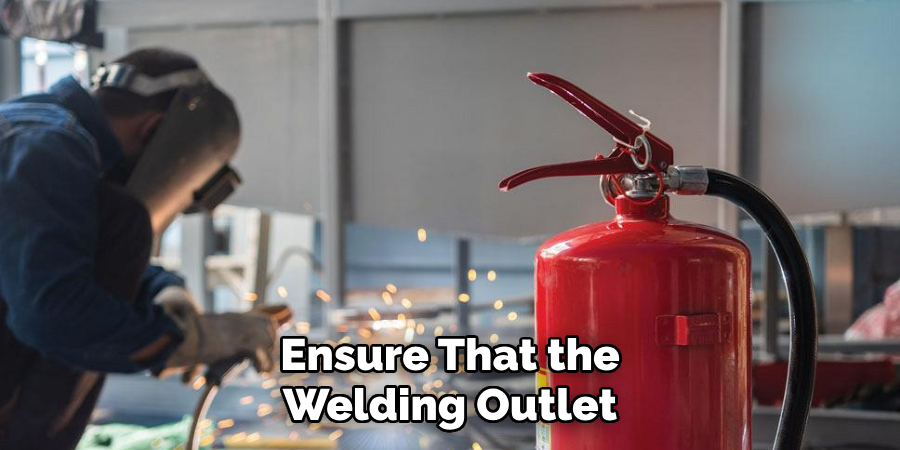
Safety Precautions Before Starting the Wiring Process
Before embarking on the wiring process for a welding outlet, it is crucial to prioritize safety. Implementing the following precautions will help ensure a secure and hazard-free installation:
Importance of Turning Off the Power:
Always turn off the main circuit breaker that supplies power to the area where you will be working. This step is essential to prevent electric shock or injury during the wiring process. Use a voltage tester to confirm that no power is flowing to the circuit.
Wearing Proper Safety Gear:
Personal safety must be prioritized when working with electrical wiring. To protect against accidental shocks and burns, wear rubber gloves, safety glasses, and insulated tools. These safety measures minimize the risk of electrical injury and provide extra protection.
Proper Ventilation:
Ensure that the work area is well-ventilated when working with electrical wiring. Proper ventilation helps prevent the inhalation of fumes generated from burning wires or connectors. Maintaining good air quality is essential to safeguarding your health and well-being.
Adhering to these safety precautions can create a secure environment and minimize the risks associated with the wiring process. Remember, if you are unsure or uncomfortable with any aspect of the wiring process, do not hesitate to seek guidance from a qualified electrician. Safety should always be the top priority when working with electricity.
Preparing the Electrical Circuit and Outlet Box
Before installing a dedicated circuit for your welding machine, it is crucial to ensure proper preparation of the electrical circuit and outlet box. Here are the essential steps to follow:
Installing a Dedicated Circuit Breaker:
- Begin by choosing the appropriate breaker size for your welding machine, typically around 50A for most models. Refer to the manufacturer’s specifications or consult with a qualified electrician for guidance.
- Once you have determined the correct breaker size, carefully install it in the electrical panel. Make sure it is correctly positioned for the new circuit and securely connected according to the manufacturer’s instructions and local electrical code regulations.
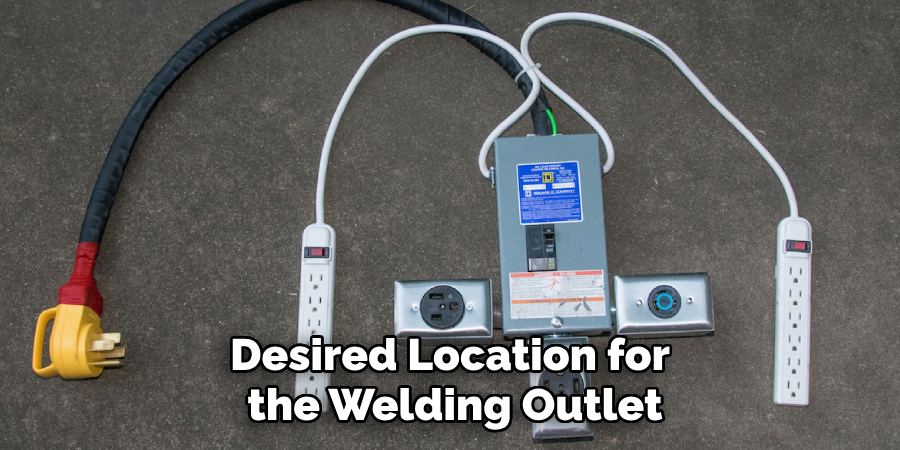
- Mounting the Outlet Box:
- Install the junction box or outlet box near the desired location for the welding outlet. Ensure it is securely mounted to the wall or stud, following local electrical code regulations.
- Provide proper support for the box, ensuring it is firmly anchored and capable of withstanding the weight and stress of the wiring connections.
- By following these preparatory steps, you lay the foundation for a safe and reliable electrical circuit for your welding machine. Remember, if you are uncertain about any aspect of the installation process, it is always recommended to seek guidance from a qualified electrician to ensure compliance with electrical codes and regulations.
Wiring the Outlet Receptacle
Preparing the Wiring:
To ensure a safe and reliable electrical connection for your welding machine, it is crucial to prepare the wiring carefully. Follow these steps to properly prepare the wiring:
- Choosing the Correct Gauge Wire: Selecting the appropriate gauge wire is essential for the safe operation of your welding machine. For most 50A circuits, a 6/3 gauge wire is recommended. This wire size can handle the high electrical load required by welding equipment.
- Stripping the Insulation from the Ends of the Wire: Use wire strippers to remove the insulation from the ends of the wire, exposing the copper conductors. Be sure to strip the appropriate length of insulation as per the manufacturer’s instructions.
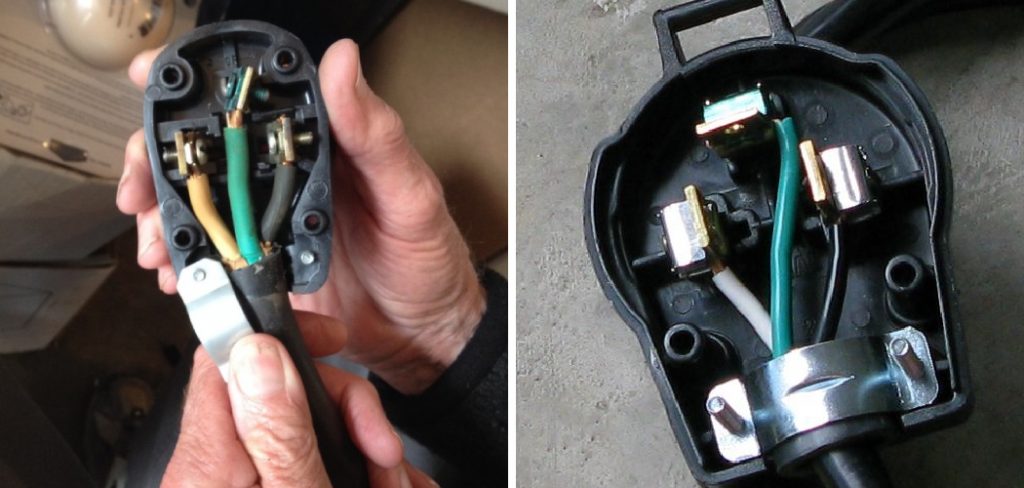
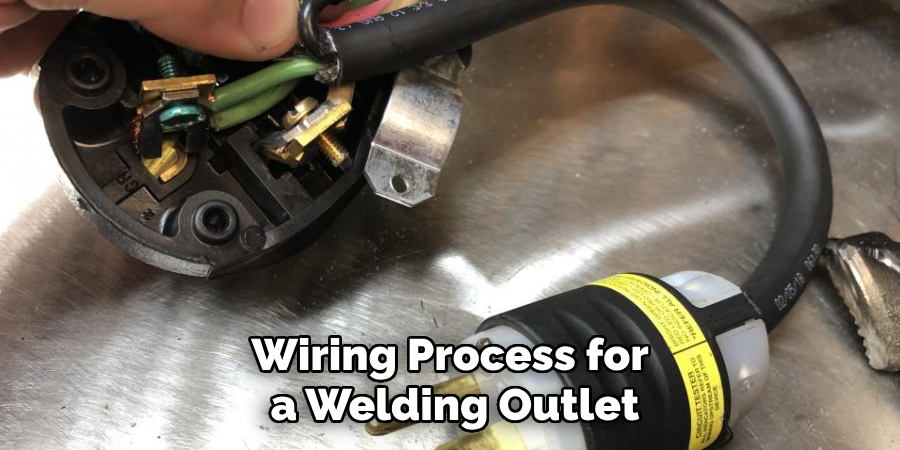
- Connecting the Ground Wire, Neutral Wire, and Hot Wires: Connect the ground wire, neutral wire (usually white), and hot wires (usually black and red) to the correct terminals on the outlet box. Follow the wiring diagram provided by the manufacturer and adhere to local electrical code regulations.
Connecting the Wiring to the Outlet:
After preparing the wiring, it’s time to connect it to the outlet receptacle. Follow these steps for a secure and reliable connection:
- Properly Connecting the Wires to the Outlet Terminals: Attach the ground wire to the green screw on the outlet, the neutral wire to the silver screw, and the hot wires to the brass screws. Ensure that all connections are tight and secure to prevent loose wires or poor conductivity.
- Attaching the Outlet Cover Plate: Once the wiring is connected, attach the outlet cover plate securely to the outlet box. This cover plate protects the wiring and provides a finished appearance to the outlet.
- Testing the Outlet: Before using the outlet, it is crucial to test it to ensure proper wiring and functionality. Use a voltage tester to confirm that the outlet is wired correctly and receiving the proper voltage. Additionally, you can use a multimeter to verify that the outlet is working correctly by measuring the voltage output.
By following these steps and testing the outlet, you can ensure a safe and reliable electrical connection for your welding machine. Remember to consult a qualified electrician if you are uncertain about any aspect of the installation process to ensure compliance with electrical codes and regulations.
How to Wire a Welding Outlet: Connecting the Welding Machine to the Outlet
Before connecting your welding machine to the newly installed outlet, it’s important to ensure that the machine is compatible with the power cord and that it is in good condition. Follow these steps to connect your welding machine safely:
Preparing the Welding Machine Cord:
- Check the Plug Type: Verify that the welding machine has the correct plug type to match the new outlet. Different machines may require different plug configurations, so matching them appropriately is crucial.
- Inspect the Power Cord: Carefully examine the welding machine’s power cord and plug for any signs of wear or damage. Ensure that the insulation is intact, and there are no exposed wires. If you notice any issues, consider getting the cord repaired or replaced by a professional.
Plugging the Welding Machine Into the Outlet:
- Secure Connection: Insert the plug of the welding machine’s power cord into the newly installed outlet. Ensure it fits snugly and makes a secure connection to prevent accidental disconnections during operation.
- Power-On Check: After plugging in the machine, perform a quick power-on check to ensure that it is receiving the required voltage and amperage. Verify that the machine powers on and functions as expected.
By following these steps and conducting the necessary checks, you can safely connect your welding machine to the newly installed outlet, ensuring efficient and reliable operation for your welding needs.
Troubleshooting Common Issues with Welding Outlets
Inconsistent Power or Flickering:
If you encounter issues with inconsistent power or flickering when using your welding machine, there could be several possible causes. First, check for any loose connections between the power cord and the outlet. Tighten them if necessary. A faulty or worn-out breaker can also disrupt the power flow, resulting in flickering. Consider replacing the breaker if needed. It’s also important to ensure that the welding outlet is compatible with your machine and that there is no damage to the outlet or power cord.
Outlet Not Providing Enough Power:
If your welding machine is not receiving enough power from the outlet, it could be due to an inadequate circuit breaker’s amperage rating. Check the breaker’s amperage rating and make sure it matches your welding machine’s requirements. Using a lower-rated breaker can lead to underpowering the welder. Additionally, ensure that the correct gauge wire is installed so the circuit can handle the required power without any issues.
By troubleshooting these common issues and implementing the necessary solutions, you can ensure a reliable power supply for your welding machine and maintain optimal performance during your welding projects.
Final Checks and Ongoing Maintenance
Before using your welding machine, it is important to perform some final checks and maintain the electrical setup for optimal performance and safety.
Final Electrical Check:
Perform a final test using a multimeter to ensure that the circuit is stable and provides the correct power output to your welding machine. Before starting any welding work, check that all connections, including the outlet and power cord, are tight and secure.
Ongoing Maintenance:
Regularly inspect the welding outlet, circuit breaker, and wiring for signs of wear or damage. This includes checking for loose or frayed wires, corroded connections, or any other potential hazards. Keeping the area around the outlet clean and free from debris is also important to maintain good ventilation and prevent overheating issues.
By conducting these final checks and implementing ongoing maintenance practices, you can ensure a safe and reliable electrical setup for your welding machine, allowing you to work with confidence and achieve optimal welding results.

Conclusion
In conclusion, wiring a welding outlet is crucial in creating a safe and efficient electrical setup for your welding machine. By understanding the electrical requirements, properly installing the outlet, and performing necessary checks, you can ensure your welding equipment’s optimal performance and longevity. Safety should always be the top priority, and regular maintenance and inspections are essential to prevent any potential hazards. By following the steps outlined in this guide on how to wire a welding outlet, you can confidently work, knowing that your electrical setup is reliable and secure. Invest in a dedicated welding outlet to enhance the performance of your welding equipment and prioritize the long-term safety of your welding operations.
Edmund Sumlin is a skilled author for Metal Fixes, bringing 6 years of expertise in crafting a wide range of metal fixtures. With a strong background in metalwork, Edmund’s knowledge spans various types of fixtures, from decorative pieces to functional hardware, blending precision with creativity. His passion for metalworking and design has made him a trusted resource in the industry.
Professional Focus:
- Expert in Metal Fixtures : Edmund aesthetic specializes in creating durable and innovative metal fixtures, offering both appeal and functionality. His work reflects a deep understanding of metalworking techniques and materials.
- Sustainability Advocate : He is dedicated to using sustainable practices, ensuring that every fixture is crafted with eco-friendly methods while maintaining high-quality standards.
In his writing for Metal Fixes, Edmund provides valuable insights into the latest trends, techniques, and practical advice for those passionate about metal fixtures, whether they are professionals or DIY enthusiasts. His focus on combining artistry with engineering helps others discover the true potential of metal in design.