

Installing a steel beam is a critical task in many construction and renovation projects, providing structural support and ensuring the stability of a building. This process requires precision, proper tools, and adherence to safety guidelines to achieve the desired results. Whether you are working on a residential or commercial property, understanding the steps and preparation involved in installing a steel beam is essential for a successful project. This document will provide a comprehensive guide on how to install steel beam, covering essential tools, installation techniques, and tips for achieving the best result.
Why Proper Installation is Crucial
Proper installation of a steel beam is vital to ensure the safety, durability, and longevity of the structure it supports. A poorly installed beam can lead to structural failures, which may result in costly repairs, hazards, or even collapses. Steel beams are designed to bear significant loads, and their effectiveness relies on precise placement, secure connections, and adherence to engineering specifications. Additionally, compliance with building codes and regulations is essential to avoid penalties and to ensure that the structure meets safety standards.
By taking the time and effort to install a steel beam correctly, you not only enhance the integrity of the building but also protect the safety of its occupants and anyone involved in the construction process.
Types of Steel Beams
Steel beams come in various shapes and sizes, each designed to serve specific structural needs. Understanding the different types of steel beams is essential in selecting the right one for your project. Some of the most common types include:
- I-Beam (H-Beam)
Named for its distinctive “I” or “H” shape, the I-beam is one of the most widely used steel beams in construction. It is ideal for vertical support and can efficiently bear heavy loads without excessive deflection. I-beams are often utilized in residential, commercial, and industrial projects.
- Wide Flange Beam (W-Beam)
This type of steel beam features broader flanges compared to an I-beam, offering greater strength and load-bearing capacity. W-beams are commonly used in large-scale construction projects, such as bridges and skyscrapers, where durability and stability are critical.
- Channel Beam (C-Beam)
Channel beams are shaped like the letter “C” and are typically used in lightweight structural applications. They are often employed as support for frames, trusses, or as secondary structural components.
- T-Beam

T-beams are created by splitting an I-beam in half, resulting in a “T”-shaped cross-section. These beams are used in specific architectural and engineering applications, such as floor systems, where partial support and reduced weight are required.
- Box Beam (Hollow Structural Section, HSS)
Box beams have a hollow rectangular or square cross-section, making them highly resistant to torsion and bending. These beams are commonly used in modern architectural designs and industrial applications.
10 Methods How to Install Steel Beam
1. Assessing Load Requirements and Planning the Installation
Before beginning the installation of a steel beam, the first step is to assess the load-bearing requirements for the space. This is crucial to determine the correct size and type of steel beam needed for the project. Consulting with a structural engineer is recommended to ensure that the beam chosen can handle the weight of the loads above. Once the load requirements are established, it is important to plan the installation carefully. Mark the positions where the steel beam will be placed, ensuring the beam is level and aligned with other structural components. A well-laid plan sets the stage for a smooth installation process.
2. Preparing the Site and Removing Existing Structures
Prior to the actual installation, you need to prepare the site by removing any existing structural elements, such as walls, supports, or old beams that may be in the way. If removing a load-bearing wall, temporarily support the area with adjustable posts or temporary wooden braces to hold the structure in place while you work. Ensure that any utilities, such as plumbing or electrical lines, are rerouted or removed safely before proceeding. Once the area is clear and adequately supported, the steel beam installation can proceed without unnecessary interference.

3. Selecting the Right Steel Beam
Choosing the right type of steel beam is essential to ensure that it meets both the strength and aesthetic requirements of the project. Steel beams come in various shapes, such as I-beams (also known as H-beams), box beams, and channel beams. The most commonly used are I-beams, which have an H-like shape, offering excellent strength-to-weight ratios. Consult with an engineer to ensure the beam’s specifications match the load calculations. The length, thickness, and type of steel must be precisely chosen based on the intended purpose of the beam and the structural load it will support.
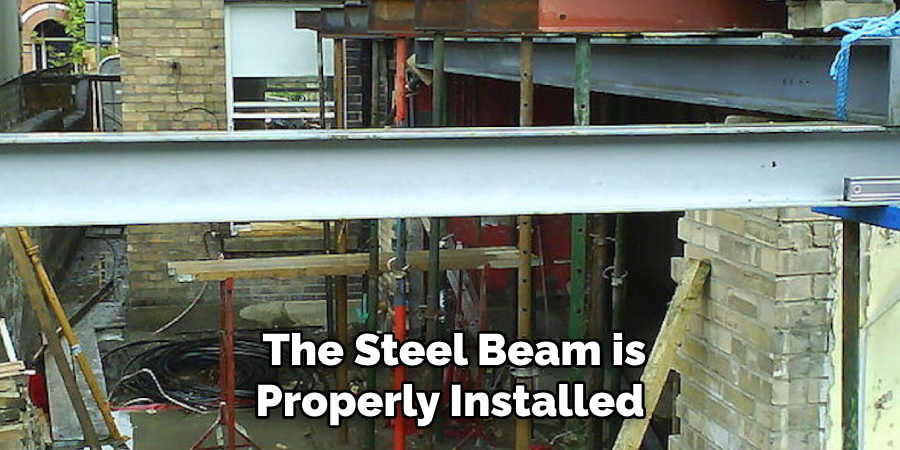
4. Lifting and Positioning the Steel Beam
Lifting and positioning a steel beam can be a challenging task due to its heavy weight and size. The beam will typically need to be hoisted into place using a crane or a chain hoist, depending on the size and the access available. For smaller beams, a forklift or a few strong helpers may be enough to lift the beam. Ensure that the lifting equipment is rated for the weight of the beam, and that lifting straps or chains are properly secured to avoid accidents. Once lifted, position the beam carefully into place, ensuring it aligns correctly with the previously marked positions. Use temporary supports to hold the beam in place as you begin securing it.
5. Securing the Beam to Support Columns or Walls
Once the steel beam is in position, it needs to be securely fastened to the support columns or walls at each end. This is typically done using steel plates, bolts, and steel anchor bolts. The beam must be perfectly level and aligned with the rest of the structure to avoid structural issues. Use a level and measuring tape to ensure that the beam is positioned correctly. Depending on the design, you may need to drill holes into the steel beam and into the supporting surfaces to insert bolts. Tighten the bolts gradually to avoid stressing the beam or support structure unevenly. If necessary, use shims or wedges to adjust the beam’s position before securing it completely.
6. Welding the Steel Beam (if required)
In some cases, welding the steel beam to the supporting structures may be required for added stability. Welding provides a solid, continuous connection between the beam and the surrounding structure. Depending on the type of beam and its role in the building’s design, a professional welder will use appropriate welding techniques, such as MIG or stick welding, to fuse the steel beam to the support columns or walls. If welding is necessary, it should be done by a certified welder, as improper welding can compromise the structural integrity of the beam and the overall building.

7. Reinforcing the Steel Beam with Bracing
In addition to securing the beam to the support columns or walls, additional bracing may be required to reinforce the steel beam. Braces can be made from steel, wood, or other materials, and are designed to prevent the beam from shifting or sagging over time. Braces should be placed at intervals along the length of the beam, at strategic points that align with the load-bearing areas.
8. Installing Additional Support Beams or Columns
In some cases, the steel beam alone may not be enough to fully support the load of the structure. Additional support beams or columns may be required to distribute the weight evenly across the entire structure. These supports can be made of steel, concrete, or wood, depending on the design of the building and the load it must bear. Install these additional supports either directly under the steel beam or at key load-bearing points to ensure that the weight is evenly distributed.
9. Inspecting the Installation for Safety
After the steel beam is installed and secured, it is important to conduct a thorough inspection to ensure that the beam and all supporting structures are stable and safe. Check the beam’s alignment, making sure it is level and properly secured to the columns or walls. Inspect the bolts, welding, and bracing to ensure that everything is tight and properly connected. If any issues are found during the inspection, such as misaligned beams or loose bolts, they should be corrected immediately.
10. Finishing the Installation and Rebuilding the Surrounding Area
Once the steel beam is properly installed and inspected, the final step is to finish the installation by rebuilding the surrounding area. If the steel beam was installed to replace a load-bearing wall, frame the opening with appropriate materials and add any necessary finishing touches, such as drywall, trim, or paint. If additional support columns were installed, ensure they are integrated into the design of the room or space.
Conclusion
The installation of a steel beam is a complex but crucial process in many construction and renovation projects. By following the proper steps—including selecting the right beam, lifting and positioning it carefully, securing it to the supporting structures, and inspecting the work for safety—builders can ensure the structural integrity and longevity of the project. Thanks for reading, and we hope this has given you some inspiration on how to install steel beam!
Edmund Sumlin is a skilled author for Metal Fixes, bringing 6 years of expertise in crafting a wide range of metal fixtures. With a strong background in metalwork, Edmund’s knowledge spans various types of fixtures, from decorative pieces to functional hardware, blending precision with creativity. His passion for metalworking and design has made him a trusted resource in the industry.
Professional Focus:
- Expert in Metal Fixtures : Edmund aesthetic specializes in creating durable and innovative metal fixtures, offering both appeal and functionality. His work reflects a deep understanding of metalworking techniques and materials.
- Sustainability Advocate : He is dedicated to using sustainable practices, ensuring that every fixture is crafted with eco-friendly methods while maintaining high-quality standards.
In his writing for Metal Fixes, Edmund provides valuable insights into the latest trends, techniques, and practical advice for those passionate about metal fixtures, whether they are professionals or DIY enthusiasts. His focus on combining artistry with engineering helps others discover the true potential of metal in design.