

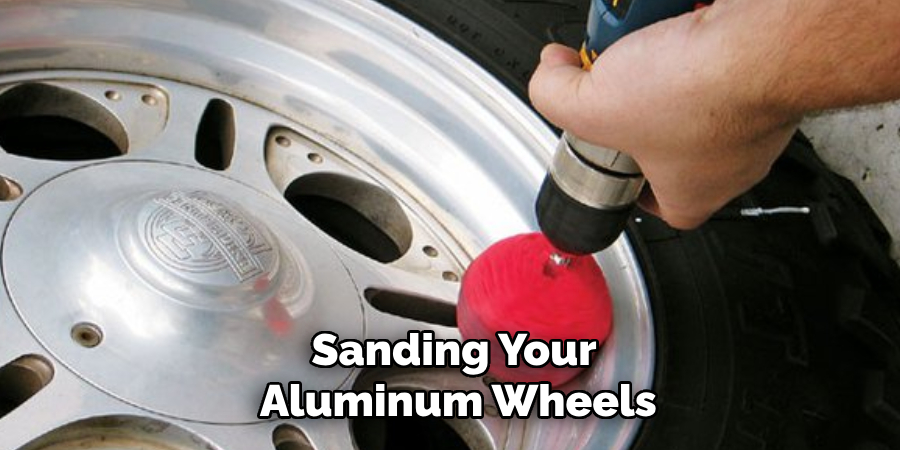
Sanding aluminum wheels is an essential process for restoring their shine and removing imperfections such as scratches, oxidation, and blemishes. Whether you’re preparing the wheels for painting or simply aiming to achieve a polished, mirror-like finish, proper sanding techniques are crucial. With the right tools, materials, and patience, anyone can transform old or tarnished aluminum wheels into stunning, like-new pieces. This guide will walk you through how to sand aluminum wheels effectively and safely.

Importance of Sanding Aluminum Wheels
Sanding aluminum wheels is a pivotal step in maintaining their appearance and prolonging their lifespan. Over time, wheels can accumulate scratches, dirt, and oxidation, which not only diminish their aesthetic appeal but can also lead to corrosion if left untreated. Proper sanding removes these imperfections, restoring the wheel’s smooth surface and preparing it for polishing or painting. Additionally, well-sanded wheels improve the overall look of your vehicle, contributing to a clean and professional finish. By investing time in sanding, you ensure that your aluminum wheels remain durable, functional, and visually appealing for years to come.
Materials and Tools Needed
Before starting the sanding process, it’s essential to gather all the materials and tools required for the job. Having the right items on hand will ensure a smoother and more efficient process. Here’s what you’ll need:
- Safety Gear: Gloves, safety glasses, and a dust mask to protect your hands, eyes, and lungs from dust and debris.
- Sandpaper: A variety of grits, including coarse (e.g., 220 grit), medium (e.g., 400 grit), and fine (e.g., 800–2000 grit) for progressively refining the surface.
- Sanding Block or Pad: To hold the sandpaper securely and provide even pressure during sanding.
- Water and a Spray Bottle (for Wet Sanding): Wet sanding reduces dust and improves the finish by lubricating the surface.
- Soap and a Soft Brush: For cleaning the wheels before sanding to remove dirt and grease.
- Towels or Microfiber Cloths: For drying the wheels after cleaning or wet sanding.
- Polishing Compound (Optional): For adding a finishing shine after sanding for a mirror-like appearance.
These materials and tools are essential for properly preparing and sanding your aluminum wheels, ensuring the best possible results.
10 Methods How to Sand Aluminum Wheels
1. Choosing the Right Sandpaper Grit
Selecting the appropriate sandpaper grit is essential to achieving a smooth finish without damaging the aluminum surface. For initial sanding or when working with rough surfaces, start with a coarse grit sandpaper (around 80 to 120 grit). This will help remove any corrosion, rust, or heavy scratches. For subsequent sanding, use finer grits (around 180 to 220) to smooth the surface further. Finally, for the polishing phase or to achieve a high-gloss finish, use a very fine grit (320 to 400 or even higher). Choosing the right grit ensures that you don’t skip any steps, allowing you to progressively refine the surface for optimal results.
2. Preparing the Wheel Surface
Before starting to sand, it’s crucial to prepare the aluminum wheel properly. Begin by cleaning the wheel thoroughly to remove dirt, grime, and brake dust. Use a degreaser or a mild soap solution and scrub the wheel with a brush to ensure that all contaminants are removed. If there are existing layers of paint, clear coat, or other coatings, these should be stripped off using a paint remover or a chemical stripper. A clean, well-prepared surface is vital for effective sanding and will help the sandpaper adhere better to the wheel.
3. Using a Power Sander for Large Areas
For large, flat sections of the wheel, using a power sander (either an orbital sander or a random orbital sander) can make the job faster and more efficient. Start with a medium-grit sandpaper (around 120 grit) attached to the sander, and move it over the wheel’s surface in smooth, circular motions. Avoid pressing too hard on the sander, as this can cause uneven sanding or even gouging. The power sander will help remove heavy scratches, corrosion, or old paint quickly and evenly. Make sure to keep the sander moving constantly to avoid creating flat spots or sanding through the aluminum.
4. Hand Sanding for Precision Work
While power sanders are effective for larger areas, hand sanding is often necessary for detailed or intricate parts of the wheel, such as the spokes, lug nut areas, or corners. Hand sanding allows for better control and precision, ensuring that you don’t accidentally damage delicate areas. Use a sanding block to keep the paper straight and maintain even pressure, or for tight spots, use flexible sandpaper or a small sponge. Gradually move through different grits, starting with coarser paper and finishing with finer grits for a smooth finish.

5. Wet Sanding for a Smooth, Glossy Finish
Wet sanding is a technique that involves wetting the sandpaper and the surface to reduce friction and heat buildup while sanding, resulting in a smoother finish. This method helps minimize the chances of scratching the aluminum and allows you to work with finer grits. Start with a lower grit (around 800) and apply water to both the sandpaper and the wheel. Sand the wheel in a circular motion, keeping the surface wet. As you move up through the grits (1000, 1500, or higher), the wheel will gradually take on a more polished look. Wet sanding is ideal for achieving a high-gloss, smooth surface, especially if you plan to polish the aluminum afterward.
6. Sanding the Wheel in Sections
When sanding an aluminum wheel, it’s best to work in small sections rather than sanding the entire wheel at once. This method ensures that you are more thorough and prevents areas from being missed. Start with the rim or outer edge and then move inwards, sanding each section progressively with the appropriate grit. This approach helps achieve a consistent, even finish across the entire wheel. If you’re dealing with a wheel that has multiple spokes or intricate designs, this method also allows you to focus on specific areas without causing any accidental damage to surrounding parts.
7. Using a Dremel Tool for Small or Intricate Areas
For detailed areas such as intricate spokes, hard-to-reach corners, or small indentations, a Dremel tool with a sanding attachment can be an excellent choice. Dremel tools are versatile, precise, and can reach places that larger sanders or even hand tools cannot. Attach a fine sanding drum or a small sanding bit to the Dremel, and carefully work over the area you want to smooth. This method is particularly helpful for restoring the finish on small or delicate details without affecting the larger, flatter surfaces of the wheel.

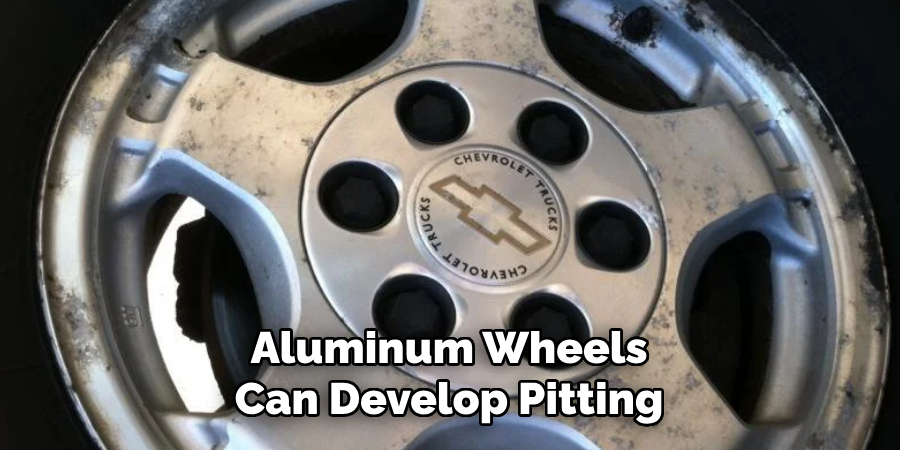
8. Removing Pitting and Corrosion
Aluminum wheels can develop pitting or corrosion over time, especially in areas exposed to harsh weather conditions. To address these issues, you’ll need to focus more aggressively on these areas with a lower grit (around 80 or 120). Sand the corroded areas until the pitting is gone, being careful not to sand too much in one spot to avoid gouging the metal. Once the pitting is removed, switch to a finer grit to smooth the surface and restore a more uniform finish. After sanding, it’s important to clean the wheel thoroughly again to remove any sanding dust or debris before proceeding with further steps, such as polishing.
9. Polishing the Sanded Surface
After sanding the wheel with progressively finer grits, polishing is the next step to achieve a shiny, glossy finish. Use a metal polish or a polishing compound specifically designed for aluminum. Apply the polish to the wheel using a clean, soft cloth or a polishing pad attached to a power tool (like a rotary polisher). Work in circular motions to buff the aluminum, applying pressure as necessary to bring out the shine. If using a power tool, be sure to keep the pad moving to avoid overheating any one area. Polishing the sanded surface enhances the final appearance and helps to protect the wheel from oxidation.
10. Sealing the Sanded and Polished Wheel
Once the aluminum wheel is sanded and polished to your satisfaction, sealing the surface with a protective clear coat is highly recommended. This step helps maintain the glossy finish and prevents the aluminum from oxidizing or tarnishing in the future. Choose a high-quality clear coat designed for use on metal surfaces, and apply it evenly across the entire wheel. Clear coat can be applied via spray or brush, depending on your preference. Let the clear coat dry completely, and consider applying two or more coats for added protection. Sealing the wheel will also make it easier to clean and maintain in the future.
Conclusion
Sanding aluminum wheels is a detailed, multi-step process that requires the right tools, techniques, and attention to detail. Whether you’re trying to remove old paint, corrosion, or simply achieve a smooth, glossy finish, these ten methods will guide you through the process to restore the beauty of your wheels. So, there you have it – a quick and easy guide on how to sand aluminum wheels.
Edmund Sumlin is a skilled author for Metal Fixes, bringing 6 years of expertise in crafting a wide range of metal fixtures. With a strong background in metalwork, Edmund’s knowledge spans various types of fixtures, from decorative pieces to functional hardware, blending precision with creativity. His passion for metalworking and design has made him a trusted resource in the industry.
Professional Focus:
- Expert in Metal Fixtures : Edmund aesthetic specializes in creating durable and innovative metal fixtures, offering both appeal and functionality. His work reflects a deep understanding of metalworking techniques and materials.
- Sustainability Advocate : He is dedicated to using sustainable practices, ensuring that every fixture is crafted with eco-friendly methods while maintaining high-quality standards.
In his writing for Metal Fixes, Edmund provides valuable insights into the latest trends, techniques, and practical advice for those passionate about metal fixtures, whether they are professionals or DIY enthusiasts. His focus on combining artistry with engineering helps others discover the true potential of metal in design.