

Do you have aluminum shutters that need a new look? Are you looking for an easy, budget-friendly update to your home’s exterior décor? Painting your aluminum shutters can be easier than you think.
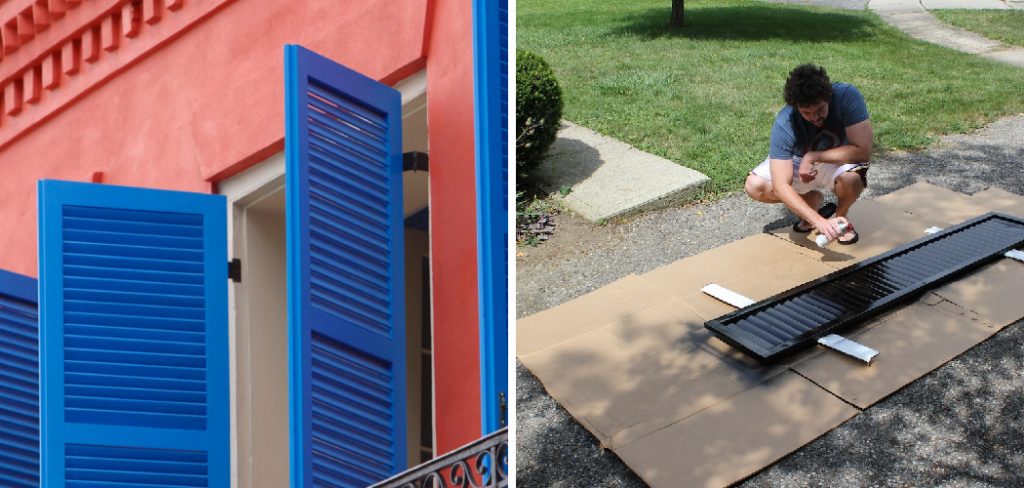
Aluminum shutters are a popular choice for their durability and low maintenance. However, over time, the color may fade or become outdated. Painting them can give your home a new look without breaking the bank.
In this blog post, we’ll not only show you how to paint aluminum shutters successfully but also provide tips on choosing the right tools and colors so that they last. From cleaning your shutters before painting to applying protective sealants afterward, follow our simple step-by-step guide for all the information you need!
What Will You Need?
Before you begin, make sure you have all the necessary supplies. Here’s a list of what you’ll need:
- Drop cloths or plastic sheeting
- Painter’s tape
- Degreaser or TSP (trisodium phosphate)
- Sandpaper (medium grit)
- Primer designed for metal surfaces
- Acrylic exterior paint in your chosen color(s)
- Paintbrushes (angled and flat)
- Protective sealant (optional)
Once you have all your supplies, it’s time to start prepping!
9 Easy Steps on How to Paint Aluminum Shutters
Step 1. Clean the Shutters:
Begin by taking down the shutters, if possible, and laying them on the drop cloths or plastic sheeting. Use a degreaser or TSP solution to thoroughly clean the shutters, ensuring to removal of all dirt, dust, and grime. This step is crucial as any remaining contaminants can interfere with the paint’s adhesion to the aluminum surface. Allow the shutters to dry completely before proceeding to the next step.
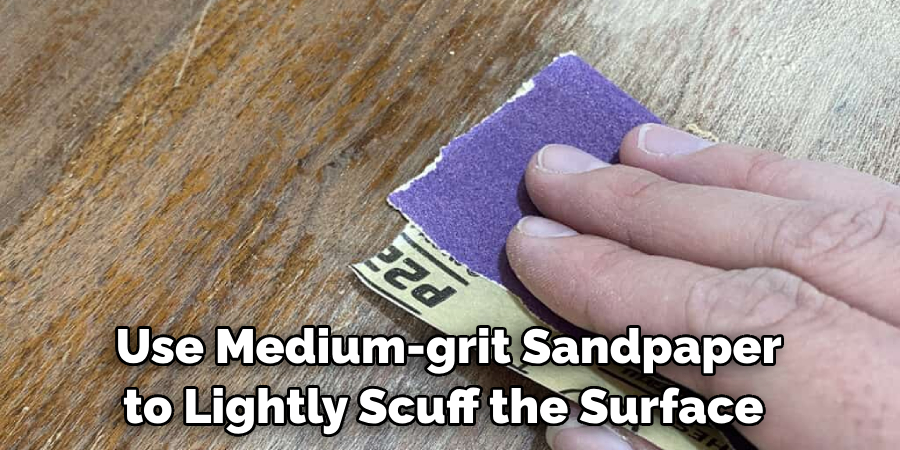
Step 2. Sand the Shutters:
After the shutters are completely dry, the next step in painting aluminum shutters is to sand them down. Use medium-grit sandpaper to lightly scuff the surface. This creates a rough texture that aids paint adhesion and helps remove any old, flaky paint or oxidation. Remember to wipe down the shutters with a damp cloth or sponge to remove any residual dust and particles after sanding. Allow the shutters to dry completely before proceeding.
Step 3. Apply Primer:
Priming the shutters is the next crucial step in painting aluminum shutters. Using a primer designed for metal surfaces ensures a smooth and durable finish. Carefully apply a thin, even coat of primer to each shutter, paying close attention to crevices and corners. Be sure to follow the manufacturer’s instructions regarding drying times. Once the primer is fully dry, you’re ready for the exciting part – painting!
Step 4. Paint the Shutters:
Now comes the most rewarding part of the process: painting the shutters. Choose an acrylic paint that is specifically designed for exterior use to withstand various weather conditions. Using your paintbrush, apply the paint in a thin, even layer. Start at the top for best results and work your way down to prevent drips.
Allow the first coat to dry thoroughly (usually a couple of hours, but check the paint can for specific drying times). After the first coat is dry, assess the coverage. Apply a second coat if the original color is still visible or the finish is uneven. Allow adequate drying time between coats to ensure a smooth and durable finish.
Step 5. Apply Sealant (Optional):
After your last coat of paint has thoroughly dried, consider applying a protective sealant. This step is unnecessary for all types of paint, particularly if you’ve used paint with a built-in sealant. However, in areas with harsh weather conditions, an additional sealant can provide an extra layer of protection against rain, sun, and wind damage.
If you apply a sealant, ensure it is suitable for use with your chosen paint, and apply it with a clean brush in thin, even layers. After applying the sealant, allow it to dry completely according to the manufacturer’s instructions before reattaching the shutters to the house.
Step 6. Reattach the Shutters:
Once your shutters are dry and you’re satisfied with their appearance, it’s time to reattach them to your home. Ensure that you align them correctly and securely fasten them. Use the same hardware that was used to hang them initially. If the old hardware is worn or rusty, replace it with new hardware.
Congratulations! You have successfully painted your aluminum shutters, and they are ready to face the elements. Remember to periodically check your shutters for signs of wear and tear to maintain their fresh, vibrant appearance.
Step 7. Maintenance:
The final step in the process of painting aluminum shutters is maintenance. To keep your newly painted shutters looking fresh and vibrant for as long as possible, clean them regularly. Use a gentle detergent and a soft brush or cloth to remove dirt and grime.

If your shutters show signs of wear or the paint starts to chip, simply follow the steps outlined in this guide to touch up the paint. With proper care and maintenance, your painted aluminum shutters can boost your home’s curb appeal for years.
Step 8. Celebrate Your Achievement:
Lastly, step back and admire your handiwork! Painting aluminum shutters can be time-consuming, but the satisfaction of a job well done makes it worthwhile. Your efforts have enhanced the aesthetic appeal of your home and safeguarded your shutters against the elements. Be sure to share your success with friends and family. Who knows, you might inspire others to embark on their home improvement projects!
Step 9. Share Your Experience:
Once you have admired your handiwork, consider sharing your experience and results with others. You could post before-and-after pictures on your social media and share the process of painting aluminum shutters. By doing so, you could help others who are considering similar home improvement tasks.
Include any tips or tricks you learned along the way and any challenges you encountered and overcame. Your experience could provide valuable insights for others and inspire them to embark on their DIY projects.
By following these steps, you can achieve a professional-looking finish when painting your aluminum shutters.
5 Additional Tips and Tricks
- Choose Your Paint Wisely: Not all paints are created equal. For aluminum shutters, choose high-quality exterior acrylic paint. These paints are designed to withstand weather conditions and UV radiation, ensuring your shutters look vibrant for a longer period.
- The Right Tools: Using the right tools can make a significant difference in the quality of your paint job. Invest in good quality brushes and rollers, which can help you achieve a smooth, even finish.
- Safety First: Always ensure your safety while working. Use protective gloves, eyewear during cleaning and painting, and a sturdy ladder for reaching higher places.
- Weather Considerations: Avoid painting on extremely hot or cold days or when rain is forecasted. Ideal painting conditions are mild, overcast days with no wind.
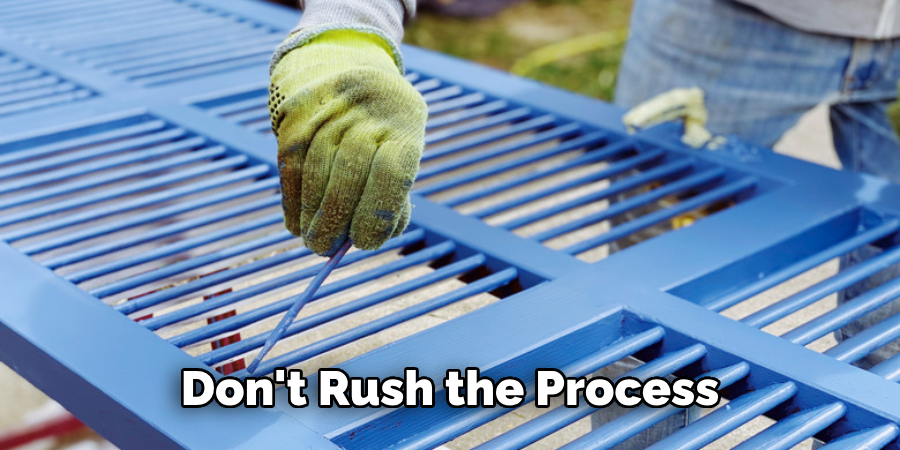
- Patience is Key: Don’t rush the process. Allow ample time for each coat of primer and paint to dry thoroughly before applying the next. Running could lead to drips, uneven coverage, and a less durable finish.
With these tips, you can confidently tackle the task of painting your aluminum shutters and achieve a professional-looking finish.
5 Things You Should Avoid
- Ignoring the Manufacturer’s Instructions: Always read the instructions on the paint can. They provide crucial information about application methods, drying times, and safety precautions. Ignoring these instructions can lead to less-than-ideal results and even safety hazards.
- Skipping Preparation Steps: It’s tempting to dive right into painting, but preparing your shutters correctly is essential. Ignoring cleaning, sanding, or priming can lead to poor paint adhesion and a less durable finish.
- Using the Wrong Paint: Not every paint is suitable for aluminum shutters. Using interior paint or the wrong type of exterior paint can result in peeling, cracking, and fading. Always choose a paint specifically designed for external use on aluminum.
- Painting in Poor Weather Conditions: Painting in extreme heat, cold, or humidity, or when rain is forecast, can negatively impact the drying process and the overall finish. Always aim to paint in mild, dry conditions.
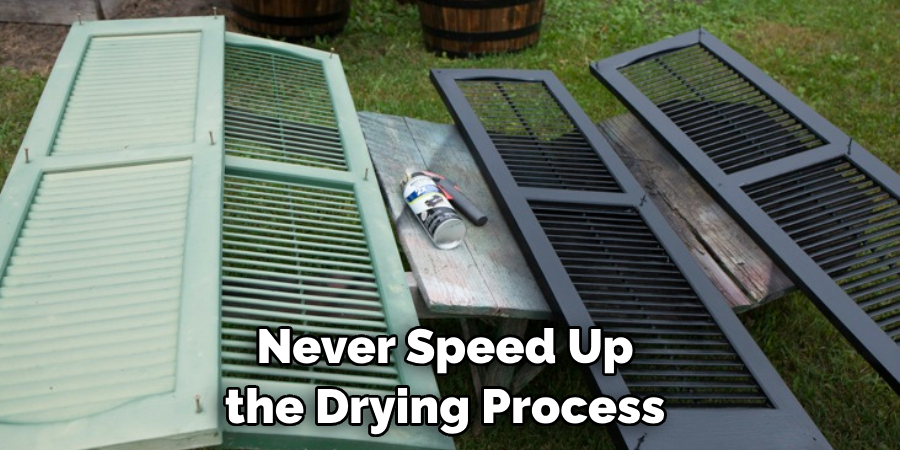
- Rushing the Drying Process: Never speed up the drying process. It’s crucial to allow each coat of primer and paint to dry thoroughly before applying the next. If you rush, the paint may not adhere properly, leading to an uneven finish and possibly requiring more work in the future.
By avoiding these mistakes, you can ensure a successful and long-lasting paint job for your aluminum shutters.
Conclusion
Painting aluminum shutters with a few simple steps and the right supplies can be a relatively quick DIY project. With an added coat of paint, your shutters will look new and make your house stand out in the neighborhood. Don’t let fear of the unknown stop you from attempting home renovation projects!
You may find you have a knack for it. Take a leap of faith and try to paint those shutters! Perhaps you could even start your own business offering this service. The most important thing is to take proper safety precautions and ensure that each step is done properly, guaranteeing beautiful results.
Hopefully, this guide on how to paint aluminum shutters has provided you with the necessary information and confidence to paint your aluminum shutters successfully. Now go forth and shine up those aluminum shutters!
Edmund Sumlin is a skilled author for Metal Fixes, bringing 6 years of expertise in crafting a wide range of metal fixtures. With a strong background in metalwork, Edmund’s knowledge spans various types of fixtures, from decorative pieces to functional hardware, blending precision with creativity. His passion for metalworking and design has made him a trusted resource in the industry.
Professional Focus:
- Expert in Metal Fixtures : Edmund aesthetic specializes in creating durable and innovative metal fixtures, offering both appeal and functionality. His work reflects a deep understanding of metalworking techniques and materials.
- Sustainability Advocate : He is dedicated to using sustainable practices, ensuring that every fixture is crafted with eco-friendly methods while maintaining high-quality standards.
In his writing for Metal Fixes, Edmund provides valuable insights into the latest trends, techniques, and practical advice for those passionate about metal fixtures, whether they are professionals or DIY enthusiasts. His focus on combining artistry with engineering helps others discover the true potential of metal in design.