Adding a metal plug to a table lamp can be a practical and straightforward way to enhance the aesthetics and functionality of your lighting fixture. Whether you’re replacing an old plug or upgrading to match your interior design, understanding the process will ensure a safe and efficient installation. This guide will walk you through how to add a metal plug to table lamp, reducing risks and enhancing the overall longevity of your lamp.
Importance of Replacing or Adding a Plug to a Table Lamp
Replacing or adding a plug to a table lamp is crucial for several reasons. Firstly, safety is a primary concern; old or damaged plugs can pose electrical hazards such as short circuits or even fire risks. By ensuring that your lamp is equipped with a modern, well-insulated plug, you significantly reduce these potential dangers. Secondly, functionality plays a vital role. A new plug can provide more reliable electrical connectivity, ensuring that your lamp operates smoothly without flickering or unexpected shut-offs.
Finally, from a design perspective, a new plug can enhance the overall look of your lamp, complementing your décor and providing an up-to-date aesthetic. Therefore, paying attention to this detail not only enhances safety and performance but also contributes to the visual appeal of your living space.
Tools and Materials Needed
To successfully replace or add a metal plug to your table lamp, you’ll need a few essential tools and materials. Here’s a list to help you get started:
- Screwdriver: A flathead or Phillips screwdriver will be necessary for loosening and tightening screws on the plug.
- Wire Strippers: These are crucial for stripping away the insulation from the wires inside the lamp cord.
- Needle-Nose Pliers: Useful for bending and manipulating wires as you attach them to the new plug.
- Multimeter: Though optional, it can help verify that the electrical connection is safe and functional after installation.
- Replacement Plug: Ensure it’s a metal plug suitable for your lamp’s voltage and wattage requirements.
- Electrical Tape: Useful for securing connections and providing additional insulation if needed.
- Safety Glasses: Protect your eyes while working with electrical components.
Having these tools and materials on hand will make the process smoother and ensure a safe, professional result.
Safety Precautions
Before you begin the process of adding a metal plug to your table lamp, it’s crucial to adhere to important safety precautions to prevent any electrical hazards. First and foremost, always ensure the lamp is unplugged from any power source before you start working. This step is vital to avoid the risk of electric shock. Additionally, work in a well-lit area so you can clearly see what you are doing, and wear safety glasses to protect your eyes. Avoid working in damp or wet conditions to reduce the risk of electrical accidents.
It’s also beneficial to have a fire extinguisher nearby, specifically rated for electrical fires, in case of an emergency. When working with wires, handle them carefully and make sure to strip the insulation off with precision to prevent damage to the copper wiring inside.
10 Methods on How to Add a Metal Plug to Table Lamp
1. Choose the Appropriate Metal Plug
The first step is to select a metal plug that suits your table lamp. Metal plugs are available in various designs, finishes, and functionalities, including grounded, non-grounded, or polarized options. Ensure the plug matches the lamp’s electrical requirements and complements its design. For added safety, choose a plug with a grounding pin if the lamp’s wiring supports it. A well-chosen plug ensures compatibility and adds a polished look to your project.
2. Gather Necessary Tools and Materials
Before starting, prepare all the tools and materials you’ll need for the project. Common items include wire cutters, strippers, a screwdriver, electrical tape, and a voltage tester. Ensure the metal plug is compatible with your lamp’s cord and check for quality certifications such as UL listing. Having all the tools on hand minimizes interruptions and ensures a smoother installation process.
3. Unplug and Disassemble the Lamp
Safety is paramount when working with electrical components. Unplug the lamp and disassemble it to access the wiring. Remove the base, socket, or any coverings that obstruct the cord. Keep track of screws and other small parts to make reassembly easier. Disassembling the lamp allows you to inspect the wiring for damage and make any necessary repairs before attaching the metal plug.
4. Cut and Strip the Cord
Once you have access to the cord, cut off the old plug if one is attached. Use a wire stripper to remove about ½ inch of insulation from the ends of the wires. This exposes the copper strands, allowing for a secure connection with the metal plug. Be careful not to nick or damage the wires, as this could affect the lamp’s performance or create safety hazards.
5. Identify the Wires
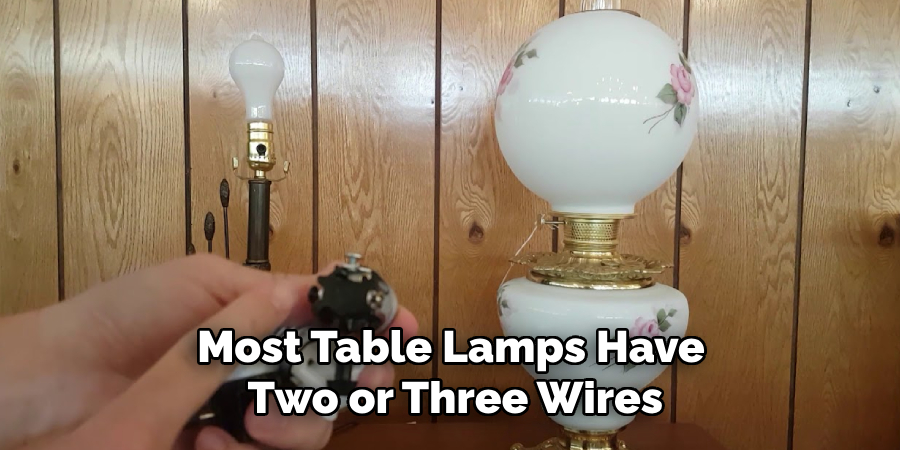
Inspect the cord to identify the wires. Most table lamps have two or three wires: hot (black or brown), neutral (white or blue), and ground (green or bare copper). Match these to the terminals in the metal plug. For polarized plugs, the larger prong connects to the neutral wire, while the smaller prong connects to the hot wire. Proper identification ensures correct wiring and reduces the risk of electrical faults.
6. Attach the Wires to the Metal Plug
Open the metal plug to expose the terminal screws. Loop each stripped wire around its corresponding screw terminal. Tighten the screws securely, ensuring there are no loose strands that could cause a short circuit. If the plug includes a grounding terminal, connect the green or bare wire to it. Follow the plug manufacturer’s wiring diagram if provided, as incorrect connections can result in malfunction or safety hazards.
7. Secure the Cord in the Plug Housing
Most metal plugs include a cord grip or clamp to hold the cord securely in place. Slide the cord into the plug housing and tighten the grip to prevent it from pulling out. This step is critical for durability and safety, as it reduces stress on the wire connections and minimizes the risk of disconnections during use. Test the grip’s strength before closing the plug housing.
8. Assemble and Test the Plug
After attaching the wires and securing the cord, reassemble the plug. Ensure all components fit snugly, and no wires are exposed. Use a screwdriver to fasten the plug housing tightly. Once assembled, test the plug with a voltage tester or plug the lamp into a surge-protected outlet to confirm that it functions correctly. If the lamp doesn’t light, double-check your wiring connections.
9. Reassemble the Lamp
With the new metal plug successfully attached and tested, reassemble the table lamp. Replace the base, socket, and any coverings you removed during disassembly. Ensure all components are aligned and securely fastened. A properly reassembled lamp not only looks polished but also ensures safe operation and longevity.
10. Add Finishing Touches
For a professional finish, inspect the entire lamp for loose components or visible wires. Wrap any exposed connections with electrical tape for added safety. If the lamp cord looks worn, consider replacing it entirely to complement the new plug. Polishing the metal plug and any metal components of the lamp can enhance its aesthetic appeal. These final touches ensure your project looks as good as it functions.

Troubleshooting Common Issues
While installing a new metal plug on your table lamp is a straightforward task, you may encounter some common issues. Here are a few troubleshooting tips to help you resolve them effectively:
- Lamp Doesn’t Turn On: If your lamp fails to light up after installation, double-check the wiring connections inside the metal plug. Ensure that each wire is securely attached to the correct terminal. Additionally, verify that the lamp is plugged into a working outlet and that the bulb is functional.
- Flickering Light: A flickering light can indicate a loose connection. Reopen the metal plug and tighten all terminal screws. Inspect the cord grip to ensure the cord is secured properly within the plug housing. If the bulb is old or of poor quality, replacing it might also resolve the issue.
- Tripped Circuit Breaker: If your circuit breaker trips when you plug in the lamp, it could be due to incorrect wiring. Disconnect the lamp immediately and inspect the terminal connections to ensure the hot, neutral, and ground wires are properly attached. Look for any exposed wire strands that might cause a short circuit.
- Overheating Plug: An overheating plug is a serious issue that requires immediate attention. Check that the wiring meets the power requirements of the lamp and that there are no loose or damaged wires.
Conclusion
Installing a new metal plug on your table lamp can be a rewarding and simple DIY project that enhances both the functionality and safety of your lamp. By following the systematic steps outlined in this guide, you can confidently replace old or damaged plugs with minimal hassle. Always prioritize safety by ensuring accurate wiring connections and using tools carefully. So, there you have it – a quick and easy guide on how to add a metal plug to table lamp.
Edmund Sumlin is a skilled author for Metal Fixes, bringing 6 years of expertise in crafting a wide range of metal fixtures. With a strong background in metalwork, Edmund’s knowledge spans various types of fixtures, from decorative pieces to functional hardware, blending precision with creativity. His passion for metalworking and design has made him a trusted resource in the industry.
Professional Focus:
- Expert in Metal Fixtures : Edmund aesthetic specializes in creating durable and innovative metal fixtures, offering both appeal and functionality. His work reflects a deep understanding of metalworking techniques and materials.
- Sustainability Advocate : He is dedicated to using sustainable practices, ensuring that every fixture is crafted with eco-friendly methods while maintaining high-quality standards.
In his writing for Metal Fixes, Edmund provides valuable insights into the latest trends, techniques, and practical advice for those passionate about metal fixtures, whether they are professionals or DIY enthusiasts. His focus on combining artistry with engineering helps others discover the true potential of metal in design.


