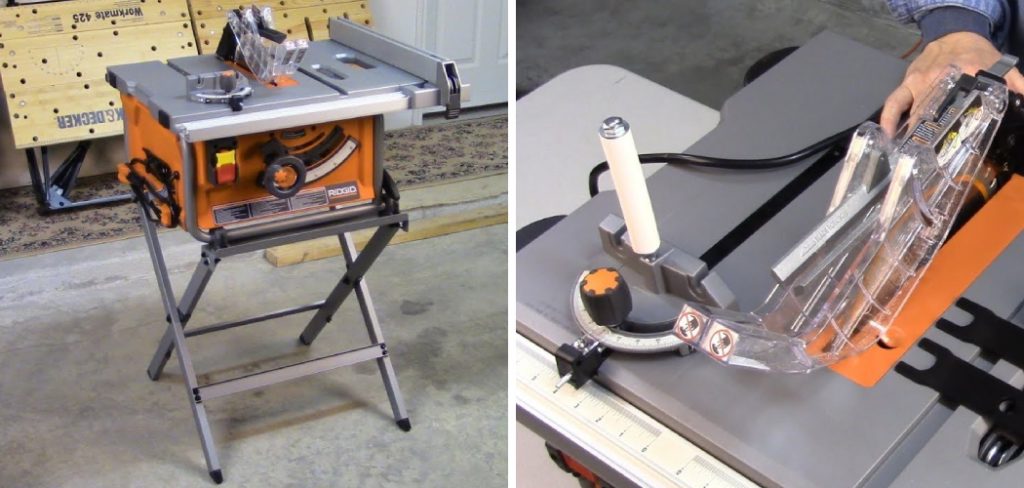
Changing the blade on a Ridgid table saw is an essential maintenance task that ensures your saw operates efficiently and safely. Over time, blades can become dull or damaged, affecting the quality of your cuts and potentially posing a safety hazard.

Whether you’re replacing an old blade or switching to a different type for a new project, knowing how to correctly change the blade is crucial. This guide on how to change blade on ridgid table saw will walk you through the process step-by-step, helping you maintain optimal performance and prolong the life of your table saw.
What is a Ridgid Table Saw?
Before we dive into the process of changing the blade, let’s briefly discuss what a Ridgid table saw is.
Ridgid is a brand that specializes in professional-grade power tools, and their table saws are no exception. These heavy-duty machines are designed for precision cutting and can handle even the toughest jobs.
Ridgid table saws come with powerful motors, adjustable fences, and other features that make them popular among woodworkers and construction professionals. With proper maintenance and care, they can last for years and provide reliable performance.
Why Should You Change the Blade on Your Ridgid Table Saw?
Regularly changing the blade on your Ridgid table saw is vital for several reasons. Firstly, a sharp blade ensures cleaner and more precise cuts, which is essential for achieving professional-grade results.
A dull or damaged blade is more likely to produce splintered edges and inaccuracies, compromising the quality of your work.
Secondly, using a blade that’s in good condition reduces the strain on the saw’s motor, leading to a more efficient operation and potentially extending the lifespan of your table saw.
Lastly, safety is a paramount concern; a properly maintained blade minimizes the risk of kickback and other dangerous incidents. By keeping your blade in optimal condition, you ensure a safer working environment and protect yourself and those around you.
8 Steps on How to Change Blade on Ridgid Table Saw
Now that we’ve covered the importance of changing your table saw’s blade, let’s go through the steps involved. Before you begin, make sure to read and follow all safety precautions outlined in your Ridgid table saw’s manual.
Step 1: Disconnect the Power
The first and most crucial step in changing the blade on your Ridgid table saw is to ensure the machine is completely powered off.

Disconnect the table saw from any power source by unplugging it from the electrical outlet. This step is vital for your safety, as it eliminates the risk of accidental start-up while you’re working on the saw.
Never attempt to change the blade without first ensuring that the saw is disconnected from its power supply. Taking this precaution will help prevent serious injuries and create a safe working environment.
Step 2: Remove the Blade Guard
The blade guard is the protective covering that sits over your table saw’s blade. It’s designed to prevent accidental contact with the blade, reducing the risk of injury. To change the blade on your Ridgid table saw, you’ll need to remove this guard first.
Most Ridgid table saws come with a knob or lever that allows for easy removal of the blade guard. Locate this mechanism and follow the instructions in your manual to safely detach it from your saw.
Step 3: Raise the Blade
Before you can remove the old blade, you need to raise it to its highest position. This step is important for accessing the blade and making sure there’s enough clearance to remove and replace it safely.
To raise the blade, turn the height adjustment wheel in a clockwise direction until the blade is at its maximum height.
Step 4: Lock the Blade
Once the blade is raised to its highest position, the next step is to lock the blade in place to prevent it from moving while you work on it. Most Ridgid table saws are equipped with an arbor lock mechanism.
Locate the arbor lock button, which is usually found near the base of the blade assembly.

Press and hold the arbor lock button while you use a wrench to begin loosening the arbor nut. This action will keep the blade from rotating, making it easier and safer to remove the nut and the old blade.
If your table saw does not have an arbor lock, you can use a piece of wood or a blade lock device to stabilize the blade.
Step 5: Remove the Blade
With the blade raised and locked in place, it’s time to remove the old blade. Using a wrench or socket, unscrew the arbor nut in a counterclockwise direction. Once the nut is loose enough, remove it completely, then take out the old blade from its position on the arbor.
Be careful when handling the old blade, as it may still be sharp and can cause injury if mishandled. Inspect the condition of the blade and dispose of it properly if necessary.
Step 6: Clean & Lubricate
Before installing your new blade, it’s essential to clean the area around the arbor and remove any debris that may have accumulated. Use a brush or cloth to wipe away any dust, sawdust, or rust particles. This step will help ensure a smooth and secure installation of your new blade.
Additionally, you can apply some lubricant to the arbor shaft to prevent any future rusting and make it easier to remove the blade next time.
Step 7: Install the New Blade
With the old blade removed and the arbor area cleaned and lubricated, you are ready to install the new blade.

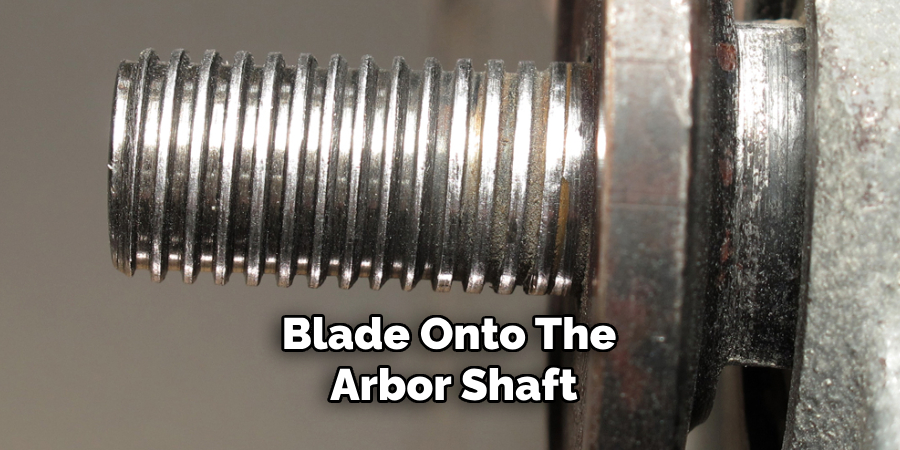
Carefully align the new blade with the arbor, ensuring that the teeth of the blade are facing in the correct direction for cutting. Slide the blade onto the arbor shaft, making sure it sits firmly in place.
Next, replace the arbor nut by threading it back onto the shaft in a clockwise direction.
Use a wrench or socket to tighten the arbor nut securely, but be cautious not to overtighten, as this could damage the blade or the saw. Once the blade is securely in place, you can release the arbor lock or remove the blade lock device.
After installing the new blade, double-check that it is properly seated and secured before proceeding to the final steps. This will ensure that your table saw is set up correctly and ready for safe, efficient cutting.
Step 8: Reattach the Blade Guard and Restore the Power
After completing all previous steps on how to change blade on ridgid table saw, you can now reattach the blade guard to your Ridgid table saw. Follow the instructions in your manual for properly securing the guard back onto the saw.
Next, plug your table saw back into its power source and turn it on. Test out the new blade by making a few cuts on scrap wood to ensure it is cutting accurately and smoothly.
Congratulations! You have successfully changed the blade on your Ridgid table saw. Remember to regularly inspect and maintain your saw’s blade to ensure safe and efficient operation. With a sharp and properly installed blade, you can enjoy accurate cuts and a safer working environment. Happy cutting!
Frequently Asked Questions
Q: Do I Need Any Special Tools to Change the Blade on My Ridgid Table Saw?
A: Yes, you will need a wrench or socket to remove the arbor nut and potentially an arbor lock device if your saw does not have an arbor lock mechanism.
Q: How Often Should I Change the Blade on My Ridgid Table Saw?
A: This depends on how frequently you use your table saw and the type of material you are cutting. Generally, it’s recommended to change your blade whenever it becomes dull or damaged.
Q: Can I Use Any Type of Blade on My Ridgid Table Saw?
A: No, it’s essential to use blades that are compatible with your specific model of Ridgid table saw for optimal performance and safety. Always refer to your manual for recommended blade types and sizes.

Q: Is It Dangerous to Change the Blade on My Table Saw?
A: As with any power tool, it’s essential to follow safety precautions and use caution when changing the blade on your table saw. By following the steps outlined above and using proper safety gear, you can safely change the blade on your Ridgid table saw.
Conclusion
Changing the blade on your Ridgid table saw may seem daunting at first, but by following these clear, step-by-step instructions on how to change blade on ridgid table saw, you can perform this task safely and efficiently.
Ensuring you have the right tools and taking appropriate safety measures is crucial for a successful blade replacement.
By regularly maintaining your table saw and inspecting the condition of the blade, you can ensure it operates smoothly and effectively, providing precise cuts and a safer working environment.
Mastering this simple maintenance task will allow you to keep your table saw in top condition, extending its lifespan and improving your overall woodworking experience.
Edmund Sumlin is a skilled author for Metal Fixes, bringing 6 years of expertise in crafting a wide range of metal fixtures. With a strong background in metalwork, Edmund’s knowledge spans various types of fixtures, from decorative pieces to functional hardware, blending precision with creativity. His passion for metalworking and design has made him a trusted resource in the industry.
Professional Focus:
- Expert in Metal Fixtures : Edmund aesthetic specializes in creating durable and innovative metal fixtures, offering both appeal and functionality. His work reflects a deep understanding of metalworking techniques and materials.
- Sustainability Advocate : He is dedicated to using sustainable practices, ensuring that every fixture is crafted with eco-friendly methods while maintaining high-quality standards.
In his writing for Metal Fixes, Edmund provides valuable insights into the latest trends, techniques, and practical advice for those passionate about metal fixtures, whether they are professionals or DIY enthusiasts. His focus on combining artistry with engineering helps others discover the true potential of metal in design.


