

Are you looking to change the color of your stainless steel items?
Stainless steel is widely recognized for its durability and resistance to corrosion, making it a popular choice for various applications, from kitchen appliances to jewelry. However, you may want to change the color of stainless steel to suit your aesthetic preferences or to breathe new life into an old piece.
In this article on how to change stainless steel color, we will explore different methods and techniques for altering the color of stainless steel, allowing you to add a personalized touch and transform your stainless steel items into unique and eye-catching pieces. Whether you’re looking to achieve a sleek black finish or experiment with vibrant colors, we’ve got you covered. Let’s dive in and unlock the possibilities of changing the stainless steel color!
What Will You Need?
Before we get into the methods for changing stainless steel color, let’s first gather the materials you will need:
- Stainless steel items to be colored
- Appropriate coloring agent (more on this later)
- Clean cloth or sponge
- Protective gear such as gloves and goggles
- Sandpaper or steel wool (optional)
- Cleaning solution (optional)
Once you have all the necessary materials, let’s discuss the different methods for changing the color of stainless steel.
10 Easy Steps on How to Change Stainless Steel Color
Step 1: Heat Coloring
This method involves using heat to create a rainbow effect on stainless steel. This technique is commonly used in jewelry making and can produce beautiful and unique results.
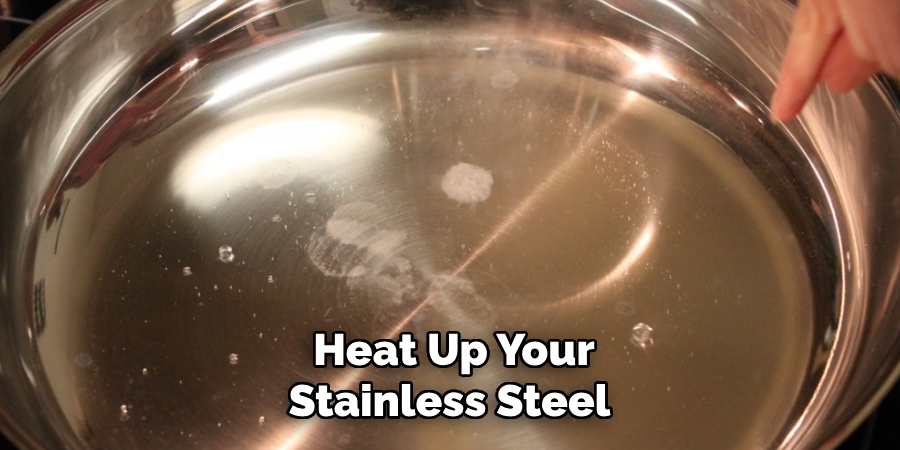
First, clean the stainless steel item with a cloth or sponge to remove dirt or oils. Use protective gear such as gloves and goggles to protect yourself from the high temperatures. Heat up your stainless steel item with a blowtorch or other heating tool until it reaches the desired temperature for coloring (around 600-800 degrees Fahrenheit). Once heated, remove the item from the heat source and let it cool down naturally.
As it cools, you will notice a color change occurring on the surface of the stainless steel. If you want to intensify the color, you can repeat the heating and cooling process multiple times. Once you are satisfied with the color, use a clean cloth or sponge to polish and remove any residue left from the heating process.
Step 2: Chemical Coloring
Chemical coloring involves using different acids or solutions to alter the color of stainless steel. This method is ideal for creating unique and intricate designs on your stainless steel items.
Before starting, make sure you have the appropriate coloring agent for the desired result. Some common choices include hydrochloric acid, nitric acid, and ferric chloride. Follow the instructions provided by the manufacturer for safety precautions and proper usage. Once you have prepared the solution, apply it to the surface of the stainless steel item and let it sit for a few minutes (the exact time will depend on the strength of the solution). Check periodically until you achieve your desired color, then rinse off with water and dry thoroughly.
Step 3: Paint
Painting is a simple and effective method if you’re looking to add a pop of color to your stainless steel item. Make sure to clean the surface of the stainless steel thoroughly before painting. You can use a specialized metal primer or a high-quality spray paint suitable for metal surfaces. Apply multiple thin coats for better coverage, letting each coat dry completely before applying the next one. Remember to use a clear sealant on top of the paint for added protection and longevity.
Step 4: Powder Coating
Powder coating is similar to painting but with a more durable and long-lasting finish. This method involves electrostatically spraying a dry powder onto the stainless steel surface. The item is then heated in an oven or with a heat gun, causing the powder to melt into a smooth and robust coating. This technique can produce various colors and finishes, making it ideal for more oversized furniture.

Step 5: Stainless Steel Wrapping
Another method to add color to stainless steel surfaces is through stainless steel wrapping. Wrapping involves using specially designed vinyl films that adhere to the surface, mimicking the appearance of a different material or finish. This technique offers various design possibilities, from metallic looks to vibrant patterns and textures. It is a non-permanent solution, allowing you to change the look of your stainless steel items whenever desired. Professional installation is recommended for optimal results, ensuring a seamless and long-lasting finish.
Step 6: Anodizing
Anodizing is a process that creates an oxide layer on the surface of stainless steel, changing its color and improving its corrosion resistance. This technique involves placing the stainless steel item in an electrolytic solution and running an electric current through it. The surface is then dyed with various colors using organic dyes or metallic salts. The result is a durable and vibrant finish that can withstand harsh environments.
Step 7: PVD Coating
Physical vapor deposition (PVD) coating is a method that involves depositing thin layers of material onto a stainless steel surface, altering its color, and providing added durability. This process can create various finishes, such as chrome, gold, and bronze. It is commonly used in the automotive industry but can also be applied to smaller items. Try experimenting with different colors and finishes to achieve a unique look.
Step 8: Galvanization
Galvanization is a method of applying a layer of zinc to the surface of stainless steel to improve its corrosion resistance and alter its color. This technique involves immersing the stainless steel item in a hot bath of molten zinc or using an electrochemical process. The end result is a shiny, silver-colored finish that can also be painted over for added customization. You can weather the zinc layer with an acidic solution if you want a more rustic look.
Step 9: Dye Sensitization
Dye sensitization is a process that uses dyes and anodizing to create colorful designs on stainless steel surfaces. This method is commonly used in the manufacturing of jewelry and can produce intricate and vibrant patterns. It involves immersing the item in an acid bath and applying dye directly onto the surface. The dye will only adhere to areas that have been anodized, resulting in a colorful design.
Step 10: Laser Etching
Laser etching is a modern and innovative technique for adding color to stainless steel surfaces. It involves using a high-powered laser to engrave designs onto the surface, creating contrast and different shades of color. This method allows for precise and detailed designs, making it popular in customizing small items such as jewelry and electronics.
By following these methods, you can easily add color and personality to your stainless steel items while protecting them from corrosion and wear.
5 Additional Tips and Tricks
- Chemical Patination: Experiment with chemical solutions like vinegar, ammonia, or hydrochloric acid to achieve various color effects on stainless steel surfaces. Follow proper safety precautions and test the solution on a small, inconspicuous area before applying it to the entire surface.
- Electrochemical Coloration: Explore the electrochemical coloration technique, also known as anodizing, to modify the surface color of stainless steel. This process involves applying an electric current to create an oxide layer, resulting in various colors and finishes.
- Specialized Coatings: Explore specialized coatings explicitly designed for stainless steel, such as tinting clear or color-changing coatings. These coatings provide a quick and convenient way to alter the color of stainless steel while preserving its durability and corrosion resistance.
- Professional Help: If you need help with the best method to add color to your stainless steel items, seek professional help. A trained and experienced specialist can provide guidance on the most suitable technique for your specific item and desired outcome.
- Maintenance: Once you have successfully added color to your stainless steel surfaces, it’s essential to maintain them properly. Regular cleaning with mild soap and water and using a protective sealant can extend the longevity of the color and prevent any potential damage or corrosion.
Before applying it to your stainless steel surfaces, remember to research and test any technique or product thoroughly.
5 Things You Should Avoid
To prevent damage and maintain the quality of your stainless steel, here are five things you should avoid when attempting to change its color:
- Abrasive Cleaners: Avoid using abrasive cleaners or scrub brushes that can scratch or dull the surface of stainless steel.
- Bleach or Chlorine-based Cleaners: Avoid bleach or cleaners containing chlorine, as they can discolor and damage stainless steel surfaces.
- Steel Wool or Wire Brushes: Do not use steel wool or wire brushes, as they can leave scratches and potentially rust on stainless steel.
- Excessive Heat: Avoid applying excessive heat to stainless steel surfaces, as it can lead to warping, discoloration, or damage.
- Abrasive Materials: Do not use abrasive materials like sandpaper or scouring pads, as they can scratch and mar the stainless steel surface.
By being mindful of these precautions, you can protect the integrity of your stainless steel while successfully experimenting with changing its color.
Conclusion
In conclusion, how to change stainless steel color is both a fun and practical way to customize your items while also improving their durability.
With various techniques such as anodizing, PVD coating, galvanization, and dye sensitization, you can achieve a wide range of colors and finishes on stainless steel surfaces. Remember to take proper safety precautions, seek professional help when needed, and maintain your colored stainless steel items regularly for long-lasting results. Avoiding abrasive materials and chemicals will help preserve the quality of your stainless steel while still allowing you to experiment with different coloring methods.
So go ahead and add some color to your stainless steel items – the possibilities are endless!
Edmund Sumlin is a skilled author for Metal Fixes, bringing 6 years of expertise in crafting a wide range of metal fixtures. With a strong background in metalwork, Edmund’s knowledge spans various types of fixtures, from decorative pieces to functional hardware, blending precision with creativity. His passion for metalworking and design has made him a trusted resource in the industry.
Professional Focus:
- Expert in Metal Fixtures : Edmund aesthetic specializes in creating durable and innovative metal fixtures, offering both appeal and functionality. His work reflects a deep understanding of metalworking techniques and materials.
- Sustainability Advocate : He is dedicated to using sustainable practices, ensuring that every fixture is crafted with eco-friendly methods while maintaining high-quality standards.
In his writing for Metal Fixes, Edmund provides valuable insights into the latest trends, techniques, and practical advice for those passionate about metal fixtures, whether they are professionals or DIY enthusiasts. His focus on combining artistry with engineering helps others discover the true potential of metal in design.