

Are you tired of looking at your home’s dirty and dusty metal vent covers? Cleaning them may seem like a daunting task, but with some simple steps, you can have them looking as good as new. Metal vent covers are not only functional, but they also add to the aesthetic appeal of your home.
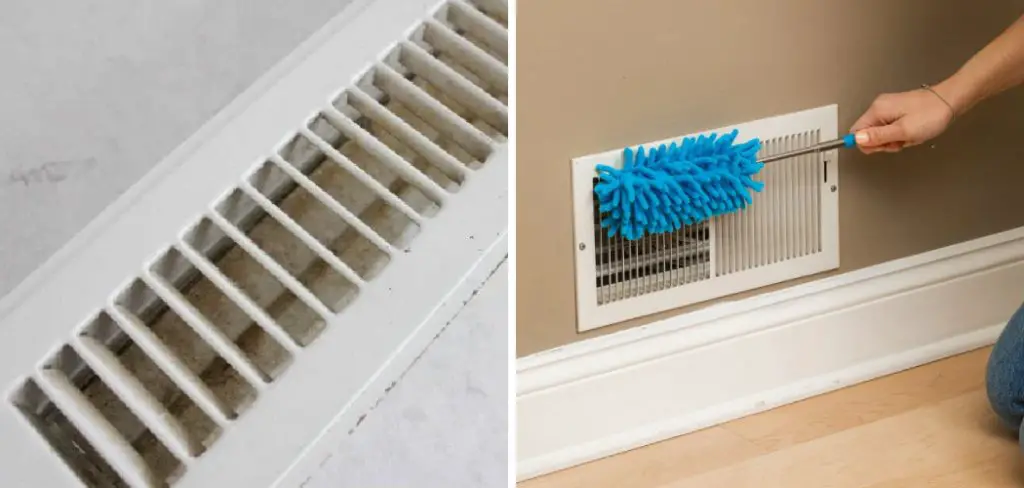
How to clean metal vent covers is essential for ensuring optimal airflow and improving the air quality in your home or office.
Over time, dust, dirt, and debris can accumulate on vent covers, potentially leading to reduced efficiency of your heating and cooling systems. Regular cleaning enhances the performance of these systems and contributes to a healthier living environment.
In this guide, we’ll walk you through the steps needed to effectively clean your metal vent covers, ensuring they stay in top condition and continue to function properly.
What Will You Need?
Before you get started, gather the following supplies:
- Vacuum cleaner with a hose attachment
- Soft-bristled brush or toothbrush
- Mild dish soap or all-purpose cleaner
- Microfiber cloth or soft rag
- Water in a spray bottle (optional)
Let’s dive into the cleaning process once you have all your supplies ready.
10 Easy Steps on How to Clean Metal Vent Covers
Step 1: Remove the Vent Covers
To begin cleaning, you first need to remove the vent covers from the wall, floor, or ceiling. This is often a straightforward task, but the method can vary slightly depending on your vent cover type.
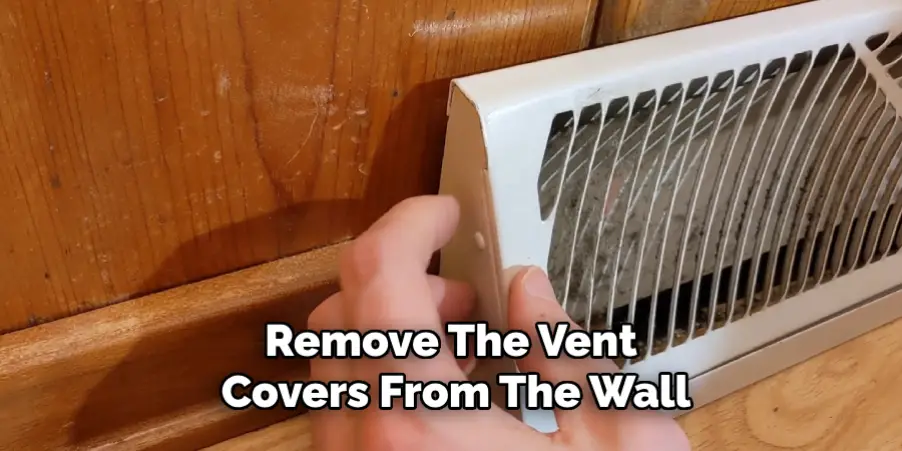
Most metal vent covers are held in place by screws, so you’ll need a screwdriver to carefully unscrew them. Make sure to keep the screws in a safe place, as you’ll need them when it’s time to reattach the covers.
If your vent covers are old or painted over, you may need to use a utility knife to gently cut around the edges to free them without causing damage to the surrounding area. Once you have successfully removed the vent covers, take them to a well-ventilated area or a space where you can easily clean them without making a mess indoors.
A garage, backyard, or even a bathtub can work well for this purpose. Removing the vent covers allows you to thoroughly clean both the front and back surfaces and reach any hidden dirt or grime that has accumulated over time.
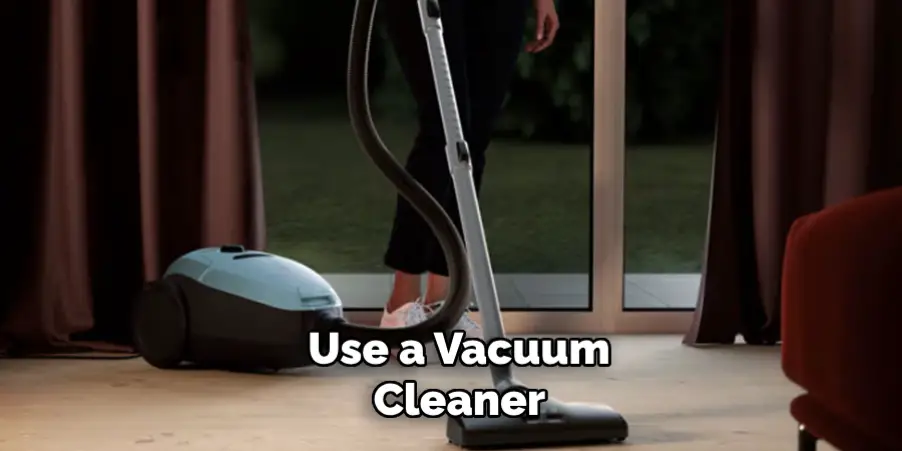
Step 2: Vacuum Loose Dust and Debris
Before you begin washing, use a vacuum cleaner with a hose attachment to remove any loose dust and debris from the vent covers.
Pay special attention to the spaces between the grates, as this is where dust tends to accumulate the most. This step is crucial because it helps to minimize the amount of grime you’ll need to scrub off later, making the cleaning process easier and more efficient.
Step 3: Soak the Vent Covers

Fill a bathtub or a large container with warm water and add a few drops of mild dish soap or an all-purpose cleaner. Place the vent covers into the soapy water and let them soak for about 15-20 minutes. Soaking helps to loosen any stubborn dirt and grease, making it easier to clean them thoroughly in the subsequent steps.
Step 4: Scrub with a Brush
After soaking, gently scrub the vent covers with a soft-bristled brush or a toothbrush. Focus on areas with built-up grime or stains, ensuring that both the front and back surfaces are. Use circular motions to dislodge dirt from the crevices and grates. Be gentle enough to avoid scratching the metal surface.
Step 5: Rinse Thoroughly
Once you’ve scrubbed off all the dirt, rinse the vent covers under running water to wash away any soap residue and remaining debris. Make sure to rinse both sides thoroughly so that no cleaner is left on the metal surface. Use a spray bottle with water to help rinse hard-to-reach areas.
Step 6: Dry Completely
After rinsing, shake off excess water and then use a microfiber cloth or a soft rag to dry the vent covers. Make sure to dry them completely to prevent any water spots or rust from forming. If necessary, allow them to air dry for an additional 15-30 minutes.
Step 7: Inspect for Remaining Dirt or Damage
Once the vent covers are dry, inspect them for any remaining dirt, grime, or damage. If you notice any spots that need extra attention, repeat the scrubbing and rinsing process as needed. Also, check for any bends, dents, or loose parts that might need repair before reinstalling.
Step 8: Clean the Surrounding Area
While your vent covers are soaking or drying, clean the area around the vent openings. Use a vacuum cleaner to remove dust and debris from the vent openings, and wipe the surrounding wall, floor, or ceiling with a damp cloth. This ensures that the entire area stays clean and fresh, maximizing airflow and air quality.
Step 9: Reinstall the Vent Covers
Once the vent covers are clean and dry, it’s time to reinstall them. Carefully line up the covers with the vent openings and use the screws you set aside earlier to secure them back in place.
Make sure the covers are firmly attached and sitting flush with the surrounding surface to prevent any gaps where dirt might accumulate.
Step 10: Regular Maintenance
Establish a regular cleaning schedule to keep your metal vent covers looking and functioning at their best.
Aim to clean them at least every few months or more frequently if you notice a significant buildup of dust and debris. Regular maintenance can extend the life of your vent covers and improve the overall air quality in your home or office.
By following these 10 easy steps, you can effectively clean your metal vent covers and maintain a healthier and more efficient living environment.
5 Additional Tips and Tricks
- Use a Mild Detergent Solution: Mix a small amount of mild detergent with warm water. Dampen a soft cloth or sponge in the solution and gently scrub the vent covers to remove grime and dirt.
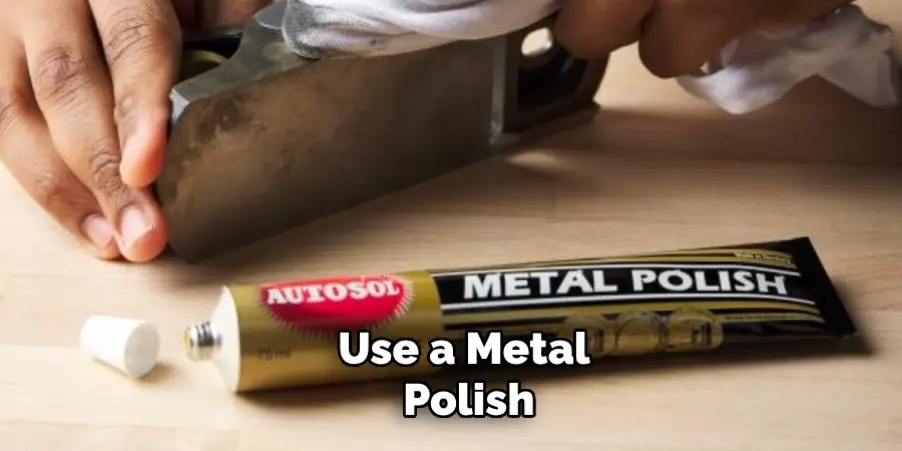
- Polish for Shine: To restore the shine of your metal vent covers, use a metal polish suitable for the type of metal. Apply a small amount of polish to a soft cloth and buff the vent covers in circular motions until they gleam.
- Keep Them Dry: After cleaning and polishing, make sure to dry the vent covers thoroughly with a soft cloth. Leaving them wet can cause water spots and damage to the metal over time.
- Remove Stubborn Stains with Vinegar: Mix white vinegar and water in a spray bottle for tough stains or built-up grime. Spray the solution onto the vent covers and let it sit for a few minutes before wiping it off with a damp cloth.
- Protect from Rust: To prevent your metal vent covers from rusting, apply a thin layer of car wax or mineral oil after cleaning. This creates a barrier against moisture and helps to maintain the metal’s shine. Just make sure to wipe off any excess wax or oil with a soft cloth.
With these additional tips and tricks, you can effectively clean and maintain your metal vent covers, keeping them looking shiny and new for longer.
5 Things You Should Avoid
- Avoid Using Abrasive Cleaners: Harsh chemicals or abrasive cleaners can scratch and damage the finish of your metal vent covers. Stick to mild detergents and gentle cleaning solutions to maintain their appearance and longevity.
- Don’t Use Steel Wool: While it might seem effective for scrubbing off stubborn dirt, steel wool can leave scratches on metal surfaces. Opt for a soft sponge or cloth instead to avoid damaging the vent covers.
- Avoid High-Pressure Water: High-pressure washing can dent or warp the metal, compromising the function and aesthetics of your vent covers. Use a gentle stream of water or a damp cloth for cleaning.
- Don’t Ignore Rust: Even small rust spots can quickly spread if left untreated. Address rust as soon as you notice it to prevent further corrosion and possibly costly replacements.
- Avoid Strong Acidic Solutions: Strong acids, such as those found in some household cleaners, can corrode metal over time. Always check the ingredients of your cleaning products and opt for pH-neutral solutions whenever possible.
By keeping these potential pitfalls in mind, you can ensure that your metal vent covers are cleaned safely and effectively, preserving their look and functionality for years to come.
Conclusion
Maintaining clean and well-functioning metal vent covers is essential for promoting optimal air quality and efficient airflow within your living or working spaces.
By following a systematic cleaning process, you can easily remove dirt, grime, and built-up debris, ensuring that the vent covers remain in excellent condition.
Regular maintenance, combined with a few helpful tips and a conscious effort to avoid common mistakes, can significantly extend the lifespan of your vent covers and improve the overall hygiene of your environment.
Hopefully, the article on how to clean metal vent covers has provided you with all the necessary information and guidance to keep your vent covers in top shape. So, grab your cleaning supplies and get started on a quick and easy way to promote a healthier living or working space. Happy cleaning!
Edmund Sumlin is a skilled author for Metal Fixes, bringing 6 years of expertise in crafting a wide range of metal fixtures. With a strong background in metalwork, Edmund’s knowledge spans various types of fixtures, from decorative pieces to functional hardware, blending precision with creativity. His passion for metalworking and design has made him a trusted resource in the industry.
Professional Focus:
- Expert in Metal Fixtures : Edmund aesthetic specializes in creating durable and innovative metal fixtures, offering both appeal and functionality. His work reflects a deep understanding of metalworking techniques and materials.
- Sustainability Advocate : He is dedicated to using sustainable practices, ensuring that every fixture is crafted with eco-friendly methods while maintaining high-quality standards.
In his writing for Metal Fixes, Edmund provides valuable insights into the latest trends, techniques, and practical advice for those passionate about metal fixtures, whether they are professionals or DIY enthusiasts. His focus on combining artistry with engineering helps others discover the true potential of metal in design.