

Are you tired of seeing your silver tarnish and lose its shine? Fortunately, there are some simple steps you can follow to clean your silver metal items and restore their original luster.
How to clean silver metal can restore its original luster and brilliance, ensuring it remains a beautiful and cherished possession for years. Over time, silver can tarnish due to exposure to air and moisture, leading to an unsightly, dull appearance. This guide will provide effective methods and tips to clean your silverware, jewelry, or decorative items safely and efficiently without causing damage.

By following these steps, you can maintain the elegance and shine of silver, whether it is a treasured heirloom or a modern piece in your collection.
What Will You Need?
Before you begin the cleaning process, gathering all the necessary equipment and supplies is essential. The items you may need for cleaning silver metal include:
- Mild dish soap
- Warm water
- Soft cloth or sponge
- Baking soda (optional)
- Aluminum foil (optional)
- Silver polish (optional)
Once you have the required supplies, you can begin cleaning your silver.
9 Easy Steps on How to Clean Silver Metal
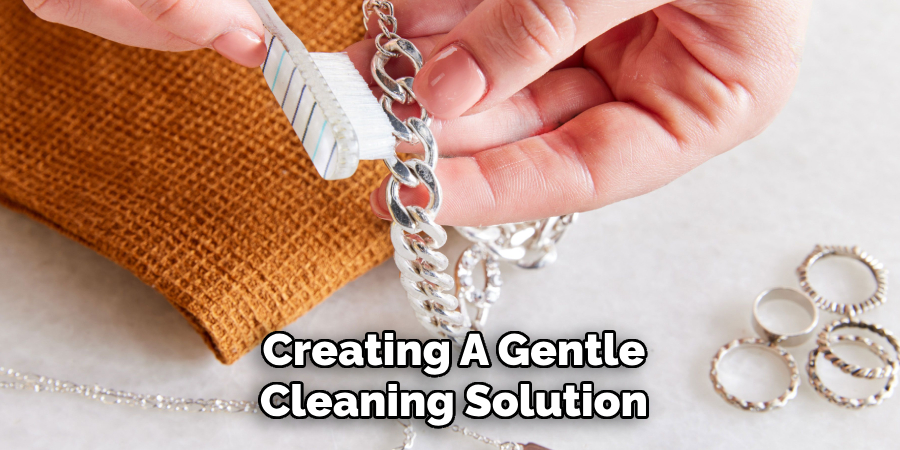
Step 1. Prepare the Cleaning Solution:
Start by creating a gentle cleaning solution that won’t harm your silver items. Fill a basin or a large bowl with warm water—make sure it is not too hot, as extreme temperatures can damage delicate silver. Add a few drops of mild dish soap to the water, stirring gently until bubbles form.
This mild soap solution effectively loosens dirt and grime from the surface of silver without being too abrasive. If you choose to use baking soda or aluminum foil for a deeper clean, proceed cautiously to avoid any potential scratching. The key is to ensure the solution is well-mixed, providing a gentle and effective cleaning environment for your silver items.
Step 2. Submerge the Silver in the Solution:
Carefully place your silver items into the soapy water, ensuring they are fully submerged. Allow them to soak for about 5 to 10 minutes. This soaking time helps to loosen any dirt or tarnish clinging to the surface of the silver. If you are cleaning several small items, such as jewelry, consider placing them in a small mesh bag before submerging them in the cleaning solution to keep everything organized and prevent loss.
Step 3. Gently Clean the Silver:
After the silver items have soaked, it is time to clean them to remove any remaining dirt and tarnish gently. Using a soft cloth or sponge, gently rub each piece in circular motions. Be mindful of any intricate details or crevices, as these areas may require a softer touch to avoid damage.
If you notice stubborn tarnish that doesn’t quickly come off, you can lightly dip your cloth or sponge into baking soda. The mild abrasiveness of baking soda can help lift persistent stains without scratching the silver. However, remember to apply minimal pressure to preserve the item’s delicate surface. After cleaning, rinse each silver piece thoroughly with warm water to remove any soap residue. Ensure no soap is left on the item, as leftover soap can cause discoloration over time.
Step 4. Rinse Thoroughly and Dry
After cleaning each silver item, ensure that you rinse them thoroughly under clean, warm water. This step is crucial to remove all traces of soap and any possible baking soda residue that could contribute to further tarnishing. Once rinsed, carefully dry each piece using a soft, lint-free cloth.
Gently pat or rub the silver until it’s scorched. Remaining moisture can lead to tarnishing, so ensure there are no water droplets left on the items. For pieces with intricate designs, pay extra attention to ensuring all nooks and crannies are dry by using the corner of your cloth or a soft brush. Drying your silver thoroughly prevents spots and maintains its shine and longevity.
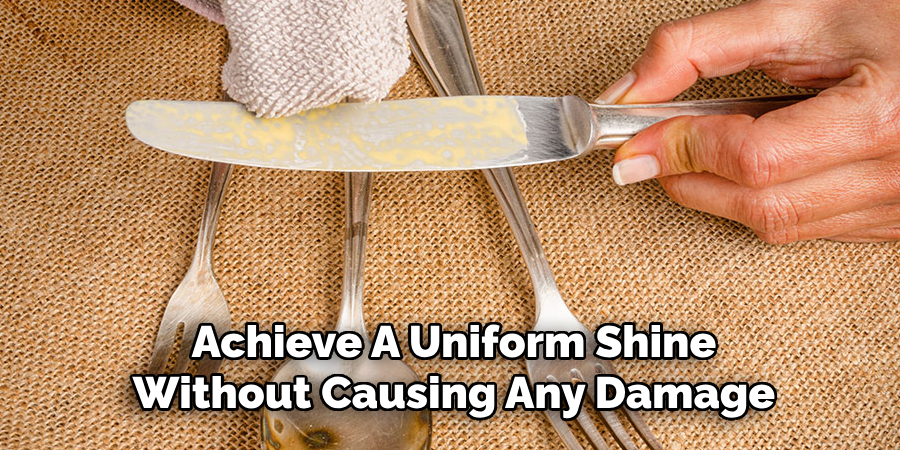
Step 5. Buff the Silver for Extra Shine
Once your silver pieces are dehydrated, the next step is to buff them to enhance their shine. Use a soft, clean, and lint-free cloth designed for polishing silver. Gently rub the surface of each piece in circular motions, applying light pressure to prevent scratching.
This motion will help you achieve a uniform shine without causing any damage to the metal. For more oversized silver items like platters or trays, work in sections to ensure every area is polished evenly. You can use a small amount of silver polish for a deeper luster if desired. After buffing, you’ll notice a significant improvement in the brightness and vibrancy of your silver items, making them look almost as good as new.
Step 6. Consider Using Silver Polish
If your silver items still show signs of tarnish after cleaning and buffing, consider using a specialized silver polish to restore their luster. Apply a small amount of silver polish to a soft cloth and gently rub it over the tarnished areas. Be sure to follow the manufacturer’s instructions for the polish you choose, as each product may have specific application guidelines.
Focus on areas that require extra attention, and work in small sections to avoid leaving residue on the metal. After polishing, use a clean, soft cloth to wipe away any excess polish, ensuring a streak-free finish. This step can help protect your silver from future tarnishing by leaving a protective layer on the surface.
Step 7. Store Silver Properly
Proper storage of your silver items is essential for maintaining shine and preventing tarnish. After cleaning and polishing, store your silver in a cool, dry place away from direct sunlight or heat sources, as these can accelerate tarnishing. Use anti-tarnish bags, clothes, or paper designed explicitly for silver storage to provide extra protection.
If you plan to stack silver pieces, consider using felt or soft cloth between each item to prevent scratches. Storing each piece in individual pouches or compartments for silver jewelry can help avoid tangling and surface damage. By taking these precautions, you can enjoy the beauty of your silver items for years to come without frequent cleaning.
Step 8. Regular Silver Maintenance
Incorporate regular maintenance into your routine to ensure your silver items maintain their luster and remain tarnish-free for as long as possible. Schedule periodic checks to assess the condition of your silver, mainly if it’s frequently used or displayed. Lightly clean and dry your silverware, jewelry, or decorative pieces using a soft, lint-free cloth to remove fingerprints or minor smudges that can lead to tarnish over time. Additionally, consider rotating the use of your silver items if possible, which can help distribute exposure to air and other elements evenly. Consistent upkeep can mitigate tarnishing, reduce the need for intensive cleaning sessions, and preserve the beauty and quality of your silver collection.

Step 9. Handle Silver Items with Care
When using or handling your silver items, always do so with care to minimize the risk of scratches or damage. Use cotton gloves to handle highly polished or antique silver to avoid transferring oils or acids from your skin, which can contribute to tarnishing. Avoid exposing silver to harsh chemicals or abrasive surfaces, which can cause damage or discoloration. Use placemats or tablecloths to prevent direct contact with wooden or metal surfaces when setting silver tableware. Being mindful and gentle with your silver pieces during use and handling ensures they stay pristine, preventing unnecessary wear and tear.
Following these steps, you can effectively clean and maintain your silver items to keep them looking their best for years.
5 Things You Should Avoid
- Avoid Using Abrasive Materials: When cleaning silver, avoid using abrasive materials or harsh chemicals. These can scratch or damage the metal, causing permanent harm to your silver items.
- Avoid Using Metal Polish on Antique Silver: While metal polish can effectively remove tarnish, it’s not recommended for use on antique silver. The polish can strip away the patina or aged look, which gives antique silver its unique character and value.
- Avoid Dishwashing Silver: While putting your silver items in the dishwasher may seem convenient, it’s not recommended for cleaning. The high heat and harsh detergents used in dishwashers can cause tarnishing or even damage to your silver pieces.
- Avoid Using Hot Water: When cleaning silver, avoid using hot water, as it can speed up tarnishing. Instead, opt for lukewarm or room-temperature water to protect the metal.
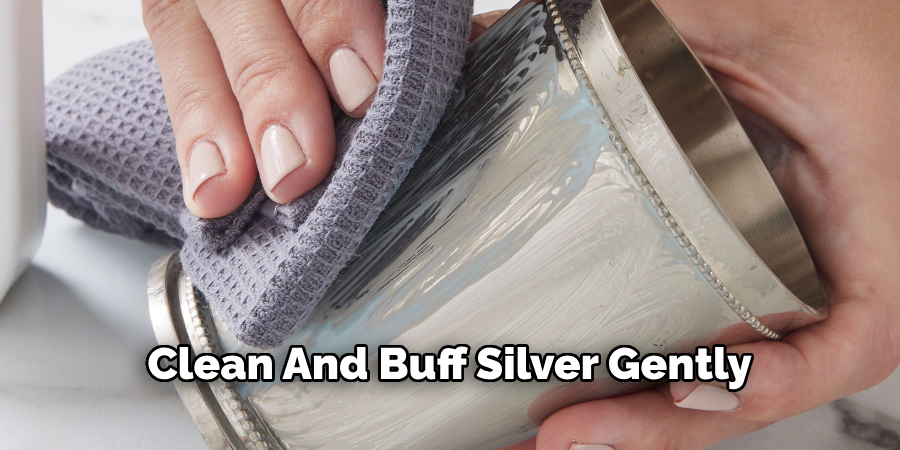
- Avoid Excessive Rubbing: While it’s important to clean and buff silver gently, excessive rubbing can damage or wear away the metal over time. Be gentle when cleaning, and avoid using too much pressure.
By avoiding these common mistakes, you can safely and effectively clean your silver items without harming them.
Conclusion
How to clean silver metal effectively involves a combination of the right techniques, consistent maintenance, and careful handling.
By following a structured process that includes pre-cleaning precautions, selecting appropriate cleaning materials, and applying proper polishing methods, you can maintain the luster of your silver pieces while avoiding potential damage. Adequate storage and regular maintenance checks are crucial in preventing tarnish and preserving the quality of your silver collection. Additionally, by being aware of practices to avoid—such as using abrasive materials, excessive heat, or harsh chemicals—you safeguard your silver from unnecessary wear and tear.
Ultimately, with these comprehensive guidelines, you can enjoy the beauty and longevity of your silver items for many years, ensuring they remain cherished parts of your home or collection.
You can also check it out Remove Lead From Metal
Edmund Sumlin is a skilled author for Metal Fixes, bringing 6 years of expertise in crafting a wide range of metal fixtures. With a strong background in metalwork, Edmund’s knowledge spans various types of fixtures, from decorative pieces to functional hardware, blending precision with creativity. His passion for metalworking and design has made him a trusted resource in the industry.
Professional Focus:
- Expert in Metal Fixtures : Edmund aesthetic specializes in creating durable and innovative metal fixtures, offering both appeal and functionality. His work reflects a deep understanding of metalworking techniques and materials.
- Sustainability Advocate : He is dedicated to using sustainable practices, ensuring that every fixture is crafted with eco-friendly methods while maintaining high-quality standards.
In his writing for Metal Fixes, Edmund provides valuable insights into the latest trends, techniques, and practical advice for those passionate about metal fixtures, whether they are professionals or DIY enthusiasts. His focus on combining artistry with engineering helps others discover the true potential of metal in design.