

Cutting aluminum downspouts is a straightforward task that can be accomplished with a few tools and some safety precautions. Whether you are installing new guttering or making repairs, knowing how to accurately cut aluminum downspouts ensures a proper fit and effective water drainage from your roof.

This guide on how to cut aluminum downspout will walk you through the steps needed to complete the job efficiently and safely, allowing you to enhance your home’s drainage system with ease.
Why Cut Aluminum Downspout?
Cutting aluminum downspouts is an essential step in customizing your gutter system to fit your specific home layout. Every property has unique dimensions and architectural features, and standard downspout lengths may not suit all requirements. Tailoring the length of downspouts ensures that the system effectively directs water away from the foundation, preventing potential water damage.
Additionally, proper fitting downspouts contribute to improved aesthetics, making sure that your gutter system looks neat and orderly without awkward extensions or gaps. By cutting downspouts to the correct size, you also improve the overall efficiency and lifespan of your drainage system, minimizing blockages and wear over time.
Needed Tools and Materials
Before starting the cutting process, it is essential to gather all the required tools and materials. These may include:

Measuring Tape or Ruler:
Accurate measurements are crucial for a proper fit, so make sure to have your measuring tool on hand.
Marker or Pencil:
Marking the cut line is essential before making any cuts. A washable marker or pencil can be used to draw the line clearly.
Hacksaw or Jigsaw:
Hacksaws and jigsaws are both effective tools for cutting aluminum downspouts. A hacksaw is ideal for straight cuts, while a jigsaw allows more flexibility for curved and angled cuts.
Safety Gear:
When working with any tools, it is crucial to prioritize safety. Protective gear like goggles and gloves should be worn at all times during the cutting process.
9 Steps on How to Cut Aluminum Downspout
Step 1: Measure the Downspout
Begin by carefully measuring the section of the downspout that needs to be cut. Use a measuring tape or ruler to determine the exact length required for your gutter system. It’s important to double-check your measurements to ensure accuracy, as an incorrect cut could result in a poor fit or inefficient drainage.
Once you have your measurements, mark the cut line clearly on the downspout using a marker or pencil. This will serve as your guide for the cutting process, helping you achieve precise results.
Step 2: Secure the Downspout
Next, secure the downspout using a vice or clamps. This will prevent it from moving while you make your cuts and also allow for more stability and control. Make sure to adjust the position of the downspout to align with your cut line.

The downspout should be clamped in a way that keeps the area you are cutting clear from any obstructions, such as nearby walls or plants.
Step 3: Put on Safety Gear
Before proceeding with the cutting process, ensure that you put on the appropriate safety gear. Wearing protective goggles is essential to shield your eyes from any metal shards or dust that may be generated during the cutting.
Additionally, wear thick gloves to protect your hands from sharp edges and provide a better grip on the tools. Prioritizing safety by wearing the correct gear will help prevent injuries and make the cutting process smoother and more efficient.
Step 4: Start Cutting with a Hacksaw
If using a hacksaw, start by aligning the saw blade with the marked cut line and gently saw back and forth. Use light pressure to prevent bending or damaging the downspout. Continue cutting until you reach the end of your marked line.
But, if using a jigsaw, make sure to use a blade designed for cutting metal. Align the blade with the marked line and start cutting slowly and steadily. For curved or angled cuts, carefully maneuver the jigsaw to follow your marked line.
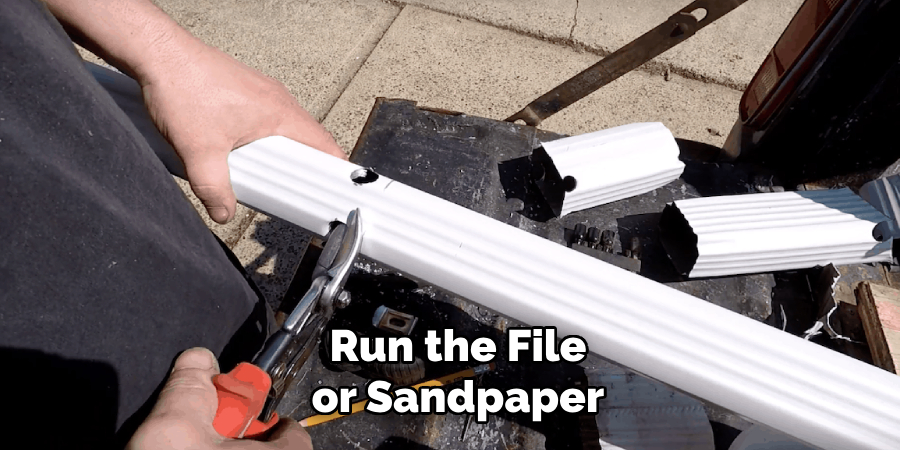
Step 5: Remove Any Rough Edges
After cutting the downspout, it’s important to check for any rough or sharp edges that may have been left behind. These edges can interfere with the proper fitting of the downspout and pose a potential safety hazard. Use a metal file or sandpaper to gently smooth out these edges.
Run the file or sandpaper along the cut end of the downspout until it feels smooth to the touch and any burrs are removed. This finishing touch ensures a clean and professional look, as well as a safer handling experience during installation.
Step 6: Remove the Clamps or Vice
Once you have finished cutting and smoothing the downspout, carefully remove the clamps or vice-holding them in place. It’s important to release the equipment gently to prevent the newly cut downspout from dropping or getting damaged.
Ensure that the downspout is adequately supported while you remove the clamps to maintain stability. By doing so, you can prevent any unnecessary dents or scratches, preserving the integrity and appearance of the newly customized downspout.
Step 7: Check for Proper Fit
With the downspout now cut to size, it’s important to check that it fits correctly before proceeding with installation. Place one end of the downspout into its designated connection point on your gutter system and ensure that it sits snugly without any gaps or misalignment. If needed, make minor adjustments by trimming a small amount off the cut end until a perfect fit is achieved.
It’s crucial to take your time and ensure a proper fit, as this will ultimately contribute to the effectiveness and longevity of your gutter system.
Step 8: Install the Downspout
Once you have confirmed a proper fit, it’s time to install the downspout onto your gutter system. Carefully insert the downspout into its designated connection points and secure them in place according to manufacturer instructions. Make sure to check for any leaks or loose connections and address them immediately to ensure efficient drainage.
Step 9: Clean Up
After completing the cutting and installation process, it’s important to clean up any debris or metal shavings that may have accumulated. Use a broom or vacuum to remove any excess metal particles from the work area, ensuring a safe and tidy environment. Properly dispose of any waste material according to local regulations.
Following these steps on how to cut aluminum downspout and taking the time to carefully cut your aluminum downspouts will result in a more efficient and aesthetically pleasing gutter system. With the right tools, safety gear, and techniques, you can easily customize your downspouts to fit your specific needs. Remember to always prioritize safety and double-check your measurements for accurate results.
Frequently Asked Questions
Q: Can I Use a Circular Saw to Cut Aluminum Downspouts?
A: Yes, you can. However, it’s important to ensure that the blade is specifically designed for cutting metal and that you take proper safety precautions while using the saw. The same applies to using a jigsaw – make sure to use a metal-cutting blade and follow safety guidelines.
Q: Do I Need to Wear Protective Gear While Cutting Aluminum Downspouts?
A: Yes, it’s highly recommended to wear protective gear while cutting aluminum downspouts. This includes safety goggles and thick gloves to protect your eyes and hands from any potential hazards or injuries. Wearing the correct gear can help prevent accidents and ensure a smoother cutting process.
Q: Can I Use Tin Snips Instead of a Hacksaw or Jigsaw?
A: Yes, you can use tin snips to cut aluminum downspouts. However, using this tool may require more strength and precision and may not be suitable for longer or angled cuts. It’s important to choose the right tool for the job based on your specific cutting needs.

Q: Do I Need to File Down Rough Edges After Cutting Aluminum Downspouts?
A: Yes, it’s recommended to file down any rough edges after cutting aluminum downspouts. This will ensure a clean and safe installation process, as well as prevent any potential damages to the gutter system or injuries while handling the downspout. Take the time to properly finish off your cut edges for a professional result.
Q: Can I Cut Aluminum Downspouts at an Angle?
A: Yes, you can cut aluminum downspouts at an angle using a jigsaw or hacksaw with proper blade alignment and technique. Just make sure to double-check your measurements and take extra care while cutting curved or angled lines.
Conclusion
Cutting aluminum downspouts is an essential skill for maintaining your gutter system efficiently. By following these steps on how to cut aluminum downspout and taking necessary safety precautions, you can customize your downspouts to fit perfectly into your gutter system.
Remember to gather all the necessary tools and materials before starting the cutting process and to clean up any debris afterward. With proper cutting, you can ensure a functional and visually appealing gutter system that protects your home from water damage. So, don’t hesitate to take the time and effort to cut your aluminum downspouts accurately for optimal results. Happy cutting!
Edmund Sumlin is a skilled author for Metal Fixes, bringing 6 years of expertise in crafting a wide range of metal fixtures. With a strong background in metalwork, Edmund’s knowledge spans various types of fixtures, from decorative pieces to functional hardware, blending precision with creativity. His passion for metalworking and design has made him a trusted resource in the industry.
Professional Focus:
- Expert in Metal Fixtures : Edmund aesthetic specializes in creating durable and innovative metal fixtures, offering both appeal and functionality. His work reflects a deep understanding of metalworking techniques and materials.
- Sustainability Advocate : He is dedicated to using sustainable practices, ensuring that every fixture is crafted with eco-friendly methods while maintaining high-quality standards.
In his writing for Metal Fixes, Edmund provides valuable insights into the latest trends, techniques, and practical advice for those passionate about metal fixtures, whether they are professionals or DIY enthusiasts. His focus on combining artistry with engineering helps others discover the true potential of metal in design.