

Cutting aluminum with a grinder is a practical and effective way to achieve precise cuts for various projects. Aluminum, being a lightweight and versatile metal, is commonly used in construction, automotive, and DIY applications. Using a grinder requires the right tools and techniques to ensure safety and accuracy while preventing damage to the material. This guide will walk you through the essential steps and tips for how to cut aluminum with a grinder effectively.
Tools and Materials Needed
To cut aluminum with a grinder effectively, you will need the following tools and materials prepared beforehand:
- Angle Grinder: Choose an angle grinder that is compatible with metal cutting discs and has adjustable speed settings, if possible.
- Cutting Disc: Use a specialized aluminum cutting disc, as it is designed to handle the softness of the metal and reduce clogging.
- Clamps or Vise: Secure the aluminum piece firmly with clamps or a vise to ensure stability during cutting.
- Measuring Tape and Marker: Precisely measure and mark the cutting line on the aluminum to guide your cuts.
- Safety Goggles and Dust Mask: Protect your eyes and respiratory system from aluminum dust and flying debris.
- Gloves: Wear sturdy gloves to safeguard your hands while operating the grinder.
- Work Surface or Table: Use a stable workbench or table to create a steady workspace for the project.
Having the proper tools and materials at the ready will set the foundation for clean and efficient cuts on aluminum.
10 Methods How to Cut Aluminum with a Grinder
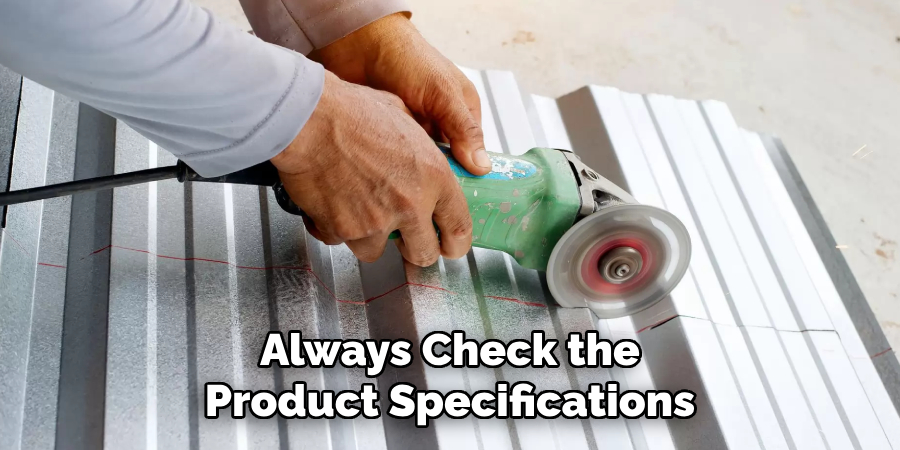
1. Choose the Right Cutting Wheel
Selecting the appropriate cutting wheel is the first and most important step when using a grinder to cut aluminum. Aluminum is a soft metal, and using the wrong wheel can result in uneven cuts, excessive heat buildup, and damage to the material or the tool. For aluminum, a metal cutting disc made specifically for non-ferrous metals is ideal. These discs are usually made of fiberglass or aluminum oxide with a thinner profile, designed to cut through softer metals without causing clogging. Always check the product specifications to ensure the cutting wheel is suitable for aluminum before use.
2. Prepare the Workspace
Before starting the cutting process, ensure that your workspace is well-prepared and safe. Place the aluminum piece securely on a stable surface, such as a workbench or clamping device, to prevent it from shifting during the cutting process. This will allow for more accurate cuts and reduce the risk of injury. Additionally, make sure the area is free of flammable materials, as grinding aluminum can produce sparks. It’s also essential to wear proper protective gear, including gloves, goggles, and a dust mask, to protect yourself from flying debris and metal dust.
3. Secure the Aluminum Piece
To ensure precision and safety while cutting aluminum, secure the material in place. Using clamps or a vice, firmly hold the aluminum so that it doesn’t move during the cutting process. This will not only make the cut cleaner but will also reduce the risk of accidents, as an unstable workpiece can cause the grinder to slip. If the aluminum piece is large, it may be helpful to have a second person assist with holding or stabilizing the material. By keeping the material immobile, you ensure a smoother and more controlled cutting process.
4. Mark the Cut Line
Before cutting, mark the line where you want to cut the aluminum. Use a pencil, chalk, or a specialized marker to draw a clear, straight line along the area you want to cut. A measuring tape or ruler will help ensure that the cut is straight and precise. If you’re cutting along a complex shape, you can use a template or a flexible ruler to trace the curve. Marking the cut line ensures that your grinder will follow the intended path, preventing errors or misalignment during the cutting process.
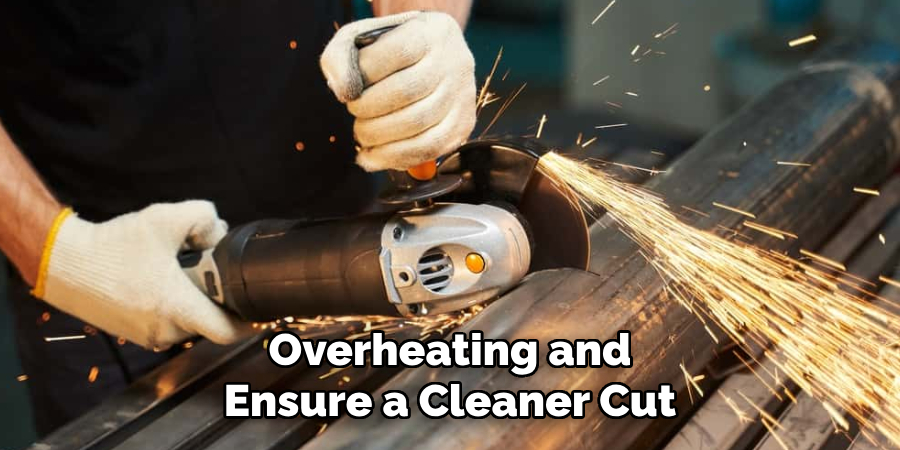
5. Set the Grinder to the Correct Speed
Grinders often come with adjustable speed settings. When cutting aluminum, it’s important to set the grinder to a lower speed to avoid generating too much heat. Aluminum is prone to warping or melting if it gets too hot, and running the grinder at high speed can increase the likelihood of this. Start by setting your grinder to a medium speed and, if necessary, adjust it based on the thickness of the aluminum and the cutting wheel you are using. The correct speed will help prevent the aluminum from overheating and ensure a cleaner cut.
6. Use Steady, Controlled Movements
When cutting aluminum with a grinder, it’s essential to maintain steady, controlled movements to ensure a clean and accurate cut. Allow the grinder to do the work, applying consistent pressure as you move along the cut line. Avoid forcing the grinder through the material, as this can lead to uneven cuts, excessive heat buildup, or damage to the wheel. Start the cut slowly, and once the grinder has started to make progress, continue in a smooth, controlled motion. Always cut in a straight line or along the curve you’ve marked, and avoid making sudden jerks or movements that could cause the tool to slip.
7. Prevent Heat Buildup with Intermittent Cuts
Heat buildup is one of the biggest challenges when cutting aluminum with a grinder. If the metal becomes too hot, it can warp, discolor, or even melt in places, leading to an uneven cut and possible tool damage. To prevent this, it’s advisable to make intermittent cuts rather than trying to cut through the entire piece in one go. Pause every few seconds, allowing the material to cool down before continuing. This approach reduces the risk of heat buildup and ensures a cleaner, more controlled cutting process.
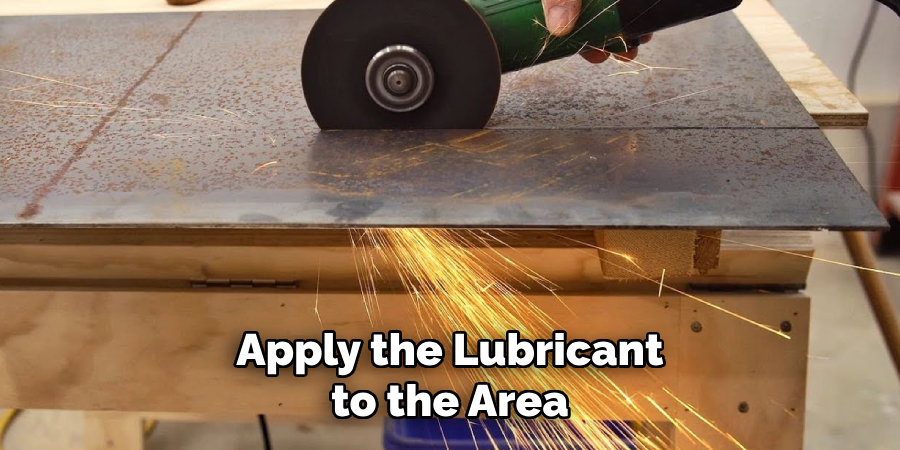
8. Use Cutting Lubricant for Smoother Cuts
Applying a cutting lubricant can significantly improve the performance of the grinder and result in a smoother, more precise cut. The lubricant helps reduce friction between the grinder and the aluminum, which in turn minimizes heat buildup. It also helps to extend the life of the cutting wheel by preventing excessive wear. You can use specialized cutting fluid or even vegetable oil in a pinch. Apply the lubricant to the area you’re cutting, ensuring it’s evenly distributed before you begin. This will allow the grinder to move more smoothly and help prevent the aluminum from becoming too hot or clogging the cutting wheel.
9. Clean the Aluminum After Cutting
Once the cutting process is complete, you will likely notice that the edges of the aluminum are rough or jagged. To clean up the edges, use a file or a deburring tool to smooth out the cut edges. You can also use the grinder with a polishing or sanding wheel to refine the edges further. Be sure to remove any burrs or sharp edges, as these can be dangerous and could cause the aluminum piece to be difficult to handle or fit into place. Cleaning the edges ensures that your cut aluminum is safe to use and looks professionally finished.
10. Inspect the Cut for Accuracy
After completing the cut, inspect the aluminum piece for accuracy and smoothness. Check if the cut follows the marked line and if the edges are smooth and even. If there are any imperfections, you can address them by re-grinding or filing the edges for a cleaner finish. Inspecting your work helps ensure that the piece will fit into its intended purpose and that the cut is both aesthetically pleasing and functional. If the cut is not accurate or if there are any issues with alignment, consider making adjustments or redoing the cut as needed.
Common Mistakes to Avoid
1. Choosing the Wrong Cutting Wheel
Using a cutting wheel not designed for aluminum is one of the most common (and avoidable) mistakes. Wheels intended for materials like steel or masonry won’t deliver clean cuts on aluminum and may damage both your material and grinder. Always check that your cutting wheel is specifically labeled for non-ferrous metals, such as aluminum, to ensure the best results.
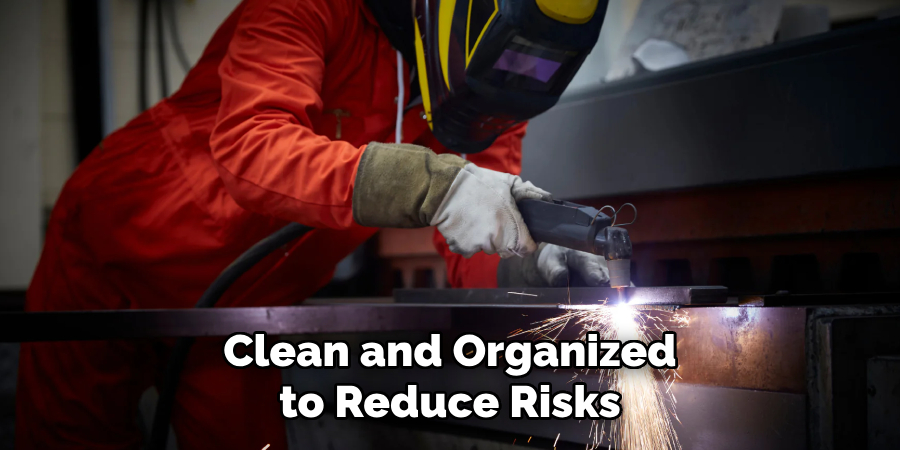
2. Ignoring Safety Precautions
Skipping safety measures is a recipe for accidents. Proper protective gear—like goggles, gloves, and a dust mask—is non-negotiable to shield you from flying debris, sharp edges, and harmful dust particles. Also, make sure your workspace is clean and organized to reduce risks and keep the process smooth.
3. Not Securing the Aluminum
Trying to cut aluminum that isn’t securely clamped or supported often leads to uneven cuts and increases the likelihood of the grinder slipping—a serious safety hazard. Before you begin, double-check that your material is firmly in place to maintain control and precision.
Conclusion
Cutting aluminum with a grinder can be a precise and efficient process when proper techniques and precautions are followed. By taking the time to prepare your workspace, using the correct tools and settings, and maintaining steady, controlled movements, you can achieve clean, accurate cuts while minimizing risks. Follow these simple instructions outlined in this blog post about how to cut aluminum with a grinder, and you’ll be able to get the job done with ease.
Edmund Sumlin is a skilled author for Metal Fixes, bringing 6 years of expertise in crafting a wide range of metal fixtures. With a strong background in metalwork, Edmund’s knowledge spans various types of fixtures, from decorative pieces to functional hardware, blending precision with creativity. His passion for metalworking and design has made him a trusted resource in the industry.
Professional Focus:
- Expert in Metal Fixtures : Edmund aesthetic specializes in creating durable and innovative metal fixtures, offering both appeal and functionality. His work reflects a deep understanding of metalworking techniques and materials.
- Sustainability Advocate : He is dedicated to using sustainable practices, ensuring that every fixture is crafted with eco-friendly methods while maintaining high-quality standards.
In his writing for Metal Fixes, Edmund provides valuable insights into the latest trends, techniques, and practical advice for those passionate about metal fixtures, whether they are professionals or DIY enthusiasts. His focus on combining artistry with engineering helps others discover the true potential of metal in design.