

Are you tired of buying new cable locks every time you forget the combination? Or do you simply want to upgrade your old, worn-out cable lock? Either way, learning how to cut braided steel cable can come in handy.
In this guide, we will discuss the steps and tools needed to cut through braided steel cables with ease.
Cutting braided steel cable requires precision and the right tools to ensure a clean cut that maintains the cable’s integrity. Whether you need to shorten a cable for a specific application or remove a damaged section, understanding the proper techniques is crucial.
In this guide, we will walk you through the necessary steps and highlight the tools required to perform this task safely and effectively. This will help you avoid common mistakes and achieve professional results.
Why Cut Braided Steel Cable?
Braided steel cable is a popular choice for securing bikes, motorcycles, and other valuable items due to its strength and durability. However, there are times when you may need to cut through it.
For instance, if you have forgotten the combination of your cable lock or need to remove a damaged section of the cable.
Cutting through braided steel cable can also be handy for DIY projects or repairs. Doing it yourself can save you time and money instead of having to buy a new cable lock every time.
Overall, knowing how to cut braided steel cable gives you greater control and flexibility over your security measures.
What Will You Need?
Before starting the cutting process, gather the following tools and materials:
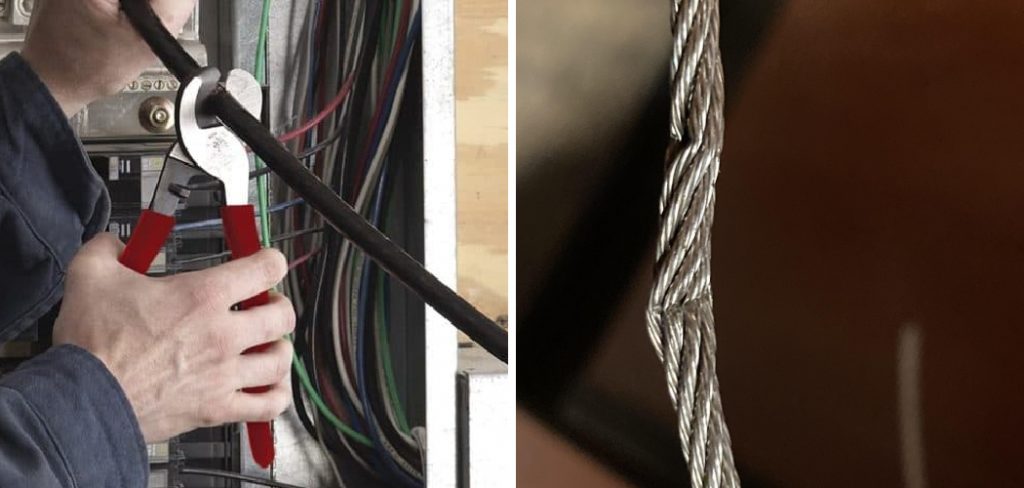
- Bolt Cutters: These are heavy-duty scissors designed to cut through strong materials like braided steel cables.
- Protective Gear: It is important to wear gloves and safety glasses to protect your hands and eyes from flying debris during the cutting process.
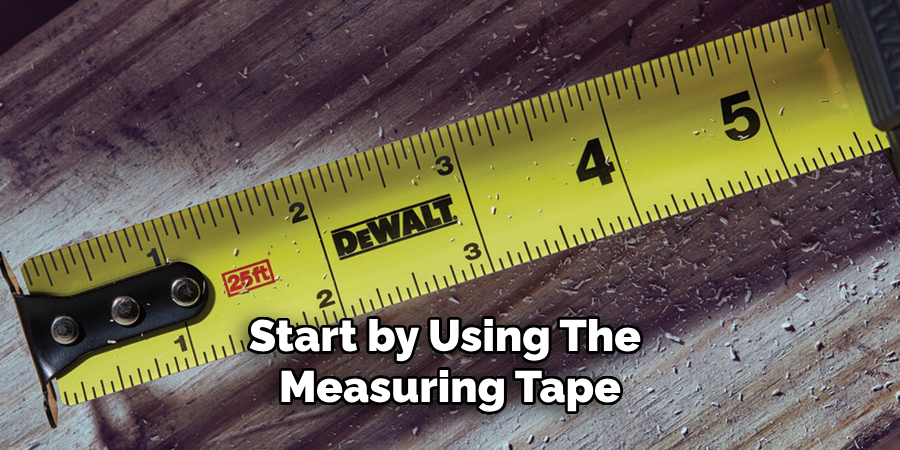
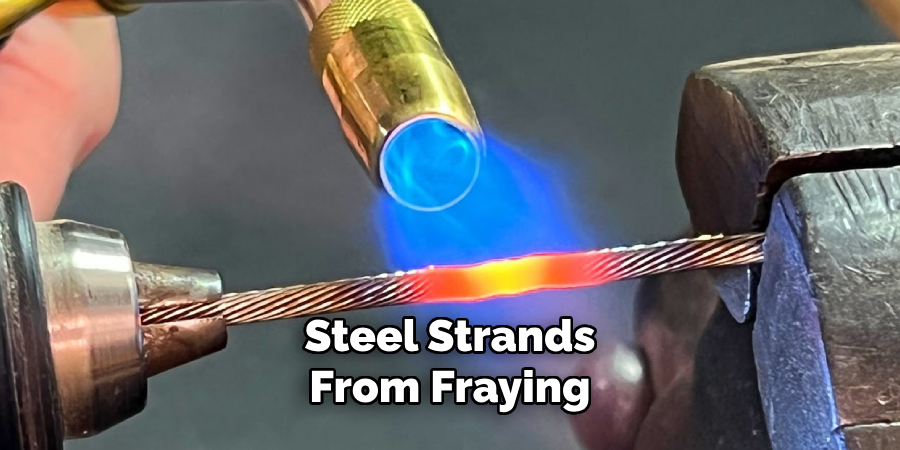
- Measuring Tape: This will help ensure precision when cutting the cable to a specific length.
- Marker or Chalk: This will help mark the area where you want to cut the cable.
Once you have gathered all the necessary tools and materials, let’s move on to the steps of cutting braided steel cable.
10 Easy Steps on How to Cut Braided Steel Cable
Step 1: Measure and Mark the Cable
Before you begin cutting, it is crucial to measure and mark the cable accurately to ensure you achieve the desired length. Start by using the measuring tape to determine the exact length of the section you need to cut. Precision is key here; even a slight miscalculation can affect the functionality of the cable.
After measuring, use a marker or chalk to make a clear, visible mark on the cable where you intend to cut. This mark will guide you and help you make a straight, clean cut. It’s best to double-check your measurements to avoid any mistakes. Once you are confident with your measurements and markings, you are ready to proceed to the next step.
Step 2: Secure the Cable
Once you have measured and marked the cable, the next step is to secure it in place. This is important to ensure stability and precision during the cutting process. Use a clamp or a vise to hold the cable firmly on a stable surface, making sure the marked section is easily accessible.
If you don’t have access to a clamp or vise, ask someone to hold the cable for you, but ensure they are also wearing protective gear.
Securing the cable properly will help prevent it from moving or shifting, which can lead to an uneven or inaccurate cut. With the cable securely in place, you are ready to proceed to the actual cutting.
Step 3: Put on Protective Gear
Before proceeding with the cutting process, it is vital to prioritize your safety by wearing the appropriate protective gear. Make sure to put on a pair of sturdy gloves to protect your hands from potential cuts or injuries from the steel strands. Additionally, wear safety glasses to shield your eyes from any flying debris that may be produced during the cutting process.

Taking these precautions will ensure that you are fully protected and can focus on making a precise and clean cut. Once you have donned your protective gear, you can move on to the next step, which involves positioning the bolt cutters correctly.
Step 4: Position the Bolt Cutters
With your protective gear on and the cable securely in place, it’s time to position the bolt cutters correctly. Open the bolt cutters and place the blades around the marked section of the cable. Make sure the blades are aligned with the mark you made earlier, positioning them as close to the mark as possible for a clean and precise cut.
Ensure the handles of the bolt cutters are spread wide enough to generate ample cutting force when squeezed together. Carefully double-check the alignment to ensure accuracy, as any misplacement can result in an uneven cut or damage the cable.
Step 5: Apply Even Pressure to the Handles
With the bolt cutters positioned correctly around the marked section of the cable, it’s time to apply even pressure to the handles. Firmly grip the handles of the bolt cutters and squeeze them together with steady, even pressure.
It may require significant force to cut through the braided steel, so use both hands to ensure you have enough strength to complete the cut. Applying even pressure is crucial to avoid fraying the cable and to achieve a neat, clean cut.
Continue squeezing the handles together until the blades have completely severed the cable. Once the cut is made, release the handles and carefully set the bolt cutters aside. You have now successfully cut through the braided steel cable.
Step 6: Inspect the Cut
After successfully cutting through the braided steel cable, it is essential to inspect the cut to ensure it is clean and precise. Examine the ends of the newly cut section to check for any signs of fraying or unevenness.
A clean cut will show minimal fraying, with the steel strands neatly severed. If you notice any frayed edges or roughness, you may need to trim these areas carefully using a pair of wire cutters or a file to smooth them out. This attention to detail is crucial, especially if the cable is to be used for securing items or for any project where a clean and professional appearance is necessary.
Taking the time to inspect and polish the cut will help maintain the integrity and functionality of the cable, ensuring a reliable and secure outcome. Once you are satisfied with the quality of the cut, you can proceed to the next steps, whether that involves attaching a new lock mechanism, using the cable in a DIY project, or any other planned application.
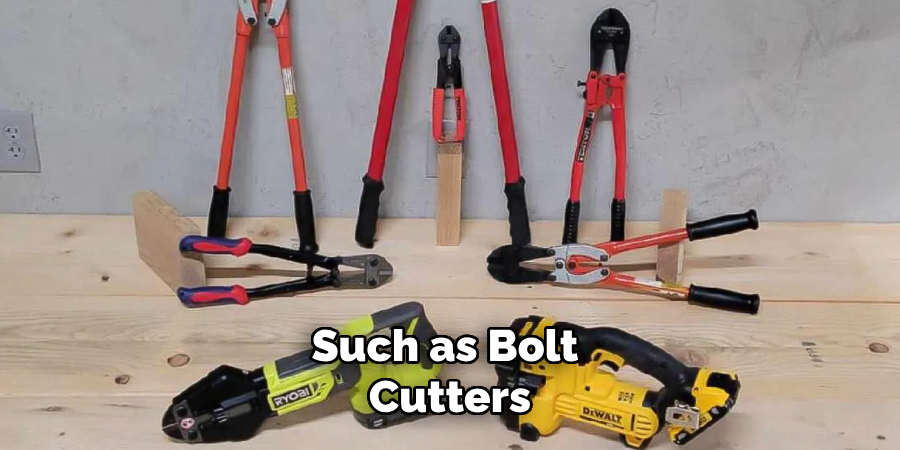
Step 7: Seal the Ends
To prevent the steel strands from fraying and ensure the cable’s longevity, it is important to seal the cut ends properly. One effective way to do this is by applying a metal adhesive or soldering the end of the cable. If you opt for metal adhesive, apply a small amount to the cut ends and allow it to dry as per the manufacturer’s instructions.
Make sure the adhesive covers all the strands to keep them securely in place. Alternatively, if you choose to solder, carefully heat the end of the cable with a soldering iron and apply solder until the ends are fully sealed.
Sealing the ends will not only help maintain the structural integrity of the cable but also provide a neat finish that prevents any accidental injuries from sharp, exposed strands.
This step is crucial for ensuring the effectiveness and durability of the cable in its intended use. Once you have successfully sealed the ends, you can proceed to the final steps, focusing on the specific requirements of your project or application.
Step 8: Store the Remaining Cable Safely
After sealing the ends of the cut cable, it is important to store any remaining cable safely to avoid damage or accidents. Coil the leftover cable neatly and secure it with a zip tie or cable tie to keep it organized.
Store the coiled cable in a dry, cool place away from moisture and direct sunlight, which can deteriorate the steel over time. Keeping the cable in a designated storage area will not only extend its lifespan but also make it easier to locate and use for future projects. Proper storage ensures that the cable remains in good condition and is ready for immediate use when needed.
Step 9: Clean Up the Work Area
After completing your project, it is important to clean up the work area to maintain a safe and organized environment. Gather any leftover materials, including small pieces of cut cable, and dispose of them properly.
Ensure that all tools, such as bolt cutters, wire cutters, and soldering iron, are cleaned and stored in their designated places. Wipe down the work surface to remove any debris or residue from the cutting and sealing process.
By thoroughly cleaning up, you reduce the risk of accidents and ensure that your work area is ready for future tasks. Taking a few moments to tidy up will help you maintain a safe and efficient workspace.
Step 10: Test the Strength of the Cable (Optional)
Depending on the intended use of the cable, you may want to test its strength and integrity after cutting and sealing. To do this, apply gradual force or weight to the cable to ensure it can handle the expected load without fraying or breaking.
This step is particularly important if the cable will be used for securing valuable items or in high-stress applications. If the cable shows any signs of weakness or damage during testing, consider replacing it or reinforcing it with additional measures such as stronger adhesive or extra solder.
Testing the strength of the cable provides peace of mind that it will perform reliably under real-world conditions, contributing to the overall success of your project. Once you have confirmed the cable’s integrity, you can confidently proceed to use it for its intended purpose.
By following these steps, you can effectively and safely cut through a braided steel cable using bolt cutters.
5 Additional Tips and Tricks
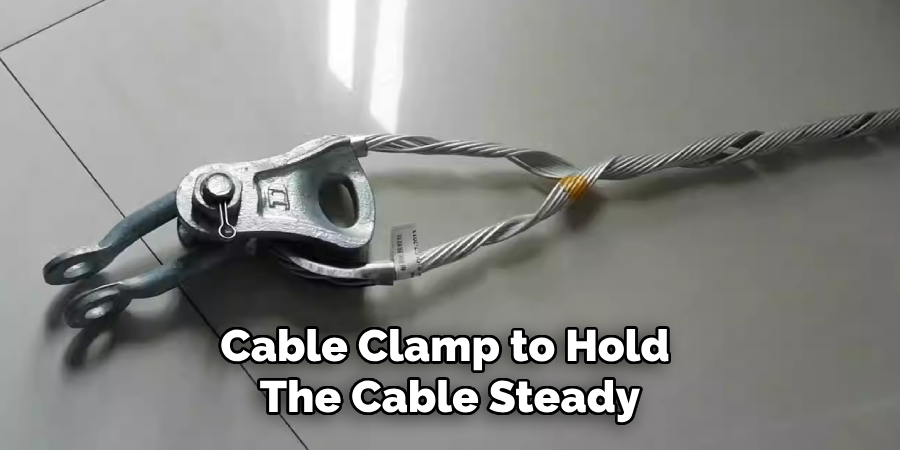
- Secure the Cable Firmly: Ensure the cable is clamped securely in place before cutting. Use a vise or a cable clamp to hold the cable steady, which reduces the risk of fraying and provides a clean cut.
- Tape the Cut Area: Wrap electrical tape or duct tape around the cable at the point where you plan to make your cut. This helps keep the strands together and minimizes fraying when you cut through the cable.
- Use the Right Tools: Employ quality cable cutters designed for braided steel cables. Tools such as bolt cutters or specialized cable cutters provide the necessary leverage and sharpness needed for a clean cut.
- Cut at a Slight Angle: When cutting the cable, do so at a slight angle rather than perpendicular to the strands. This technique helps achieve a smoother cut and reduces the chances of the cable unraveling.
- Clean and Deburr: After making the cut, inspect the end of the cable for any burrs or sharp edges. Use a metal file or a rotary tool to clean and smooth out the edges to ensure safe handling and prevent damage to other components.
With these additional tips and tricks, you can easily and precisely cut braided steel cables.
5 Things You Should Avoid
- Using Dull Tools: Avoid using dull or inadequate tools for cutting braided steel cables. Dull cutters can crush the cable instead of slicing through smoothly, leading to fraying and uneven edges.
- Skipping the Tape: Do not skip the step of taping the cut area. Failing to wrap the cable with electrical or duct tape can result in unraveled strands and a messy cut, making the cable difficult to work with.
- Cutting at a Straight Angle: Making a perpendicular cut straight across the cable can cause the strands to separate and fray. Always cut at a slight angle to ensure a cleaner and more controlled cut.
- Neglecting Safety Gear: Never neglect to wear the appropriate safety gear such as gloves and eye protection. Handling and cutting steel cables without adequate protection can lead to injuries from sharp strands and flying debris.
- Ignoring Post-Cut Inspection: Don’t ignore the importance of inspecting and deburring the cut end after cutting the cable. Sharp edges and burrs can cause injury and damage to other components in your setup. Always smooth out the edges with a metal file or rotary tool.
By avoiding these common mistakes, you can ensure a safer and more efficient cutting process when working with braided steel cable.
5 Different Use Cases for Cut Braided Steel Cable
- DIY Projects: Cut braided steel cable is a versatile material that can be used in various DIY projects such as making custom bike racks or sturdy shelving.
- Home Security: Install cut braided steel cables on doors and windows to secure your home from intruders. The strength and durability of the cable make it a reliable security measure.
- Outdoor Activities: Cut braided steel cable can be used to secure gear and equipment when camping, hiking, or engaging in other outdoor activities. The cable can also be used to build zip lines or rope bridges.
- Industrial Applications: Braided steel cable is commonly used in industrial settings for rigging, lifting, and securing heavy loads. Cut cable can be used to replace worn-out or damaged sections in existing setups.
- Automotive and Marine Services: Cut braided steel cable is commonly used in automotive and marine services for tasks such as towing, lifting, and securing cargo on trailers and boats.

With its strength, durability, and versatility, cut braided steel cable can be useful in various applications and industries.
Can You Cut a Cable With Scissors?
It is not recommended to cut braided steel cables with scissors. While sharp scissors may be able to make a few cuts, they are not designed for cutting through tough materials such as steel and will quickly become dull and ineffective.
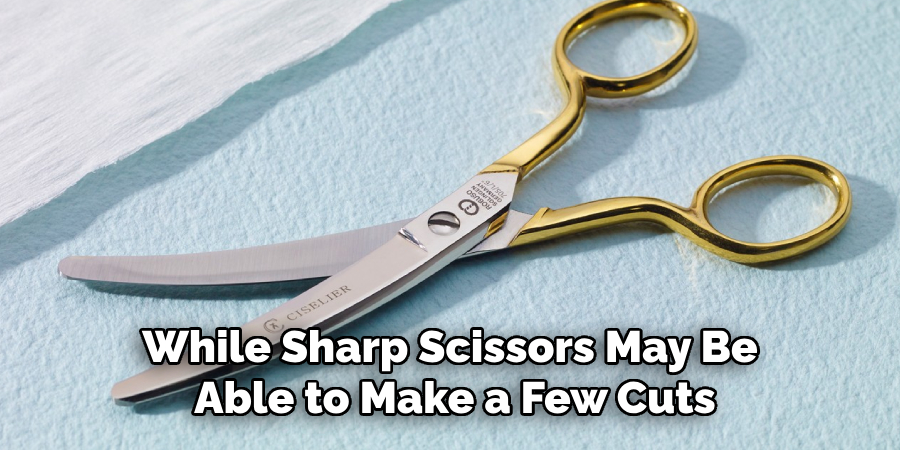
Additionally, using scissors can create uneven cuts and increase the risk of injury due to their smaller size and lack of leverage.
It is always best to use the proper tools for cutting braided steel cables, such as bolt cutters or specialized cable cutters. These tools are specifically designed for the task and will provide better results and safety. So, avoid using scissors and opt for the right tools to ensure a clean and safe cut every time.
Conclusion
How to cut braided steel cable may seem intimidating at first, but by following the correct techniques and using the appropriate tools it becomes a straightforward task.
Ensuring the cable is secured firmly, taping the cut area, employing quality cutters, cutting at a slight angle, and deburring the edges are all crucial steps to achieving a precise and clean cut.
To maintain both the integrity of the cable and personal safety, avoid common pitfalls such as using dull tools, skipping the tape, and neglecting safety gear. By adhering to these guidelines and avoiding mistakes, you can handle and modify braided steel cables effectively and confidently for any project or application.
Hopefully, this guide has provided you with valuable information on cutting braided steel cable and its various use cases. Happy cutting!
Edmund Sumlin is a skilled author for Metal Fixes, bringing 6 years of expertise in crafting a wide range of metal fixtures. With a strong background in metalwork, Edmund’s knowledge spans various types of fixtures, from decorative pieces to functional hardware, blending precision with creativity. His passion for metalworking and design has made him a trusted resource in the industry.
Professional Focus:
- Expert in Metal Fixtures : Edmund aesthetic specializes in creating durable and innovative metal fixtures, offering both appeal and functionality. His work reflects a deep understanding of metalworking techniques and materials.
- Sustainability Advocate : He is dedicated to using sustainable practices, ensuring that every fixture is crafted with eco-friendly methods while maintaining high-quality standards.
In his writing for Metal Fixes, Edmund provides valuable insights into the latest trends, techniques, and practical advice for those passionate about metal fixtures, whether they are professionals or DIY enthusiasts. His focus on combining artistry with engineering helps others discover the true potential of metal in design.