
It was a cold winter night when I heard the dreaded metallic rattle from under the hood of my aging pickup truck. As a lifelong car enthusiast and DIY mechanic, I knew that sound all too well – a slipped timing chain. This critical component had reached the end of its lifespan, and if not addressed immediately, could leave me stranded on the side of the road.

While a shop would charge hundreds, if not thousands, to replace the timing chain and guides, I was determined to save money and get the job done myself. It promised to be a long and difficult repair, tucked away in the cramped engine compartment. But I’ve always loved a challenge and wasn’t about to let a mechanical gremlin get the best of me.
In this post, I’ll share my step-by-step process for how to fix jumped timing chain, in the hopes that it can help others tackle the job and get their vehicle back on the road for less.
Supplies You Will Need to Fix Jumped Timing Chain
- Socket wrench set
- Torque wrench
- Timing kit (timing chain and guides) specific to your vehicle make and model
- New gaskets for valve cover and oil pan
- Engine oil
- Coolant
- Shop rags or towels
Step-by-step Guidelines on How To Fix Jumped Timing Chain
Step 1: Prepare Your Workspace
Before you begin, make sure you have a clean and well-lit workspace. This job will require plenty of maneuvering and precision, so it’s essential to have enough room and good lighting to work comfortably. Lay down some towels or rags to protect your engine components from scratches or damage. Preparing your workspace beforehand can save you time and frustration later on.
Step 2: Remove the Engine Components
To access the timing chain, you’ll need to remove several engine components, including the valve cover and oil pan. Refer to your vehicle’s repair manual for specific instructions on how to do this for your particular make and model. Once these parts are removed, you should be able to see the timing chain and guides, which may be covered in oil or debris that needs to be cleaned off.
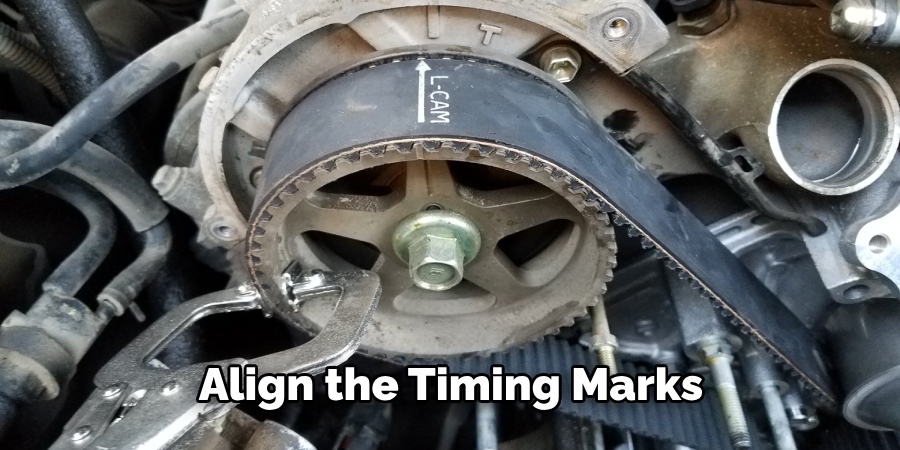
Step 3: Align the Timing Marks
Before removing the old timing chain, you must align the timing marks on your engine. These are usually located on the crankshaft gear and camshaft gear. Refer to your vehicle’s repair manual for specific instructions on how to do this for your particular make and model. Aligning the timing marks ensures that you install the new chain correctly.
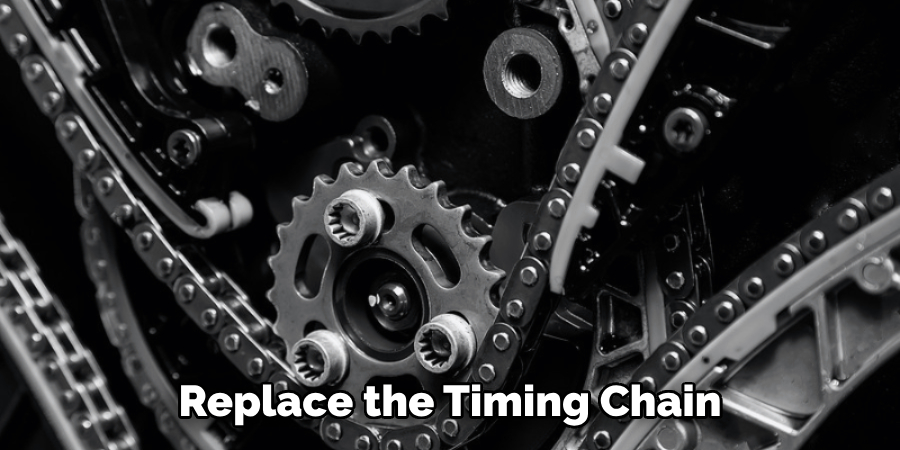
Step 4: Remove the Old Timing Chain and Guides
Using a socket wrench, loosen the bolts securing the old timing chain and guides in place. Keep track of these bolts as they will need to be replaced with new ones when installing the new chain. Once the old chain and guides are removed, clean the area thoroughly before proceeding. Removing the old timing chain and guides can be tricky, so take your time and be gentle to avoid damaging any components.
Step 5: Install the New Timing Chain and Guides
With the old chain and guides out of the way, it’s time to install the new ones. Follow the instructions included in your timing kit carefully, as each vehicle may have a slightly different process. Be sure to use the new bolts and torque them to the recommended specifications for your vehicle. Once everything is securely in place, double-check that the timing marks are still aligned.
Step 6: Reassemble Engine Components
Now that the new timing chain and guides are installed, it’s time to put everything back together. Start by replacing any gaskets or seals that were removed earlier, then reattach the valve cover and oil pan. Make sure to tighten all bolts to the recommended specifications. Once everything is back in place, add engine oil and coolant as needed.
Step 7: Test Your Repair
Before starting your vehicle, it’s crucial to double-check that the timing marks are still aligned correctly. If everything looks good, start your engine and let it run for a few minutes to ensure everything is working correctly. If you hear any strange noises or notice any issues, immediately turn off the engine and reevaluate your repair. Make any necessary adjustments before attempting to start the engine again.

Following these steps should help you successfully fix a jumped timing chain and get your vehicle running smoothly again. However, if you’re not comfortable tackling this repair on your own, don’t hesitate to seek professional help. It’s always better to have the job done correctly than risk causing further damage to your engine. So, take your time, stay organized, and always refer to your vehicle’s repair manual for specific instructions on how to fix a jumped timing chain. With patience and determination, you can save yourself time and money by doing it yourself. Happy repairing!
Additional Tips and Tricks to Fix Jumped Timing Chain
1. When the timing chain jumps, it can cause significant damage to your engine. Therefore, it’s important to fix the issue as soon as possible.
2. One of the first things you should do when your timing chain jumps is to check for any physical signs of damage. Look for broken or missing teeth on the timing chain and gears, as well as excessive wear or stretching.
3. If the timing chain is damaged or worn, it will need to be replaced. This can be a complex and time-consuming process, so it’s best to have a professional mechanic handle it.
4. In some cases, the timing chain may have just slipped slightly and can be put back in place without much difficulty. However, this should only be attempted if you are experienced and have the proper tools.
5. If you need to replace your timing chain, it’s important to also inspect and potentially replace other components such as the tensioner, guides, and sprockets. This will ensure that your new timing chain operates smoothly and without any issues.
6. It’s also a good idea to check the timing belt when fixing a jumped timing chain. While they serve different purposes, they both play a critical role in the engine’s operation and can affect each other if one is damaged.
7. If you’re working on a vehicle with an interference engine, it’s important to also check for damage to the valves. A jumped timing chain can often cause the valves to hit the pistons, resulting in bent or broken valves.
8. When replacing your timing chain, make sure to use high-quality parts from a reputable brand. This will ensure that your new timing chain lasts for a long time and doesn’t cause any further issues.
9. Regular maintenance can help prevent a jumped timing chain from occurring in the first place. Make sure to follow your vehicle’s recommended maintenance schedule and replace the timing chain at the appropriate interval.
10. If you’re not comfortable working on your car’s engine or don’t have the necessary tools, it’s best to leave the job to a professional mechanic. This will ensure that the timing chain is fixed correctly and prevent any further damage to your engine.
11. Lastly, always make sure to test drive your vehicle after fixing a jumped timing chain. This will allow you to check for any potential issues and make sure that everything is working properly before hitting the road.
Hopefully, these additional tips and tricks will help you successfully fix a jumped timing chain and keep your engine running smoothly. Remember, it’s always best to address the issue as soon as possible to prevent further damage and costly repairs. So, if you notice any signs of a jumped timing chain, don’t hesitate to take action and get it fixed. Prevention is key when it comes to maintaining your vehicle and avoiding unexpected breakdowns. Happy driving!
Precautions Need to Be Followed for Fixing Jumped Timing Chain
1. First and foremost, it is important to make sure that the engine is completely cooled down before attempting any repairs. This will prevent any potential accidents or injuries.
2. Before starting the repair process, it is advisable to disconnect the battery to avoid any electrical mishaps.
3. Always refer to the vehicle’s manual for specific instructions and diagrams related to your particular model and make. This will ensure a proper understanding of the repair process.
4. It is recommended to use genuine or high-quality replacement parts for fixing a jumped timing chain. This will ensure better performance and longevity of the engine.
5. Make sure to have all the necessary tools and equipment before starting the repair, including a torque wrench, socket set, pliers, etc.
6. While working on the engine, it is important to wear proper protective gear such as gloves and safety glasses to avoid any injuries.
7. Carefully inspect the timing chain for any signs of wear or damage before proceeding with the repair. If there are any visible issues, it is advisable to replace the entire chain instead of just fixing it.
8. Take pictures or make notes during disassembly to ensure proper reassembly of the engine components in the correct order.
Following these precautions will help ensure a safe and successful repair of a jumped timing chain. It is also recommended to seek professional help if you are not confident in your ability to perform the repair yourself. Remember, safety should always be the top priority when working on any vehicle repair. So, it is important to follow all necessary precautions before attempting any repairs.

Conclusion
Now you know how to fix jumped timing chain! It may seem like a daunting task, but with the right knowledge and tools, it can be done successfully. Remember to always consult your vehicle’s manual for specific instructions and procedures.
In addition to checking and adjusting the timing chain tensioner, there are other preventive measures you can take to avoid future issues with your timing chain. Regularly changing your engine oil and using high-quality oil can help keep your timing chain in good condition. It’s also important to listen for any unusual noises coming from your engine, as these could be indicators of a potential problem with your timing chain.