

Are you looking for an exciting and rewarding new skill to learn? Are you fascinated by the creative potential of forging metal into something substantial, unique, and beautiful? If so, then forge welding may be just what you’ve been searching for!
This ancient art is a great way to unlock your hidden talent as a craftsman and challenge yourself with something different. Forge welding requires patience, practice, precision, and, most importantly — dedication, but if it truly speaks to your soul like it does mine — I promise that learning this craft will be one of the most gratifying experiences you ever embark on.
With our comprehensive guide on how to forge weld – complete with helpful tips from industry experts – we can assure you that you will soon become the master of your universe!
What Will You Need?
Before we dive into the specifics of how to forge weld, let’s first go over the essential tools and materials you will need for this process.
- A forge is where you will heat your metal pieces to their melting point. You can purchase a pre-made forge or build one yourself using fire bricks and a propane burner.
- An anvil: This is where you will shape and manipulate the metal pieces while they are hot.
- A hammer: A good quality hammer with a rounded face and cross peen will be your primary tool for shaping and forging.
- Tongs: These are used to hold onto the hot metal pieces safely while you work on them.
- Fuel: Propane is the most common fuel used for forge welding, but other options include coal and charcoal.
- Safety gear: Safety glasses, a fire-resistant apron, and heat-resistant gloves are essential for protecting yourself while working with hot metal.
Now that you have all the necessary tools and safety gear, it’s time to learn how to do it.
9 Easy Steps on How to Forge Weld
Step 1: Prepare Your Materials
The first step in forge welding is to prepare the materials you want to join together. This can be done by cutting or shaping the pieces of metal into the desired shapes and sizes. It’s essential to ensure that both pieces are clean and free of rust, oil, or other contaminants that could prevent a successful weld.
Step 2: Heat Your Forge
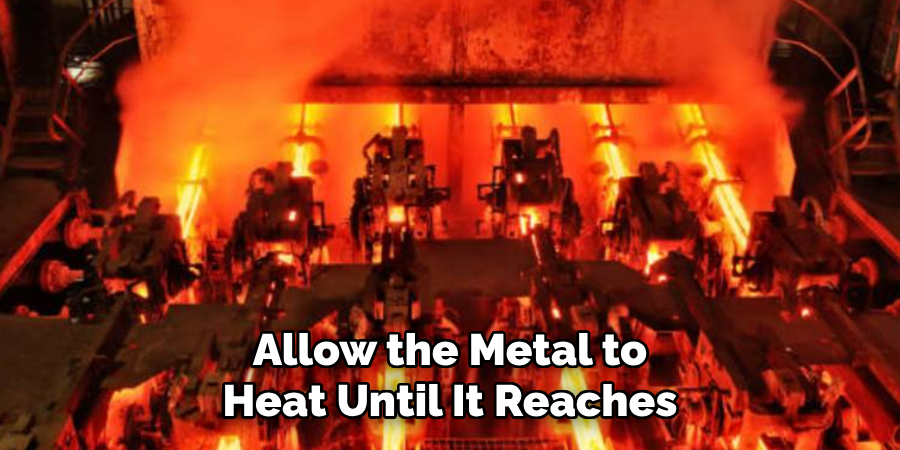
Once your materials are prepared, it’s time to heat your forge. Ensure that your forge reaches the right temperature for welding, typically around 2300°F for steel. Carefully place the pieces of metal inside the forge using your tongs. Allow the metal to heat until it reaches a bright, almost white color, indicating it is ready for forging. Always remember to follow safety procedures while heating and handling hot metals.
Step 3: Removing and Aligning the Metal
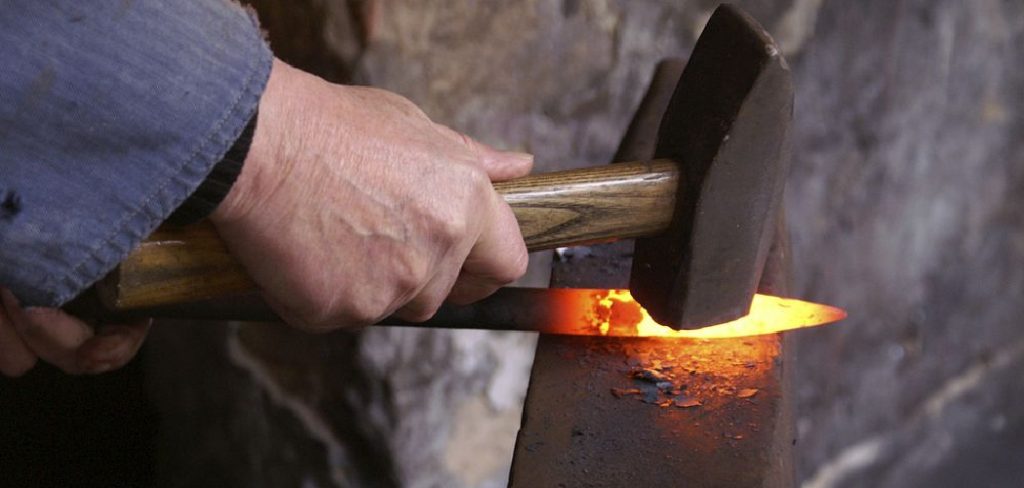
After the metal pieces have been sufficiently heated, carefully remove them from the forge with your tongs. It’s essential to move swiftly yet safely, as the metal will begin to cool as soon as it’s removed. Next, align the metal pieces on the anvil how you want them to be joined. Make sure the surfaces that you want to weld are in complete contact with each other.
Step 4: Hammering the Weld
Once your pieces are aligned, it’s time to forge the weld. With a swift, confident motion, begin hammering the aligned parts where they meet. The goal here is to create a partial weld, or ‘tack’, which holds the pieces together as they cool. Remember, the hammering should be forceful but controlled – excessive force can cause the metal to split.
Step 5: Reheating and Hammering
After the initial tack weld is made, return the piece to the forge for reheating. Once it reaches the welding temperature again, remove it and continue your hammering, this time with less force. These lighter blows help to strengthen the weld without the risk of splitting the metal. The process of heating and hammering is repeated until you’re satisfied with the strength and appearance of your weld.

Step 6: Examination and Quality Control
After the final hammering round, examining your weld thoroughly is essential. Look for any signs of weakness, such as cracks or separations. If you spot anything, return the piece to the forge, reheat it to the welding temperature, and repeat the hammering process.
Doing this will ensure your forge weld is strong, durable, and of the highest possible quality. Once satisfied with the weld, allow the metal to cool naturally. Forced cooling can weaken the weld and lead to cracks, so patience is critical at this stage.
Step 7: Finishing the Weld
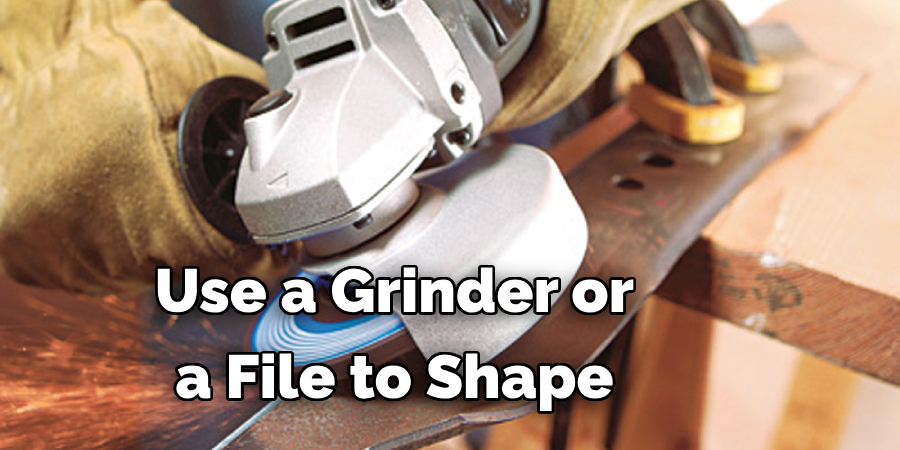
Once your weld is cooled and solidified, it’s time to finish and polish your work. Use a wire brush to remove any scale or residue from the weld. You can also use a grinder or a file to shape and smooth the weld area, ensuring it’s flush with the rest of the piece.
Additionally, apply a coat of oil or wax to prevent rust and give your piece a polished, professional look. Remember, the finishing process can be just as crucial as the welding itself, giving your piece its final appearance and protective coating. It’s your chance to put the final touches on your work and really make it shine.
Step 8: Practice and Patience
Forge welding is an art that requires practice and patience. It is important to remember that the quality of your welds will improve over time as you gain experience and develop your technique. Don’t be discouraged if your first few welds don’t turn out as expected.
Use these experiences as learning opportunities, and don’t hesitate to experiment with different techniques and materials. With perseverance and dedication, you’ll soon master the art of forge welding and be able to create your stunning metal masterpieces.
Step 9: Clean Up
After completing your weld and finishing your piece, it’s time to clean up your workspace. A clean and organized forge is a safer and more efficient forge. Start by safely disposing of any leftover metal scraps or debris. Ensure your forge is properly shut down and cooled before cleaning. Finally, store all your tools and equipment in their designated spots.
Proper maintenance of your tools, including your forge, hammer, anvil, and tongs, will extend their life and ensure they’re always ready for your next project. Proper clean-up after each session is a good safety habit and a crucial part of being a responsible and respectful blacksmith. Remember, your workspace is a reflection of your approach to your craft.
By following these easy steps, you’ll soon become a master of forge welding and be able to create strong, durable, and beautiful welds for all your metalworking projects.
5 Things You Should Avoid
- Ignoring Safety Precautions: Forge welding involves working with high temperatures and potentially dangerous tools. Never bypass safety measures, including wearing protective clothing and using equipment correctly.
- Improper Heat Management: Not getting the metal to the correct temperature could result in a failed weld. Avoid rushing the heating process and ensure the metal is heated evenly.
- Mismatching Metals: All metals do not forge weld at the same temperature. Pair metals carefully to avoid creating weak joints or damaging the metals.
- Neglecting Cleanliness: An unclean working environment or dirty metal surfaces can lead to poor-quality welds. Always ensure your work area and materials are clean.
- Overworking The Metal: Overworking the metal during hammering can weaken your weld. Be patient and work the metal gently to get the best result.
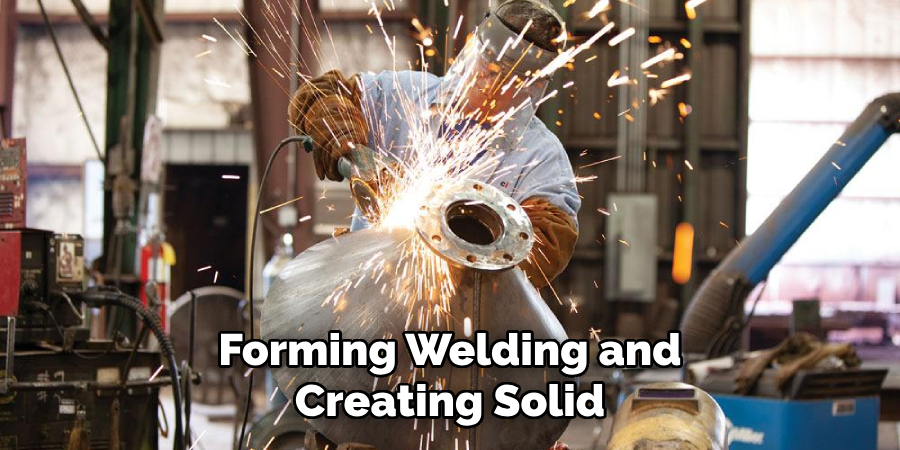
By avoiding these common mistakes, you can increase your chances of successfully forming welding and creating solid and durable connections between metals.
Is Welding Stronger Than Forging?
While welding and forging involve joining metals together, they differ in how the connection is made. Welding involves melting and fusing two pieces of metal, while forging uses heat and pressure to shape and bond the metals. As a result, a weld’s strength depends on the weld’s quality, while a forge-welded joint’s strength depends on the metals’ strength.
However, forge welding can create powerful connections between metals when done correctly. The bond is formed at a molecular level, making it more durable and resistant to breaking under stress. This makes forge welding ideal for creating high-stress components such as tools or machinery parts.
Conclusion
The process of forge welding is a unique art form, requiring skill and dedication to get it right. With practice, suitable materials, and a reliable forge-welding setup, it’s possible to become proficient in this process, ultimately leading to some influential projects.
If you’re interested in taking on forge welding, it’s best to go slowly, practice often, and take notes so you can track your progress as you go. Doing so will help ensure that every weld turns out perfectly. With time and effort, you can confidently forge and weld whatever your imagination dreams!
Hopefully, the article on how to forge weld has given you the information needed to begin your journey in this exciting and rewarding welding process. Remember always to prioritize safety, manage heat correctly, pair metals carefully, maintain cleanliness, and work the metal gently for optimal results. Happy forging!
Edmund Sumlin is a skilled author for Metal Fixes, bringing 6 years of expertise in crafting a wide range of metal fixtures. With a strong background in metalwork, Edmund’s knowledge spans various types of fixtures, from decorative pieces to functional hardware, blending precision with creativity. His passion for metalworking and design has made him a trusted resource in the industry.
Professional Focus:
- Expert in Metal Fixtures : Edmund aesthetic specializes in creating durable and innovative metal fixtures, offering both appeal and functionality. His work reflects a deep understanding of metalworking techniques and materials.
- Sustainability Advocate : He is dedicated to using sustainable practices, ensuring that every fixture is crafted with eco-friendly methods while maintaining high-quality standards.
In his writing for Metal Fixes, Edmund provides valuable insights into the latest trends, techniques, and practical advice for those passionate about metal fixtures, whether they are professionals or DIY enthusiasts. His focus on combining artistry with engineering helps others discover the true potential of metal in design.