

When it comes to maintaining the sleek look of your stainless steel fridge, dealing with scratches can be a source of frustration. Stainless steel appliances are prized for their modern aesthetic and durability, but they aren’t impervious to the wear and tear of daily use.
Whether caused by a refrigerator magnet, scuffs from cleaning, or just the rigors of a bustling kitchen, scratches can detract from the appliance’s overall appeal. Thankfully, with the right tools and techniques, many of these blemishes can be addressed, restoring your fridge to its original luster.
In this guide on how to get scratches off of stainless steel fridge, we will explore effective methods for removing scratches from stainless steel surfaces, ensuring that your fridge continues to be both functional and visually appealing.

Why Do Stainless Steel Fridges Scratch?
Stainless steel fridges are designed to offer a blend of style and practicality, but their sleek surfaces can be prone to scratches for several reasons. The material itself, despite its name, is not completely resistant to damage. Everyday activities such as moving items in and out of the fridge, cleaning with abrasive pads or harsh chemicals, and the placement of magnets or decorative items can lead to unsightly marks.
Moreover, particulates like dust or dirt can act like sandpaper against the steel when rubbed during cleaning. Understanding the factors that contribute to scratches can help in taking preventive measures to maintain the fridge’s polished appearance over time.
Needed Materials
Stainless Steel Cleaner or Mild Detergent
To get scratches off of your stainless steel fridge, you’ll need to clean the surface thoroughly. Using a mild detergent or specially formulated stainless steel cleaner can help remove any buildup or grime that may be covering up smaller scratches.
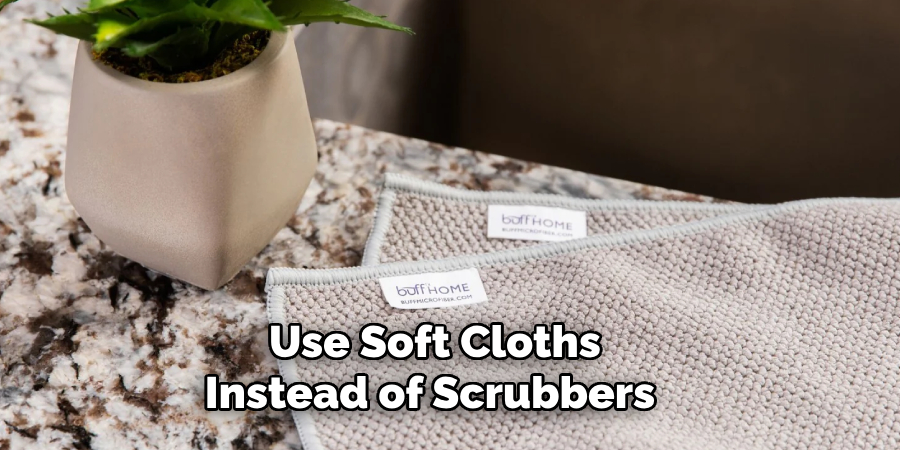
Soft Cloths
Avoid using harsh scrubbers or rough cloths on the stainless steel surface as they can cause further damage. Instead, use soft microfiber cloths or cotton balls for cleaning and buffing out scratches.
Non-Abrasive Polish
If the scratch is deeper, using a non-abrasive polish specifically designed for stainless steel can help fill in and minimize its appearance.
Sandpaper/Padding Compound
For more severe scratches, sandpaper with a high grit level or padding compound can be used to carefully sand down the surface and blend in the scratch. This method should only be used on deep, noticeable scratches as it may cause further damage if not done correctly.

8 Step-by-step Guidelines on How to Get Scratches Off of Stainless Steel Fridge
Step 1: Prepare the Surface
Begin by ensuring that the surface of your stainless steel fridge is clean and clear of debris. Use a soft cloth dampened with a mixture of warm water and mild detergent to wipe down the area. This step is crucial as it removes any dirt, grease, or particles that could further scratch the surface during the repair process.
After cleaning, thoroughly dry the area with a separate soft cloth, making sure there is no remaining moisture that could interfere with subsequent steps.
Step 2: Identify the Scratch
Carefully examine the affected area to determine the depth and severity of the scratches. Some scratches may just be on the surface, while others might be deeper. Understanding the nature of the scratch will allow you to choose the most appropriate method for removal. Use good lighting and a magnifying glass if necessary to see the fine details of the scratches.
Knowing whether the marks are fine lines or deeper grooves will help you decide if a simple polish will suffice or if more intensive treatments like sanding are required. Make a note of all the scratches needing attention before moving to the repair steps.
Step 3: Apply Polish
For light scratches and scuffs, using a non-abrasive polish specifically designed for stainless steel can be effective. Using a soft cloth, apply the polish to the scratched area, following the manufacturer’s instructions.
Gently buff the surface in circular motions, working from one end of the scratch to the other. Continue until you see an improvement in the appearance of the scratch.
If necessary, repeat this step multiple times until the desired result is achieved.
Step 4: Sanding
For deeper scratches that cannot be removed with polish alone, sanding may be necessary. Begin by taping off the area surrounding the scratch to protect it from further damage.
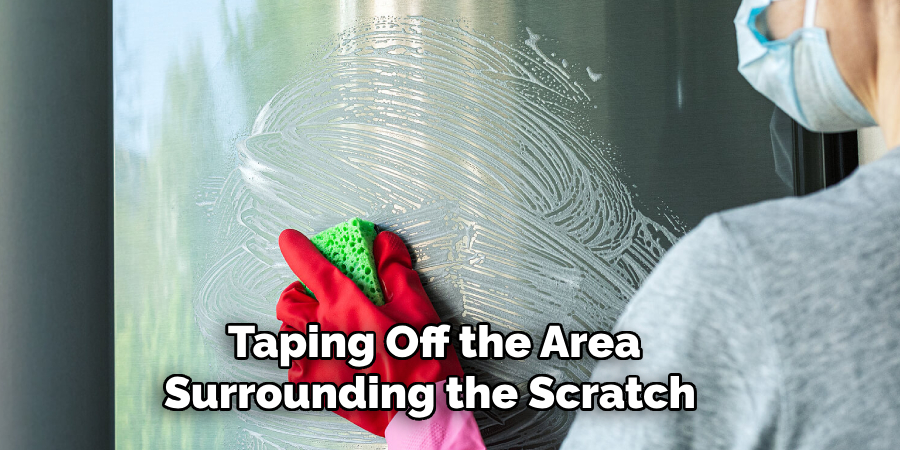
Using a high grit sandpaper, carefully sand the scratch in the direction of the grain. Make sure to keep the pressure even and avoid applying too much force, as this may cause more harm than good.
After some time, check the progress and continue until you see a noticeable improvement on the surface. Once satisfied with the results, clean away any residue from sanding with a soft cloth.
Step 5: Apply Padding Compound
For scratches that are still visible after sanding, a padding compound can be used to blend them into the rest of the surface. This method is useful for deeper scratches or those that have caused discoloration on stainless steel surfaces.
Following manufacturer instructions, apply a small amount of the compound to the scratch and use a soft cloth to buff it in. Continue until the scratch is no longer visible or has significantly improved in appearance.
Step 6: Rinse and Dry
Once you have completed the polishing, sanding, and application of the padding compound, it’s important to rinse the affected area to remove any residual compounds or debris. Use a soft cloth dampened with warm water to gently wipe down the surface where you’ve worked. This helps ensure that no abrasive materials are left behind, which could scratch the surface again.
After thoroughly rinsing, take a separate soft cloth and gently dry the area, being sure to eliminate all traces of moisture. This final drying step is crucial to prevent water spots and maintain the restored sheen of your stainless steel fridge.
Step 7: Check the Results
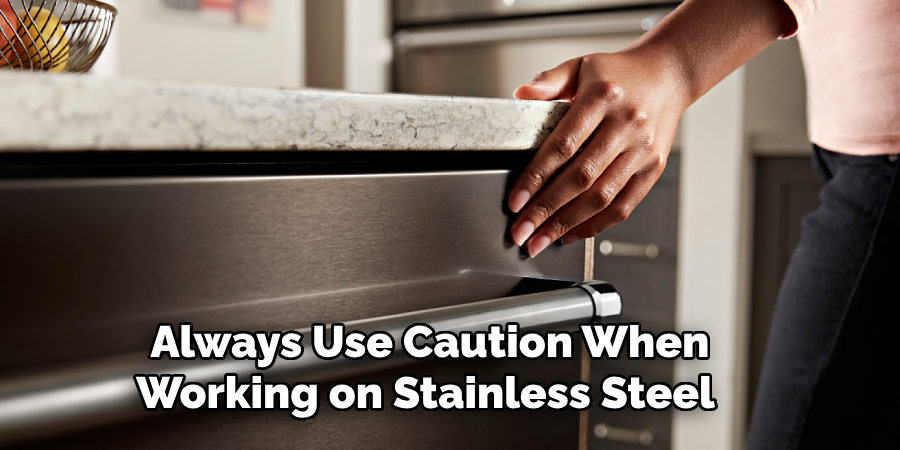
After completing all steps, it’s essential to check the results and assess if further touch-ups are needed. If you’re satisfied with the appearance of your fridge, move on to step eight.
If not, repeat any of the previous steps as necessary until you achieve your desired outcome. Remember to always use caution when working on stainless steel surfaces, and avoid using abrasive tools or harsh chemicals that can cause damage.
Step 8: Final Touch-Ups
To maintain a polished look for your stainless steel fridge, there are some precautions you should take after repairing scratches. Avoid using abrasive cleaners or scrubbers and opt for soft cloths instead. Regularly clean and dry the surface to prevent buildup or damage.
Following these steps on how to get scratches off of stainless steel fridge and caring for your stainless steel fridge properly can help keep it looking like new for years to come. Don’t let scratches ruin the appearance of your appliance, use these guidelines to restore its shine and maintain its sleek look.
Frequently Asked Questions
Q1: Can I Use Regular Polish or Cleaner on My Stainless Steel Fridge to Remove Scratches?
A1: It’s best to use a non-abrasive polish specifically designed for stainless steel to avoid further damage. Regular cleaners or harsh chemicals may be too abrasive and can cause more harm than good.
Q2: Can I Use Sandpaper to Remove Scratches on My Stainless Steel Fridge?
A2: Yes, sanding may be necessary for deeper scratches. However, make sure to use high grit sandpaper and apply gentle pressure in the direction of the grain to avoid causing more damage.
Q3: Are There Any DIY Methods I Can Use to Remove Scratches from My Stainless Steel Fridge?
A3: Yes, there are a few DIY methods you can try, such as using baking soda or toothpaste as a mild abrasive cleaner. However, these methods may not work for deeper scratches, and caution is advised when using them on stainless steel surfaces. It’s best to use products specifically designed for stainless steel or consult a professional for more severe scratches.
Q4: How Can I Prevent Scratches on My Stainless Steel Fridge?
A4: To prevent scratches, avoid using abrasive tools or harsh chemicals when cleaning and always follow the grain of the stainless steel when wiping down the surface. Use soft cloths instead of scrubbers and be cautious when placing items on top of your fridge to avoid accidental scratches.
Conclusion
Removing scratches from a stainless steel fridge can seem daunting at first, but with the right tools and techniques, it’s manageable for anyone willing to invest a bit of time and care. By following the outlined steps on how to get scratches off of a stainless steel fridge, you can effectively minimize or eliminate scratches, restoring your fridge to its original sleek appearance.
Regular maintenance and gentle cleaning methods will further protect your appliance, ensuring its longevity and continued aesthetic appeal. Embrace these methods to keep your kitchen looking pristine and enjoy the satisfaction of having a beautiful, scratch-free stainless steel fridge.
Edmund Sumlin is a skilled author for Metal Fixes, bringing 6 years of expertise in crafting a wide range of metal fixtures. With a strong background in metalwork, Edmund’s knowledge spans various types of fixtures, from decorative pieces to functional hardware, blending precision with creativity. His passion for metalworking and design has made him a trusted resource in the industry.
Professional Focus:
- Expert in Metal Fixtures : Edmund aesthetic specializes in creating durable and innovative metal fixtures, offering both appeal and functionality. His work reflects a deep understanding of metalworking techniques and materials.
- Sustainability Advocate : He is dedicated to using sustainable practices, ensuring that every fixture is crafted with eco-friendly methods while maintaining high-quality standards.
In his writing for Metal Fixes, Edmund provides valuable insights into the latest trends, techniques, and practical advice for those passionate about metal fixtures, whether they are professionals or DIY enthusiasts. His focus on combining artistry with engineering helps others discover the true potential of metal in design.