

Welding is hot, dirty, and challenging work – but also deeply rewarding. As a novice welder just getting started with TIG welding, holding that torch steady and maintaining a steady arc can feel nearly impossible. But with focus, practice, and learning from more experienced welders, you too can learn the delicate dance between torch and tungsten.
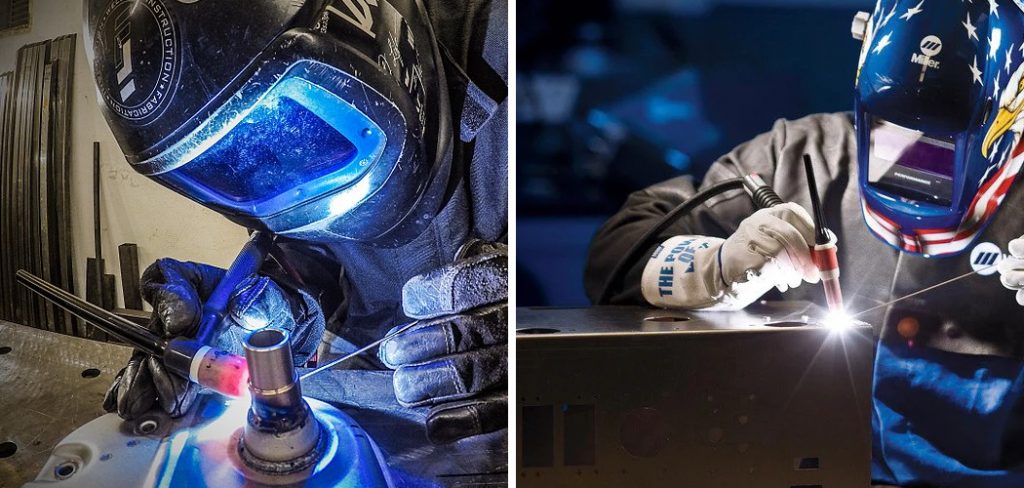
In this guide on how to hold a tig torch, I’ll share with you the insights and techniques that helped me progress from a shaky beginner frustrated by misfires to making my first successful welds. From torch grip fundamentals to positioning tricks, by the end, you’ll be ready to confidently pick up that torch again with new understanding and skills.
So grab your helmet, gloves and torch – it’s time to fire up the welder and start forging those electric-hot connections between metals. Your steady hand awaits the challenge!
Why is Holding the TIG Torch Properly Important?
Before we dive into the hows and whats of holding a TIG torch, it’s important to understand why proper grip and positioning are so critical. First and foremost, a steady hand helps maintain an even arc length between your tungsten electrode and workpiece. This constant distance is crucial for creating consistent weld beads with minimal splatter.
In addition, proper torch positioning ensures maximum visibility of the arc and weld pool. This allows for better control and precision when adding filler metal and manipulating the puddle during welding. Finally, holding a TIG torch correctly helps reduce hand fatigue, allowing you to weld longer without compromising your technique or accuracy.
Needed Equipment
Given the specialized nature of TIG welding, we’ll assume that you have a basic understanding of the process and equipment. At a minimum, you’ll need:
- A Working Welder With Tig Capabilities
- Suitable Tungsten Electrodes (Usually 2% Thoriated or Lanthanated Are Best for Beginners)
- Filler Rod Matching Your Welding Metal Type
- Argon Gas for Shielding
- Standard Ppe, Welding Helmet, Gloves, and Apron
Of course, there are many other factors involved in successful TIG welding, but for the sake of this guide, we’ll focus on how to hold the torch itself – which is one of the most critical elements!
11 Step-by-step Guidelines on How to Hold a Tig Torch
Step 1: Start With a Clean Torch
Before beginning, make sure your torch is clean of debris, dust and moisture. You’ll want to check your torch regularly throughout the welding process to ensure it’s free of obstructions which could lead to bad welds and frustration.

The most important parts to keep clean are the collet and collet body, where your tungsten electrode is held in place. Use a small wire brush for this purpose.
Step 2: Torch Orientation
The torch should be oriented so that it points at the workpiece a little ahead of the welding electrode. This helps to create a gas cup or “envelope” around the weld pool. Remember, TIG welding is all about precision and control.
The torch should be held at a 90-degree angle, and your arm should not rest on the table or work surface. This allows for more control over the direction of your weld.
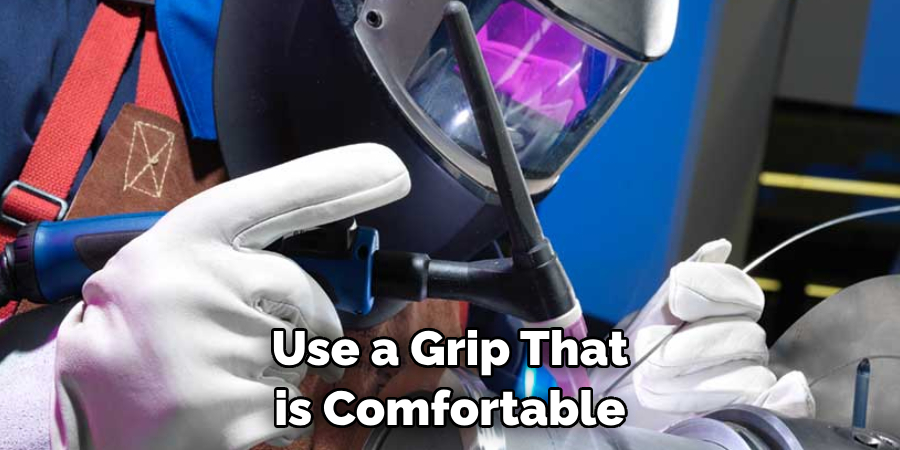
Step 3: Torch Grip
When holding the torch, you’ll want to use a grip that is comfortable and also gives you good control. Most people prefer an “overhand” grip, where they hold the torch barrel with their palm facing down.
The other fingers wrap around the handle to provide stability. It’s important to keep your wrist straight and not allow it to bend up or down. This allows you to easily control the angle of the torch relative to the workpiece.
Step 4: Trigger Control
The trigger on a TIG torch controls both gas flow and weld current. You’ll need to get comfortable with using this trigger, as it is key in maintaining a steady arc. Practice pressing and releasing it to get a feel for the timing and level of pressure needed. You’ll also want to make sure you keep the trigger pressed consistently throughout the welding process.
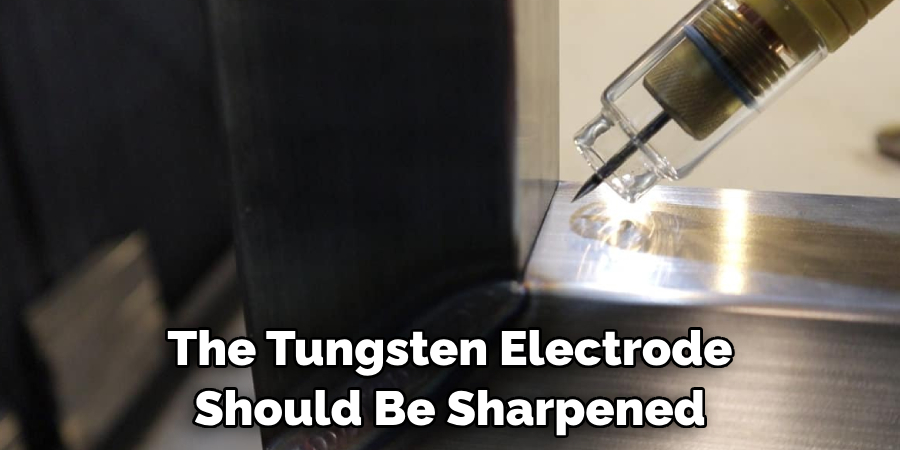
Step 5: Choosing the Right Tungsten Electrode
For beginners, we recommend using 2% thoriated or lanthanated tungsten electrodes. These are more forgiving than pure tungsten, which can be difficult to use for inexperienced welders. Remember, the tungsten electrode should be sharpened to a point before each use. The tip should also be kept clean, as contamination can cause issues with weld quality.
Step 6: Inserting the Tungsten Electrode
Insert the tungsten electrode into the collet and tighten it using a small wrench. Make sure to leave about 1/8 inch of tungsten sticking out past the end of the torch, as this is where your arc will form. But don’t make it too long, as this can lead to arc wandering and difficulty maintaining a steady arc. It may take some trial and error to find the perfect length for your welding style.
Step 7: Shielding Gas Flow
Before starting your weld, make sure the flow of argon gas is set to about 15-20 cubic feet per hour. This creates a protective environment around your weld pool, preventing oxidation and contamination. Remember to keep an eye on this throughout the welding process and adjust as needed.
Step 8: Tungsten to Work Distance
The distance between your tungsten electrode and the workpiece is crucial for a successful weld. Generally, this distance should be about 1/8 inch or less. If it’s too far, you may experience difficulty maintaining an arc or creating a stable puddle. But if it’s too close, you risk damaging the tungsten electrode or causing contamination.
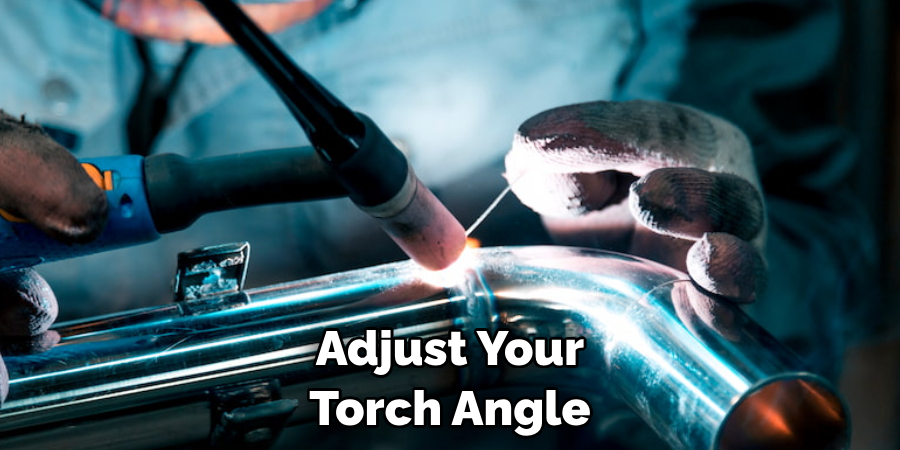
Step 9: Torch Angle
Holding the torch at a 90-degree angle from the workpiece is recommended, but you may need to adjust this slightly depending on your welding position and personal preference. Just remember to maintain consistency throughout each weld for the best results. But don’t be afraid to experiment and find what works best for you.
Step 10: Maintaining a Steady Arc
As you begin to weld, make sure to maintain a steady arc between the tungsten electrode and the workpiece. This is where trigger control comes into play, as you’ll need to press and release in a smooth motion to keep the arc stable.
You may also need to adjust your torch angle and tungsten-to-work distance as you move along your weld. The key is to keep the arc consistent for a clean, strong weld.
Step 11: Practice Makes Perfect
As with any skill, practice makes perfect. Don’t be discouraged if your first few welds don’t turn out as expected. Take the time to adjust and learn from your mistakes, and soon you’ll be holding that torch with ease and creating beautiful TIG welds. Keep practicing different techniques and positions to improve your skills even further.
Following these guidelines on how to hold a TIG torch will set you up for success in your welding journey. Remember that precision and control are key, and don’t be afraid to experiment and find what works best for you. With practice and patience, you’ll become a pro at holding a TIG torch in no time! Happy welding!
Frequently Asked Questions
Q: What is the Best Grip for Holding a Tig Torch?
A: Most people prefer an “overhand” grip, where they hold the torch barrel with their palm facing down. The other fingers wrap around the handle to provide stability. You’ll want to use a grip that is comfortable and also gives you good control.
Q: What is the Ideal Tungsten Electrode for Beginners?
A: For beginners, we recommend using 2% thoriated or lanthanated tungsten electrodes. These are more forgiving than pure tungsten, which can be difficult to use for inexperienced welders. Remember to sharpen the electrode to a point before each use and keep the tip clean.
Q: How Far Should I Hold the Torch from the Workpiece?
A: The distance between your tungsten electrode and the workpiece should be about 1/8 inch or less. If it’s too far, you may experience difficulty maintaining an arc or creating a stable puddle. But if it’s too close, you risk damaging the tungsten electrode or causing contamination.
Q: How Can I Maintain a Steady Arc?
A: Maintaining a steady arc between the tungsten electrode and the workpiece is crucial for a successful weld. This requires good trigger control, consistent torch angle, and proper tungsten-to-work distance. With practice and patience, you’ll be able to maintain a stable arc throughout your welds.
So, these are the frequently asked questions related to holding a TIG torch that will help you in becoming an expert at it. Practice and patience are key, so keep practicing and experimenting with different techniques to improve your skills! Happy welding!
Conclusion
In conclusion, learning how to hold a TIG torch may seem like a daunting task at first, but with practice and attention to detail, anyone can master it. By understanding the key elements of proper grip, body positioning, and movement control, you can improve your welding technique and produce high-quality welds.
Remember that safety should always be the top priority when handling a TIG torch, so make sure to wear all necessary protective gear and follow proper safety protocols. Additionally, don’t be afraid to experiment with different torch angles and techniques to find what works best for you.
With patience and determination, holding a TIG torch will become second nature and you’ll be able to tackle even the most challenging welding projects with ease. So go out there, grab that torch with confidence, and let your skills shine bright! Keep practicing and refining your technique because, in the world of welding, there is always room for improvement. Thank you for reading this guide and we wish you all the best in your wedding journey!
Edmund Sumlin is a skilled author for Metal Fixes, bringing 6 years of expertise in crafting a wide range of metal fixtures. With a strong background in metalwork, Edmund’s knowledge spans various types of fixtures, from decorative pieces to functional hardware, blending precision with creativity. His passion for metalworking and design has made him a trusted resource in the industry.
Professional Focus:
- Expert in Metal Fixtures : Edmund aesthetic specializes in creating durable and innovative metal fixtures, offering both appeal and functionality. His work reflects a deep understanding of metalworking techniques and materials.
- Sustainability Advocate : He is dedicated to using sustainable practices, ensuring that every fixture is crafted with eco-friendly methods while maintaining high-quality standards.
In his writing for Metal Fixes, Edmund provides valuable insights into the latest trends, techniques, and practical advice for those passionate about metal fixtures, whether they are professionals or DIY enthusiasts. His focus on combining artistry with engineering helps others discover the true potential of metal in design.