

Installing a metal shower can be an excellent way to enhance the functionality and aesthetics of your bathroom. Whether you’re upgrading an existing shower or embarking on a new installation project, following the correct procedures ensures a successful outcome.

This guide on how to install metal shower will provide you with step-by-step instructions to help you install a metal shower with confidence and precision, making the process straightforward and manageable for both experienced DIY enthusiasts and beginners alike. With the right tools and preparation, you can create a stylish and durable shower space that adds value to your home.
Why Choose a Metal Shower?
Before we dive into the installation process, let’s first understand why a metal shower may be the right choice for your bathroom. Metal showers offer several advantages over traditional materials like tile or acrylic. Here are some reasons why you might want to consider installing a metal shower:
Durability:
Metal is known for its strength and resilience, making it an excellent option for long-term use in high-traffic areas like the bathroom. It can withstand daily wear and tear, making it a durable choice for your shower.
Easy to Clean:
Metal showers are easy to clean and maintain compared to other materials. With a simple wipe-down using mild soap and water, you can keep your metal shower looking shiny and new for years to come.
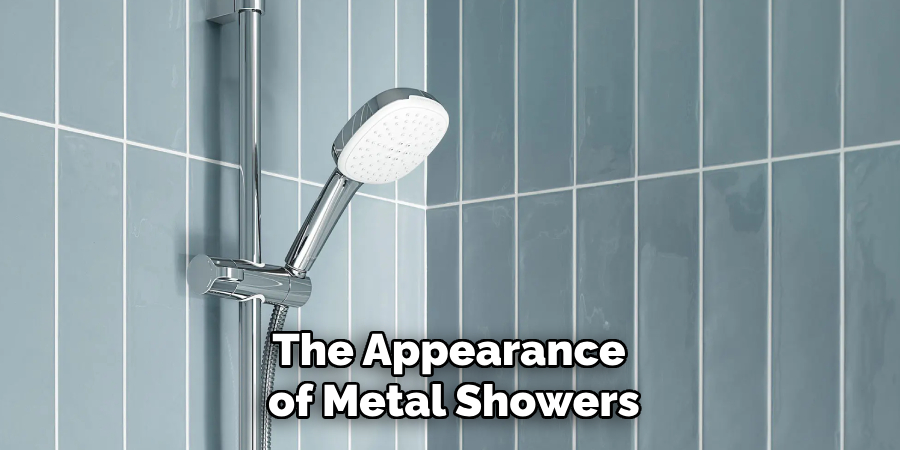
Versatility:
Metal showers offer endless design possibilities, giving you the freedom to create a unique look for your bathroom. You can choose from various finishes, including brushed or polished metals, to fit your desired style.
Materials Needed
To install a metal shower successfully, you will need the following materials:
Metal Shower Panels:
You can purchase metal shower panels in a variety of sizes, shapes, and finishes, depending on your specific requirements.
Shower Base:
The shower base serves as the foundation for your metal shower and is typically made of acrylic or stone material.
Adhesive:
Choose a waterproof adhesive suitable for attaching the metal panels to the wall. It’s essential to select an adhesive that is specifically designed for use in wet areas.
Screws:
Use screws to secure the metal panels onto the walls and base. Make sure to choose screws that are compatible with your chosen metal finish to avoid any corrosion or damage.
Caulk:
Seal all joints between the metal panels and surrounding surfaces using caulk to prevent water from seeping behind the panels.
Tools:
You will need a few tools to complete the installation process, including a drill, level, measuring tape, and a caulking gun.

8 Step-by-step Guidelines on How to Install Metal Shower
Step 1: Plan the Layout
Before beginning the installation process, it’s crucial to plan the layout of your metal shower. Start by measuring the dimensions of your shower space to ensure the metal panels and shower base will fit correctly. Consider the location of plumbing fixtures, such as the showerhead and controls, to ensure they align with the pre-cut openings in the metal panels.
Sketch a rough layout of your desired shower design, paying attention to the orientation of the panels and the configuration that best suits your bathroom’s layout. This planning stage will help identify any potential issues early, allowing for adjustments before the installation begins. Proper layout planning maximizes efficiency and helps to ensure a smooth installation process.
Step 2: Prepare the Shower Area
Before installing the metal panels, make sure your shower area is clean and free of any debris. Remove any old caulk or adhesive from the walls and base where the metal panels will be installed. Use a degreasing cleaner to remove any soap scum or residue that may prevent proper adhesion.
You may also need to make any necessary repairs to the walls or base, such as filling in holes or cracks, before proceeding with the installation. The surface must be smooth and even for the metal panels to adhere correctly.
Step 3: Install the Shower Base
Begin installing the shower base by positioning it within the prepared shower area. Make sure that the base is level; use a spirit level to confirm that all sides are even. If adjustments are needed, shims can be utilized to ensure the base is perfectly horizontal. Once the base is level, follow the manufacturer’s instructions to secure it. This typically involves attaching the base to the subfloor using screws or adhesives designed for use in bathrooms.
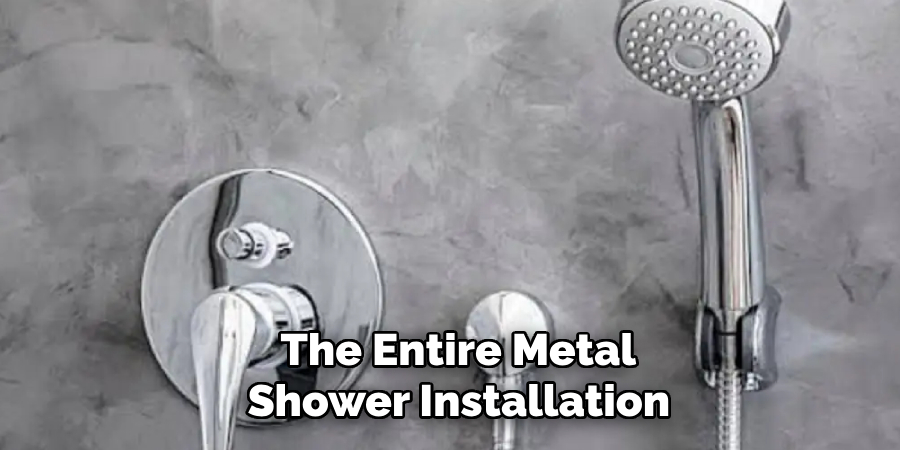
Ensure that any plumbing connections, such as the drain, are properly aligned and tightly sealed to prevent leaks. Double-check the alignment and stability of the base before proceeding to the next step. A correctly installed shower base is essential for the stability and function of the entire metal shower installation.
Step 4: Cut the Metal Shower Panels
Before attaching the metal shower panels, you may need to cut them to fit your specific shower dimensions. Measure and mark the panels using a pencil or marker before cutting them with a saw or shears. It’s essential to follow the manufacturer’s instructions for cutting to ensure proper sizing and prevent damage to the panels.
You may also need to cut holes or notches in the panels for plumbing fixtures, such as showerheads and controls. Make precise measurements and use a drill or hole saw to create these openings.
Step 5: Apply Adhesive to the Back of Metal Panels
Once your metal panels are correctly sized, you can begin attaching them to the walls using adhesive. Apply a generous amount of waterproof adhesive to the back of each panel before pressing it firmly onto the wall surface. Use a level to ensure that each panel is straight and properly aligned with any adjacent panels.
Be mindful of any pre-cut openings for plumbing fixtures, ensuring they line up accurately with the corresponding fixtures on the wall. Continue this process until all panels are securely attached to the walls.
Step 6: Secure Panels with Screws
For added stability and durability, you can also secure the metal panels to the walls using screws. Use a drill to create pilot holes in each panel before driving screws through them and into the wall studs behind. Make sure to use screws that are compatible with your chosen metal finish to prevent any damage or corrosion.
It’s generally recommended to use screws in addition to adhesive for extra support, especially if your shower is large or has an irregular shape.
Step 7: Seal Joints with Caulk
To prevent water from seeping behind the metal panels and causing damage, seal all joints between the panels and surrounding surfaces using caulk. Use a caulking gun to apply a thin bead of caulk along each seam before smoothing it out with a wet finger or caulk tool.
Be sure to also seal any openings around plumbing fixtures to ensure a watertight seal. Allow the caulk to dry completely before using the shower.
Step 8: Finishing Touches
Once all panels are securely attached and joints are sealed, you can add any finishing touches to your metal shower. Consider adding a border or trim to the edges of the panels for a polished look. You can also install shelves or hooks onto the walls if desired.
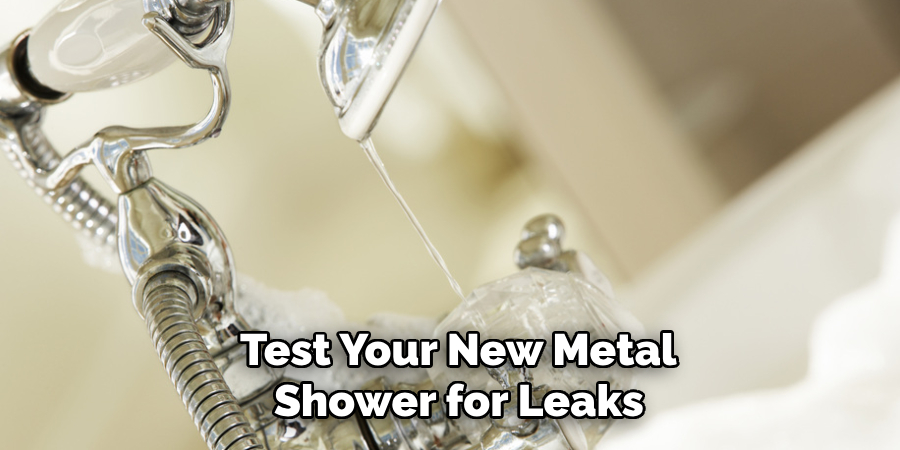
Finally, test your new metal shower for leaks and make any necessary adjustments before using it regularly. With proper installation and maintenance, your metal shower will provide a durable and stylish addition to your bathroom for years to come.
Tips
- Always follow the manufacturer’s instructions when installing metal shower panels.
- Use waterproof adhesive and caulk designed for bathroom use.
- Check that all plumbing fixtures are properly aligned and tightly sealed before using the shower.
- Regularly clean your metal shower to maintain its appearance and prevent damage. Overall, installing a metal shower can be a straightforward process if you plan carefully and follow these step-by-step guidelines on how to install metal shower. With the right tools, materials, and techniques, you can transform your outdated bathroom into a modern oasis with a sleek and durable metal shower. Happy installation!
Frequently Asked Questions
Q: Can I Install Metal Shower Panels Over Existing Tiles?
A: Yes, as long as the surface is clean and even. You may need to use additional adhesive or screws for added support.
Q: How Do I Cut Metal Shower Panels?
A: Measure and mark the panels before using a saw or shears to cut them. Follow the manufacturer’s instructions for cutting to prevent damage.
Q: Can I Install Metal Shower Panels Myself, or Should I Hire a Professional?
A: It is possible to install metal shower panels yourself as long as you have the necessary tools and skills. However, if you are unsure or uncomfortable with the process, it may be best to hire a professional for optimal results.
Q: What Type of Maintenance Is Required for Metal Showers?
A: Regular cleaning with non-abrasive cleaners is recommended for maintaining the appearance of metal showers. It is also important to check for any damage or leaks regularly and address them promptly.
Conclusion
In conclusion, installing a metal shower requires careful planning, precise execution, and attention to detail. By following the step-by-step guidelines on how to install metal shower outlined in this document, you can ensure a successful installation that not only enhances the aesthetic of your bathroom but also delivers long-lasting durability. From preparing the area to making the final adjustments, each stage plays a crucial role in the overall outcome.
Remember to regularly maintain and clean your metal shower to preserve its sleek finish, and make any quick repairs to avoid potential issues. With these measures in place, your new metal shower will undoubtedly serve as a centerpiece in your bathroom, providing both functionality and a touch of modern elegance for years to come.
Edmund Sumlin is a skilled author for Metal Fixes, bringing 6 years of expertise in crafting a wide range of metal fixtures. With a strong background in metalwork, Edmund’s knowledge spans various types of fixtures, from decorative pieces to functional hardware, blending precision with creativity. His passion for metalworking and design has made him a trusted resource in the industry.
Professional Focus:
- Expert in Metal Fixtures : Edmund aesthetic specializes in creating durable and innovative metal fixtures, offering both appeal and functionality. His work reflects a deep understanding of metalworking techniques and materials.
- Sustainability Advocate : He is dedicated to using sustainable practices, ensuring that every fixture is crafted with eco-friendly methods while maintaining high-quality standards.
In his writing for Metal Fixes, Edmund provides valuable insights into the latest trends, techniques, and practical advice for those passionate about metal fixtures, whether they are professionals or DIY enthusiasts. His focus on combining artistry with engineering helps others discover the true potential of metal in design.