

Painting a metal lamp stand can be a rewarding DIY project that transforms an ordinary item into a striking piece of decor. Whether you’re looking to refresh an old lamp stand or coordinate with a new color scheme, painting is an effective way to achieve a polished and personalized finish.

This guide will walk you through how to paint a metal lamp stand, from preparing the surface to applying the paint, ensuring that your lamp stand turns out both durable and beautiful. With a little time and effort, you can create a standout feature that enhances any room in your home.
Why Paint a Metal Lamp Stand?
Painting a metal lamp stand is not only about aesthetics but also about maintenance and protection. By painting the lamp stand, you can prevent rust and corrosion, which are common issues for metal objects, especially those exposed to moisture or varying temperatures. A fresh coat of paint can also revitalize a vintage or worn-out lamp stand, making it look new again.
Additionally, customizing a lamp stand by choosing the right color and finish allows you to seamlessly integrate the piece into your existing decor, reflecting your personal style and preferences. Whether you’re opting for a bold accent or a subtle elegance, painting offers endless possibilities to enhance and preserve your lamp stand.
Tools and Materials Needed
Before you begin the process of painting your metal lamp stand, it’s essential to gather all the necessary tools and materials to ensure a smooth workflow. You’ll need:
- Sandpaper or a Wire Brush: These are crucial for scuffing the surface of the metal lamp stand to help the paint adhere better.
- Primer: Choose a primer specifically designed for metal surfaces to prevent rust and create a smooth base for your paint.
- Paint: Select a durable spray paint or acrylic paint that suits your color preference and provides the finish you desire.
- Paintbrushes or Paint Rollers: Depending on the type of paint, brushes or rollers will be needed for application, especially for intricate details or touch-ups.
- Drop Cloths or Newspapers: Protect your workspace from paint splatters and spills by covering the area with drop cloths or newspapers.
- Painter’s Tape: Use this to protect any parts of the lamp stand you don’t want painted.
- Protective Gear: Safety glasses and gloves are recommended to protect your skin and eyes during sanding and painting.
- Clean Cloths and Detergent: For cleaning the lamp stand before painting to remove dust, grease, and other contaminants.
Having these tools and materials ready will make the painting process easier and more efficient, leading to a professional-looking final product.
Safety Precautions Before Starting
Prioritizing safety is crucial before diving into your painting project. Begin by setting up your workspace in a well-ventilated area to avoid inhaling fumes from the primer and paint. If possible, work outside or open windows and doors to ensure proper airflow. Wear protective gear such as gloves, safety glasses, and a mask to shield yourself from dust during the sanding process and chemical fumes during painting.
It’s also wise to wear old clothes or a protective apron to avoid staining your clothing. Keep a first aid kit nearby in case of any minor accidents. Lastly, be sure that the paint and primer you’re using are suitable for indoor or outdoor use, depending on where the lamp stand will be located once completed. By following these precautions, you can ensure a safe and successful painting experience.
10 Methods on How to Paint a Metal Lamp Stand
1. Start with a Thorough Cleaning
Paint adheres best to clean surfaces. Use warm soapy water to remove dust, grease, and grime from the lamp stand. For tough stains, try a degreaser or rubbing alcohol. Once clean, dry the stand thoroughly to avoid trapping moisture under the paint, which could lead to peeling or rust.
Pro Tip:
Use a cloth or a soft-bristled brush for hard-to-reach areas. Avoid skipping this step, as even invisible oils could impact the paint’s adhesion.
2. Remove Existing Paint or Rust
If your lamp stand already has an old coat of paint, you’ll need to strip it off. Use a paint stripper or a hand sander to remove the paint completely. For areas with rust, a wire brush or steel wool works wonders.
Pro Tip:
Wear protective gloves and work in a well-ventilated area when using chemicals or dealing with rust to ensure safety.
3. Sand the Surface for a Smooth Finish
Once you’ve removed the old paint or rust, sand the entire lamp stand to create a smooth surface. Use fine-grit sandpaper (120-150 grit) to remove imperfections and make the surface slightly rough, which helps the primer stick better.

Pro Tip:
Always sand in one direction for an even texture, and wipe away any dust after sanding.
4. Apply a High-Quality Primer
Metal requires a specific primer to prevent rust and improve paint adhesion. Choose a rust-preventive metal primer for the best results and apply it evenly. Allow the primer to dry fully before moving to the next step.
Pro Tip:
Use a spray primer for even and smooth coverage, especially for intricate lamp stand designs.
5. Choose the Right Type of Paint
Select paint that is specifically designed for metal surfaces, such as enamel or acrylic paints. These paints are durable and provide a glossy or matte finish, depending on your preference.
Examples:
Brands like Rust-Oleum and Krylon offer excellent metal paints in various finishes and colors.
6. Use Spray Paint for an Even Coat
Spray paint works wonders on metal surfaces, offering smooth and even coverage. Hold the can about 8-10 inches away from the lamp stand and move it side to side in a sweeping motion. Avoid lingering in one spot to prevent drips.
Pro Tip:
Apply light, multiple coats instead of one heavy coat to achieve a smooth, professional finish.
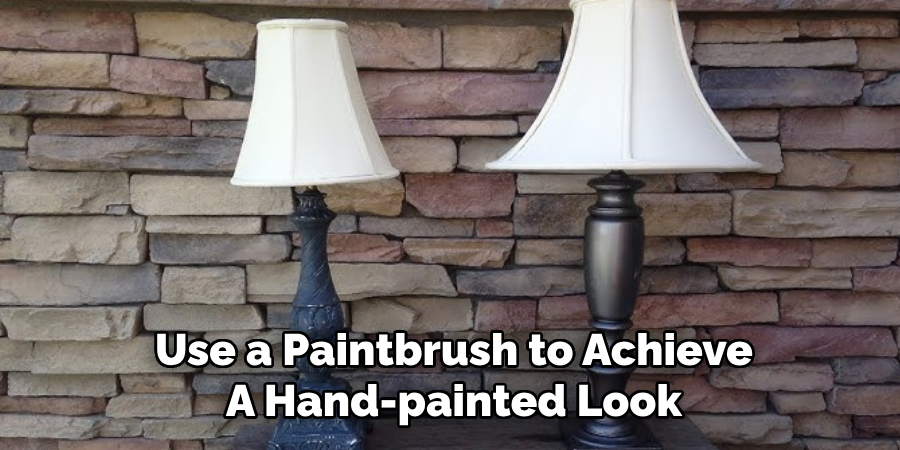
7. Get Creative with Paintbrush Techniques
If spray paint isn’t your style, use a paintbrush to achieve a hand-painted look. Opt for a high-quality brush that doesn’t shed bristles and apply thin coats to avoid streaks.
Pro Tip:
For a modern aesthetic, try color-blocking or stenciling designs on your lamp stand.
8. Seal the Paint with a Protective Topcoat
To ensure the longevity of your efforts, apply a clear protective topcoat designed for metallic surfaces. This not only protects the paint from scratches but also enhances its finish.
Pro Tip:
Choose a matte or glossy topcoat to match your desired aesthetic and repel dust effectively.
9. Allow Proper Drying and Curing Time
Don’t rush the drying process! Allow the lamp stand to dry for at least 24 hours. For maximum durability, leave it to cure for up to a week before heavy handling or attaching the lampshade.
Pro Tip:
Patience is key. Rushing this step can ruin your hard work by smudging or scratching the paint.
10. Accessorize and Style your Lamp Stand
Once painted and dried, accessorize your lamp stand to match your interior style. Add decorative elements such as metallic leaf accents, ribbons, or even decoupage patterns for a personalized touch.
Pro Tip:
Pair your revamped lamp stand with a chic lampshade that complements its new look.
Things to Consider When Choosing Paint Colors
Selecting the perfect paint colors for your metal lamp stand goes beyond aesthetic preference and involves considering the surrounding décor, intended room ambiance, and the lamp’s position in the room. Ensure that the color you choose complements existing furniture and wall colors to create a harmonious look.
Consider the lighting in the room; natural light can make colors appear different than they do under artificial lighting. Additionally, think about the style you wish to convey, whether it’s modern and minimalist or vintage and eclectic. Remember that darker colors can add drama and sophistication, while lighter shades can make spaces feel more open and airy.
Common Mistakes to Avoid
When painting a metal lamp stand, there are several pitfalls that can undermine your efforts. First, avoid skipping the cleaning and sanding process; a dirty or uneven surface can cause the paint to chip or peel. Additionally, resist the temptation to apply thick layers of paint or primer in the interest of saving time—this often leads to drips and an uneven finish.
It’s also crucial to use the right type of paint and primer for metal surfaces; using the wrong products might result in poor adhesion or lack of durability. Avoid working in poor lighting, as it can lead to missed spots or uneven coverage. Lastly, impatience with drying times can ruin all previous work, so always allow ample time for each layer to dry completely before proceeding.

Conclusion
Revamping a metal lamp stand with a fresh coat of paint is an excellent way to breathe new life into your home decor. By following the outlined steps meticulously, from preparation and priming to painting and finishing, you can achieve a professional and durable result.
The process not only offers a cost-effective makeover but also allows for creative expression, making your lamp stand uniquely yours. Remember, the key to success lies in patience and attention to detail, ensuring that each stage is executed with care. So, there you have it – a quick and easy guide on how to paint a metal lamp stand.
Edmund Sumlin is a skilled author for Metal Fixes, bringing 6 years of expertise in crafting a wide range of metal fixtures. With a strong background in metalwork, Edmund’s knowledge spans various types of fixtures, from decorative pieces to functional hardware, blending precision with creativity. His passion for metalworking and design has made him a trusted resource in the industry.
Professional Focus:
- Expert in Metal Fixtures : Edmund aesthetic specializes in creating durable and innovative metal fixtures, offering both appeal and functionality. His work reflects a deep understanding of metalworking techniques and materials.
- Sustainability Advocate : He is dedicated to using sustainable practices, ensuring that every fixture is crafted with eco-friendly methods while maintaining high-quality standards.
In his writing for Metal Fixes, Edmund provides valuable insights into the latest trends, techniques, and practical advice for those passionate about metal fixtures, whether they are professionals or DIY enthusiasts. His focus on combining artistry with engineering helps others discover the true potential of metal in design.