

Are you tired of looking at your unsightly steel fence? It may be time to spruce it up with a fresh coat of paint. How to paint a steel fence is not only a great way to improve its appearance, but it also helps protect the metal from rust and corrosion.
Painting a steel fence is a fantastic way to enhance its appearance, protect it from rust, and prolong its lifespan. Whether you’re looking to revitalize an old fence or add a fresh coat of paint to a new one, this guide will walk you through the step-by-step process of painting a steel fence.
With the right tools, techniques, and a little patience, you can transform your fence into a stunning feature that enhances the overall aesthetic of your outdoor space. So, let’s dive in and discover how to achieve a beautiful and durable finish for your steel fence.
What are the Benefits of Painting a Steel Fence?
- Enhances Appearance: A rusty and worn-out steel fence can be an eyesore on your property. By painting it, you can give it a fresh new look that adds to the overall aesthetic appeal of your outdoor space.
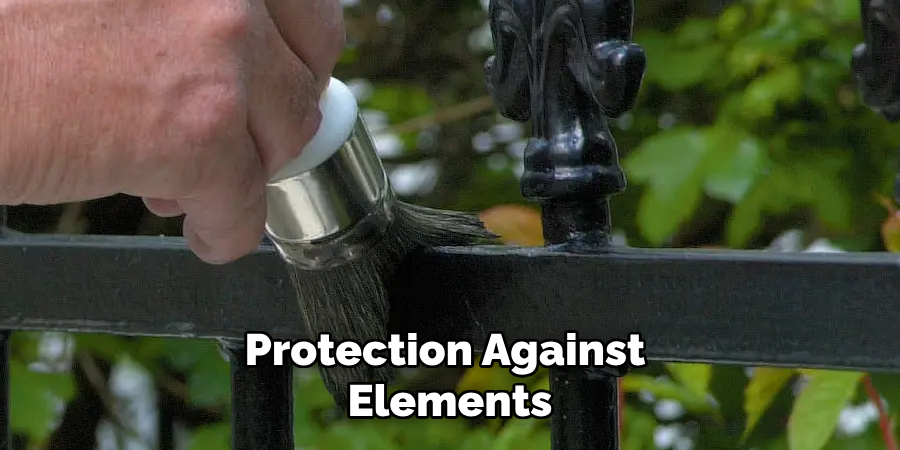
- Protects from Rust and Corrosion: Steel fences are prone to rust and corrosion, especially if constantly exposed to the elements. By painting it, you create a barrier that protects the metal from moisture and prevents rust and corrosion from forming.
- Prolong Lifespan: A well-maintained steel fence can last for decades, but its lifespan can be significantly reduced if not appropriately protected. Painting your fence helps prolong its life by preventing damage caused by rust and corrosion.
- Cost-effective: Painting your steel fence is more cost-effective than replacing it entirely. With regular maintenance, a painted steel fence can last many years without costly repairs or replacements.
- Customization: Painting your steel fence allows you to customize its color and finish according to your preferences, creating a unique look that complements your property’s style.
What Will You Need?
Before starting the painting process, gathering all the necessary tools and materials is essential. Here’s a list of items you’ll need:
- Steel fence paint (choose one that is specifically formulated for metal surfaces)
- Primer (if your fence has never been painted before)
- Paintbrush or roller
- Drop Cloth or plastic sheeting
- Painter’s tape
- Sandpaper (medium grit)
- Wire brush
- Hose or pressure washer
Once you have all your supplies ready, it’s time to get started!
10 Easy Steps on How to Paint a Steel Fence
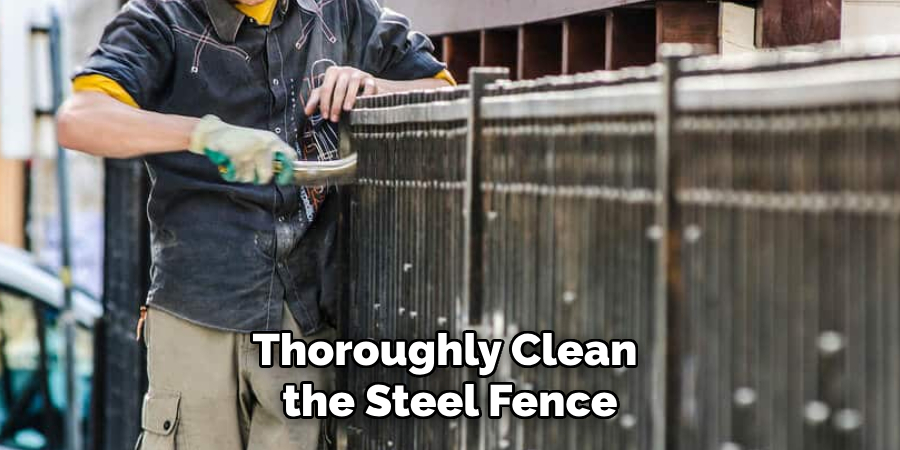
Step 1: Clean and Prepare the Fence
In this step, thoroughly clean the steel fence to remove dirt, debris, or loose paint. Begin using a hose or pressure washer to rinse the fence and ensure all surfaces are dust-free. For stubborn dirt or grime, use a mild detergent and a soft brush to scrub the wall. Rinse off the soap residue and allow the wall to dry completely. This step is crucial as it ensures proper paint adhesion and a smooth finish.
Step 2: Repair and Prepare Any Damaged Areas
Inspect the fence for any rust spots, dents, or areas with chipped paint. Use a wire brush and sandpaper to remove rust and loose paint from these areas. Smooth out any rough edges or surfaces, and if necessary, apply a rust converter or primer to prevent further corrosion. Follow the manufacturer’s instructions to repair dents or holes with a suitable filler. Once the repairs are complete, sand the patched areas to create a smooth and even surface.
Step 3: Protect Surrounding Areas
Before painting, protect the surrounding areas to avoid accidental paint splatters or stains. Lay down drop cloths or plastic sheeting on the ground and over nearby plants, furniture, or surfaces. Use painter’s tape to mask off areas you don’t want to paint, such as hinges, latches, or adjacent structures. This preparation step will save you from additional cleanup later and help ensure a neat and professional-looking result.
Step 4: Apply Primer (if needed)
Applying a primer is essential if your steel fence has never been painted before or has exposed areas with bare metal. A primer helps the paint adhere better to the surface and provides an extra protection against rust. Choose a primer specifically formulated for metal surfaces and apply it according to the manufacturer’s instructions. Allow the primer to dry completely before proceeding to the next step.
Step 5: Start Painting
Now it’s time to paint your steel fence. Stir the paint thoroughly to ensure an even consistency. Applying the paint evenly and smoothly using a paintbrush or roller, working in small sections at a time. Follow the natural lines of the fence, applying the paint with long, even strokes. Pay attention to any drips or runs and smooth them out immediately. Allow the first coat to dry as per the paint manufacturer’s instructions.
Step 6: Apply Additional Coats (if necessary)
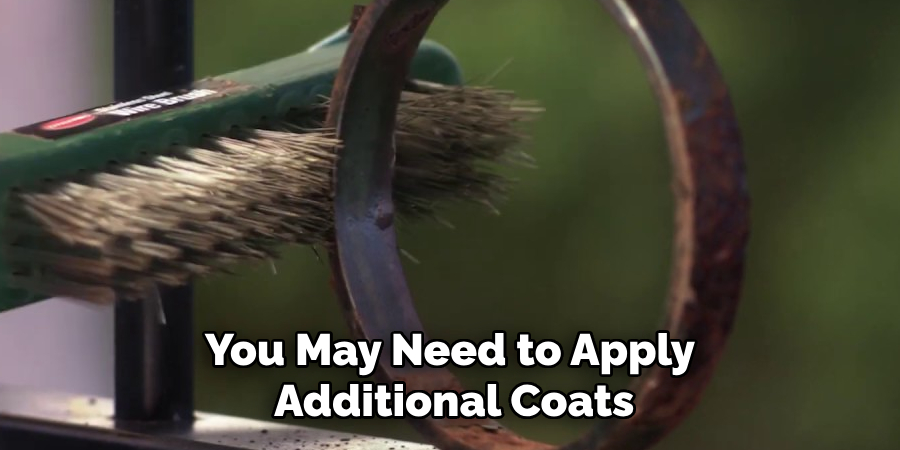
For a more durable and professional-looking finish, you may need to apply additional coats of paint. Once the first coat has dried completely, check for areas where the coverage may be uneven or the metal is still visible. If needed, apply a second coat, following the same technique as before—working in small sections and using long, even strokes. Allow each coat to dry thoroughly before applying the next for optimal results. Check the manufacturer’s recommendations for the ideal drying times between coats.
Step 7: Inspect for Missed Spots
Once the paint has dried thoroughly, carefully inspect the fence for missed spots, uneven coverage, or areas requiring touch-ups. Pay close attention to corners, edges, and intricate details, as these areas can sometimes be overlooked. If you notice any missed spots, use a small brush to apply paint and blend it seamlessly with the surrounding areas. Taking the time to ensure complete coverage will result in a polished and professional finish.
Step 8: Allow the Paint to Cure
After completing the final coat of paint and addressing any touch-ups, it’s essential to give the paint sufficient time to cure fully. Curing ensures the paint hardens appropriately, providing a durable and long-lasting finish. Typically, curing times vary depending on the type of paint and weather conditions, so refer to the manufacturer’s instructions for specific guidance. Avoid touching or exposing the fence to heavy use during the curing period.
Step 9: Remove Protective Coverings
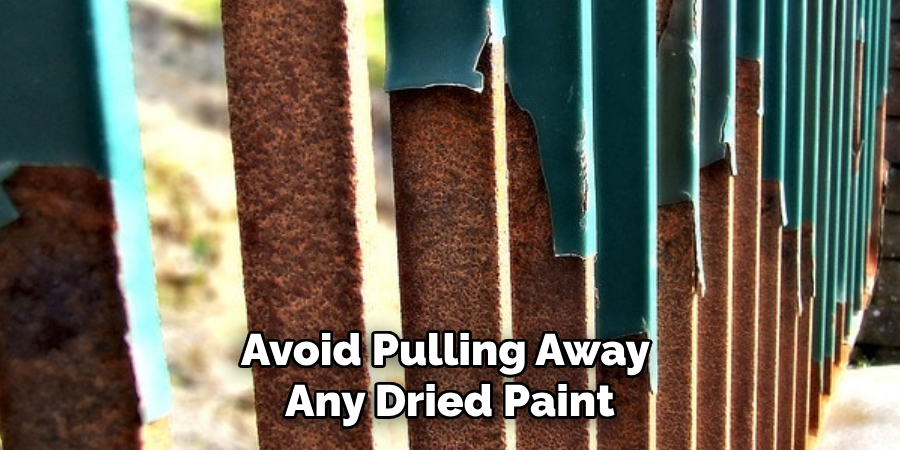
Once the paint has fully cured, carefully remove all protective coverings, such as drop cloths, plastic sheeting, and painter’s tape. Take your time to avoid pulling away any dried paint from the surfaces you’ve painted. Dispose of the coverings properly, and check the surrounding areas for accidental paint splatters or spills. If you find any, clean them promptly using a damp cloth or the appropriate cleaning solution, depending on the surface.
Step 10: Final Inspection
Perform a final fence inspection to ensure everything is in excellent condition. Look for any overlooked spots, uneven areas, or imperfections requiring minor touch-ups. Use a fine brush to correct these without disturbing the rest of the paint job. Once you’re satisfied with the results, step back and admire your handiwork! Your steel fence should now feature a vibrant, durable finish that enhances the overall appeal of your outdoor space.
By following these steps and making the necessary effort, you’ll transform your steel fence into a refreshed, polished feature that will last.
5 Things You Should Avoid
- Skipping Surface Preparation: Neglecting proper surface preparation, such as cleaning and removing rust or loose paint, can lead to adhesion issues and a subpar paint job.
- Using the Wrong Type of Paint: Choosing the wrong type of paint, such as interior paint instead of a durable exterior paint specifically designed for metal, can result in premature peeling and fading.
- Neglecting Primer: Skipping the primer can compromise the paint’s durability and longevity. A quality primer designed for metal surfaces creates a smooth and stable base to which the paint can adhere.
- Applying Paint in Poor Weather Conditions: Painting in extreme temperatures, high humidity, or wet conditions can negatively affect the paint’s drying and curing process, leading to uneven coverage and poor adhesion.
- Not Applying Multiple Coats: Applying only a single coat of paint may result in an uneven finish and insufficient protection against elements. It is recommended to apply multiple thin coats, allowing each coat to dry before applying the next.
By avoiding these common mistakes, you can ensure a professional-looking and durable paint job that enhances the appearance and protects your steel fence for years.
Conclusion
How to paint a steel fence is a valuable investment in both aesthetics and protection.
You can achieve a professional-looking and long-lasting paint job by following the proper steps and avoiding common mistakes. Start by preparing the surface through cleaning, sanding, and removing rust. Apply a suitable primer designed for metal surfaces to ensure optimal adhesion. Choose high-quality exterior paint specifically formulated for metal and apply multiple thin coats, allowing each coat to dry thoroughly. Lastly, ensure that you paint in favorable weather conditions and maintain the fence regularly to prolong its durability.
By adhering to these guidelines, you can transform your steel fence into an attractive and resilient asset for years.
Edmund Sumlin is a skilled author for Metal Fixes, bringing 6 years of expertise in crafting a wide range of metal fixtures. With a strong background in metalwork, Edmund’s knowledge spans various types of fixtures, from decorative pieces to functional hardware, blending precision with creativity. His passion for metalworking and design has made him a trusted resource in the industry.
Professional Focus:
- Expert in Metal Fixtures : Edmund aesthetic specializes in creating durable and innovative metal fixtures, offering both appeal and functionality. His work reflects a deep understanding of metalworking techniques and materials.
- Sustainability Advocate : He is dedicated to using sustainable practices, ensuring that every fixture is crafted with eco-friendly methods while maintaining high-quality standards.
In his writing for Metal Fixes, Edmund provides valuable insights into the latest trends, techniques, and practical advice for those passionate about metal fixtures, whether they are professionals or DIY enthusiasts. His focus on combining artistry with engineering helps others discover the true potential of metal in design.