

The process of sanding a metal door is essential for several reasons, such as preparing the surface for painting, removing rust, or smoothing out imperfections to ensure a pristine finish. Metal doors often require refurbishment due to exposure to the elements, which can lead to rust, dents, and other surface flaws.

By sanding, you remove these blemishes and create an even, clean surface that is ready for the next steps in restoration or maintenance. Common reasons for sanding include restoring aged or weathered doors, preparing the surface for a fresh coat of paint, or addressing rust spots that could lead to further damage if left untreated.
This article aims to provide a comprehensive guide on how to sand a metal door effectively and safely. By following these detailed instructions, you can achieve a professional-looking finish, prolong the lifespan of your metal door, and enhance its overall appearance.
Gathering the Tools and Materials
Essential Tools
You’ll need a selection of essential tools to achieve a professional finish while sanding a metal door. Start with several grits of sandpaper, ranging from coarse (80-100) for rust and old paint removal to finer grits (120-150) for smoothing the surface. A sanding block is crucial to maintain even pressure and avoid uneven areas.
Consider using an electric sander for large metal doors or extensive work, saving time and effort. A wire brush can be invaluable for tackling stubborn rust spots. Optional tools such as a vacuum or brush help efficiently clean up dust, while painter’s tape protects hardware from accidental damage.
Required Materials
In preparation for sanding, gather materials like a degreaser or mild soap to clean the metal door thoroughly, removing grease and dirt that could clog sandpaper. Drop cloths are handy for protecting the surrounding area from dust and debris.
Protective gear is essential; gloves safeguard your hands, goggles protect your eyes from flying particles, and a dust mask prevents inhalation of fine dust. Each tool and material serves a clear purpose: ensuring a clean, safe, and efficient sanding process that prepares the metal surface for priming and painting or sealing, thereby prolonging the door’s lifespan and enhancing its appearance.
Preparing the Door for Sanding
Cleaning the Surface
Before beginning the sanding process, it is crucial to thoroughly clean the metal door to eliminate any dirt, grease, and residue. Start by preparing a mixture of soapy water or using a commercial degreaser for tougher grime. Apply it generously over the door’s surface with a sponge or soft cloth, ensuring all areas are covered.
Allow the cleaning solution to sit for a few minutes to break down stubborn deposits, then scrub gently but effectively. Rinse the door with clean water to remove any soap or degreaser remnants, and dry it thoroughly with a clean towel. This initial cleaning step is vital as a grimy surface can lead to clogged sandpaper, which diminishes its effectiveness and potentially causes scratches or other surface imperfections during sanding.
Protecting Areas Not to be Sanded
To safeguard the door hardware from accidental damage during sanding, it’s important to remove or cover components like handles, locks, and hinges. If removing these parts is feasible and straightforward, ensure they are stored safely until reinstallation. Otherwise, cover them with painter’s tape to shield them against unwanted scratches or dust accumulation.
Also, a drop cloth should be placed around the work area to catch any dust and debris resulting from the sanding process. This keeps the surroundings tidy and prevents fine dust from spreading indoors, making the cleanup process more efficient. Attention to these protective measures ensures only the intended surfaces are sanded, maintaining the integrity and appearance of the entire door structure.
Choosing the Right Sandpaper Grit
Understanding Sandpaper Grit Levels
Selecting the appropriate sandpaper grit is crucial for achieving the best results when sanding a metal door. Sandpaper grits range from coarse (80-100), ideal for removing rust and old paint, to finer grits (120-150) used for smoothing out the surface. Coarser grits are more abrasive and can quickly strip away surface layers, making them suitable for tackling initial rough patches or significant imperfections.
As the sanding progresses, it’s recommended to transition to a finer grit, which will help create a smooth, even finish ready for priming or painting. Properly navigating these grit levels ensures a well-prepared metal surface for subsequent restorative work.

When to Use an Electric Sander
An electric sander can be incredibly beneficial for large metal doors or when faced with extensive sanding tasks. These power tools expedite the process and reduce manual effort significantly. When operating an electric sander on metal surfaces, it’s essential to apply even pressure and avoid excessive force, which can create unwanted scratches and compromise the integrity of the door.
Employing a steady, controlled movement ensures efficient sanding without damaging the surface. Additionally, ensure to follow all safety recommendations, such as wearing eye protection and a dust mask, to protect against particles and debris associated with electric sanding.
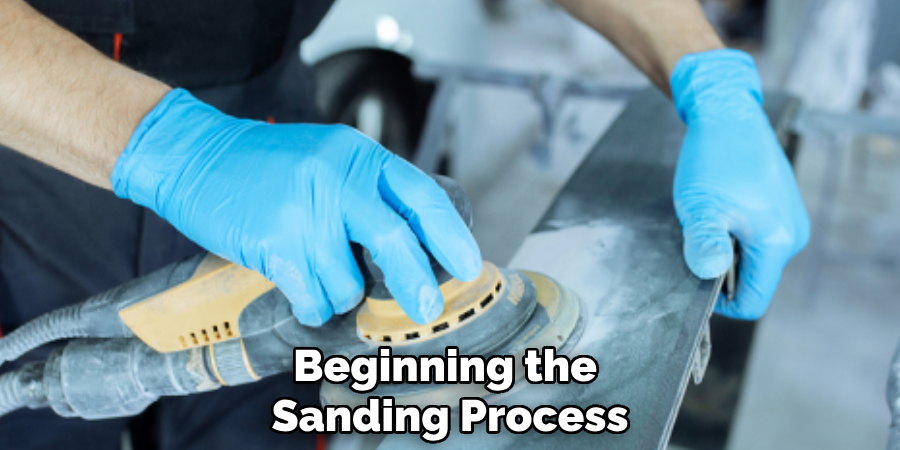
How to Sand a Metal Door: Step-by-Step Guide
Sanding to Remove Rust and Old Paint
Begin by attaching coarse grit sandpaper (80-100) to your sanding block or electric sander. Start sanding the metal door, focusing on areas where rust and old paint are most prevalent. Use firm, controlled strokes to effectively remove flaking paint and rust. Ensure that pressure is even applied to avoid creating any uneven spots on the surface.
For particularly stubborn rust patches, supplement the sandpaper with a wire brush. The wire brush will penetrate the surface more deeply, loosening and removing entrenched rust deposits. Work methodically over the entire door, checking regularly for any residual paint or corrosion to ensure a clean, stripped surface.
Smoothing the Surface with Finer Grit
Once the initial sanding phase is complete, switch to a finer grit sandpaper (120-150) to smooth the surface. Attach the sandpaper to a sanding block to maintain consistent pressure, which is especially crucial when working on edges and around corners.
Begin with gentle, sweeping motions over the entire surface of the door, maintaining a steady pace to ensure all areas are uniformly sanded. The goal is to achieve a smooth, even texture that feels consistent to the touch. Pay particular attention to any areas that may have been missed during the initial pass, ensuring that the entire door is prepared for the final stages of the restoration process.
Final Sanding Pass
Conclude the sanding process with a very fine grit sandpaper (220 or higher). Conduct a final pass over the entire door to achieve an ultra-smooth texture, ideal for painting or sealing.
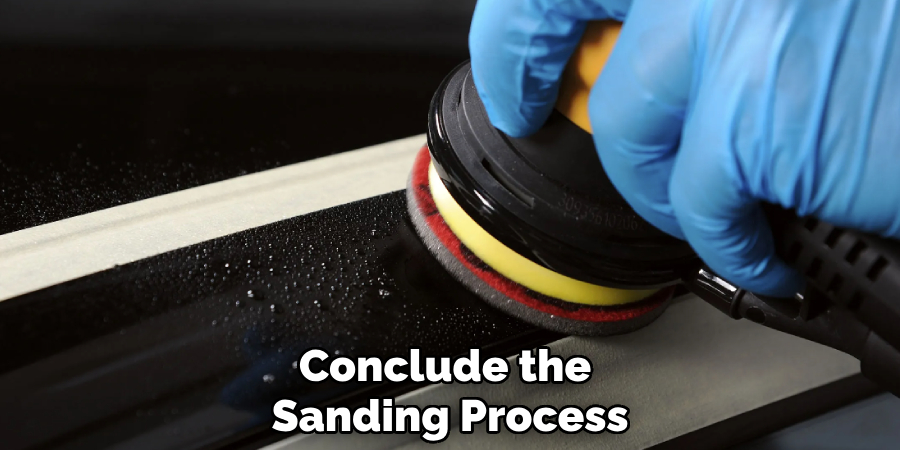
Carefully check the door’s surface with your hand to ensure it feels consistently smooth, with no rough patches or areas needing further attention. This final step ensures the door is perfectly primed for the next phase in its restoration or maintenance journey.
Cleaning Up After Sanding
Removing Dust and Residue
After sanding the metal door, it’s essential to thoroughly clean the area to remove all sanding dust and residue. Start by using a vacuum with a brush attachment to collect the bulk of the dust from the door and surrounding space. Follow up with a soft-bristled brush to gently remove any dust caught in crevices or corners.
Finally, wipe down the door with a damp cloth, removing all remaining particles. This meticulous cleaning step is crucial as any lingering dust can interfere with paint adhesion if the door is to be painted.
Inspecting for Missed Spots
With the door surface cleaned, visually inspect and run your hand over the surface to detect any remaining rough patches, rust spots, or areas that are uneven.
Pay attention to edges and corners, which may have been overlooked. If any imperfections are found, touch them up with a suitable grit sandpaper to achieve a consistent finish. This careful inspection guarantees that the door is uniformly smooth and ready for further restoration efforts, ensuring the best results in subsequent steps.
Preparing the Sanded Door for Painting
Applying a Primer if Painting
Before painting the sanded metal door, applying a rust-inhibiting primer is crucial. This primer acts as a protective layer, preventing future rust and improving paint adhesion. Choosing the right primer is essential, as it should be compatible with the paint type you plan to use.
For best results, select a primer that matches your paint—oil-based primers with oil-based paints and latex primers with latex paints—ensuring a durable, long-lasting finish.
Sealing for Protection
If repainting the metal door is not in your plans, consider applying a clear sealer. This protective coat shields the metal from rust and wear, maintaining the door’s integrity over time.
A sealer is especially useful for exterior doors exposed to changing weather conditions. It helps to create a barrier against moisture and environmental elements, preserving the metal’s appearance and extending its lifespan.
Maintenance Tips for a Smooth Metal Door
Routine Cleaning and Touch-Ups
To maintain a smooth metal door and prevent rust buildup, regularly clean the surface with mild detergent and water. Use a soft cloth or sponge to remove any dirt or residue. Address scratches or rust spots promptly by sanding and treating them to prevent further corrosion. Immediate attention to small issues avoids larger, costlier repairs.
Regular Inspection
Conduct periodic inspections of your metal door, especially if it’s exposed to harsh weather conditions. Check for signs of new rust, paint peeling, or wear. Early detection of issues allows for timely repairs, maintaining the door’s functionality and appearance over time.

Conclusion
Understanding the process of how to sand a metal door ensures a successful restoration and maintenance routine. By carefully following the steps from initial rust removal to the final smoothing pass, you prepare the door for painting or sealing, thereby restoring its appearance and durability.
Thorough cleaning after sanding and a diligent inspection prevent issues from arising in the future. Whether painting or applying a sealer, proper preparation paves the way for long-term protection against rust and environmental damage, ultimately extending the life and look of your metal door.
Edmund Sumlin is a skilled author for Metal Fixes, bringing 6 years of expertise in crafting a wide range of metal fixtures. With a strong background in metalwork, Edmund’s knowledge spans various types of fixtures, from decorative pieces to functional hardware, blending precision with creativity. His passion for metalworking and design has made him a trusted resource in the industry.
Professional Focus:
- Expert in Metal Fixtures : Edmund aesthetic specializes in creating durable and innovative metal fixtures, offering both appeal and functionality. His work reflects a deep understanding of metalworking techniques and materials.
- Sustainability Advocate : He is dedicated to using sustainable practices, ensuring that every fixture is crafted with eco-friendly methods while maintaining high-quality standards.
In his writing for Metal Fixes, Edmund provides valuable insights into the latest trends, techniques, and practical advice for those passionate about metal fixtures, whether they are professionals or DIY enthusiasts. His focus on combining artistry with engineering helps others discover the true potential of metal in design.