

If you’ve ever built a fire in a wood-burning stove or fireplace, chances are you’ve heard of creosote. This sticky, tar-like substance can build up inside your chimney or stovepipe over time, posing a serious fire hazard if not addressed. As the temperature rises, this highly flammable substance can ignite, causing a chimney fire that can quickly spread to the rest of your home. But fear not! In this blog post on how to remove creosote from metal, we will explore the most effective methods for removing creosote from metal surfaces, ensuring the safety and longevity of your heating system.
From simple DIY solutions to professional chimney sweeping techniques, we’ve got you covered. So, whether you’re a homeowner looking to perform some routine maintenance or a chimney professional seeking expert advice, read on to discover the secrets of creosote removal.
Things to Consider
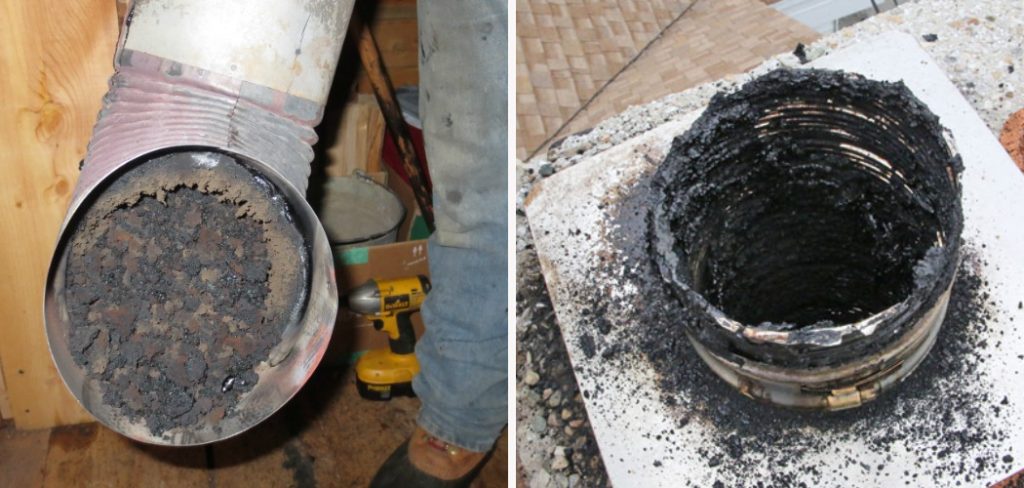
Before we dive into the methods of creosote removal, it’s important to understand the different types of creosote and their characteristics. This knowledge will help you determine which method is best suited for your specific situation. There are three stages of creosote buildup, and each one requires a different approach:
First Degree:
This stage is characterized by a dry, flaky texture that can be easily removed with a chimney brush or vacuum.
Second Degree:
At this stage, the creosote forms into harder, shiny flakes that require more effort to remove. A scraper or wire brush may be needed to effectively remove this type of creosote.
Third Degree:
This is the most dangerous stage, where the creosote has solidified into a hard, tar-like glaze that can only be removed by professional chimney sweeps using specialized tools. If left unattended, third-degree creosote can lead to a chimney fire and potentially cause serious damage.
11 Step-by-step Guides on How to Remove Creosote From Metal
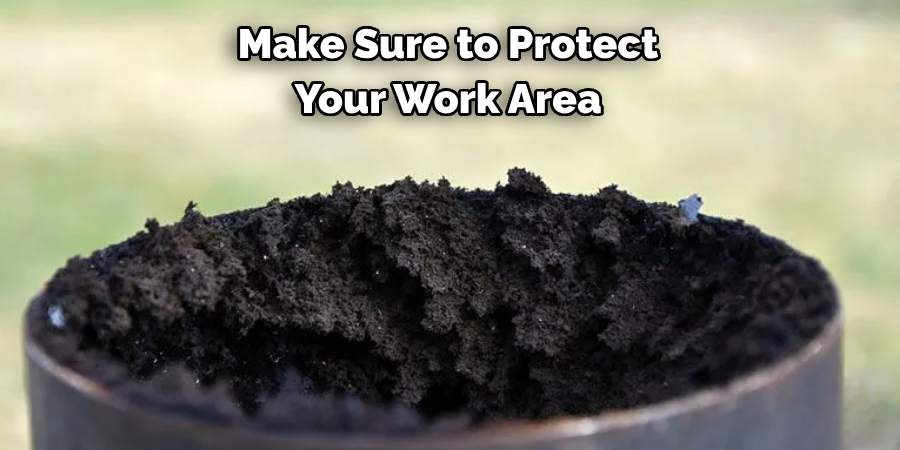
Step 1: Prepare the Work Area
Before you begin the removal process, make sure to protect your work area by laying down drop cloths or plastic sheets. This will help prevent any mess and contain the removed creosote for proper disposal. You may also want to wear protective gear, such as safety goggles and gloves, to ensure your personal safety. But don’t worry, the methods outlined below are safe and easy to perform.
Step 2: Put on Protective Gear
Creosote can cause skin irritation and respiratory problems, so it’s important to wear protective gear such as gloves, safety goggles, and a dust mask to avoid direct contact. It’s also recommended to wear old clothes that you don’t mind getting dirty. You may also want to open nearby windows for proper ventilation. It’s better to be safe than sorry when dealing with creosote.
Step 3: Remove Any Obstructions
Make sure there are no obstructions in the flue before beginning the removal process. This includes any debris or animal nests that may have built up over time. This step is crucial to ensure proper ventilation and safe removal of creosote. You can use a flashlight to inspect the entire length of the flue and remove any obstructions as needed.
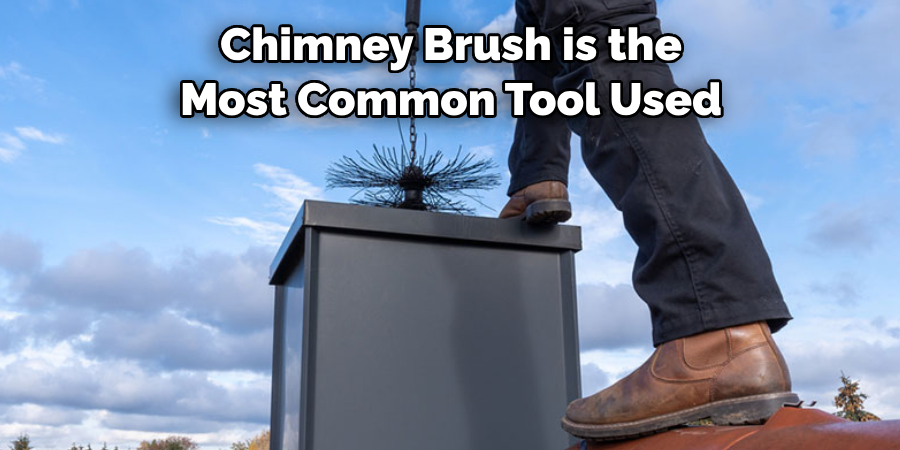
Step 4: Use a Chimney Brush
A chimney brush is the most common tool used for removing creosote. It consists of stiff wire bristles attached to a long handle and is specifically designed for cleaning chimneys. Simply insert the brush into the flue and scrub it up and down while twisting it to effectively remove any creosote build-up. For best results, use a brush with a diameter slightly larger than your chimney’s flue size.
Step 5: Vacuum or Use Wet/Dry Ash
After brushing the flue, use a vacuum cleaner to remove any loosened creosote. Alternatively, you can also sprinkle wet/dry ash onto the surface of the creosote, which will help loosen it and make it easier to remove. Be sure to wear your protective gear when handling this substance. Although it’s not toxic, it can be irritating if inhaled or ingested.
Step 6: Scrape Away Hard Creosote
For second-degree creosote, you may need to use a scraper or wire brush to remove it completely. Be careful not to damage the metal surface while scraping and avoid using sharp tools that can create scratches or gouges. You can also use steel wool or sandpaper to gently remove any remaining creosote residue.
Step 7: Use a Chemical Cleaner
If you’re dealing with stubborn third-degree creosote, a chemical cleaner may be necessary. These cleaners are specifically designed to break down and soften the hardened glaze, making it easier to remove. Follow the instructions carefully and make sure to wear protective gear when using chemical cleaners. You can also use a homemade solution of hot water and vinegar for a more natural approach.
Step 8: Repeat the Process
Depending on the severity of creosote build-up, you may need to repeat the above steps multiple times. Be patient and thorough to ensure all creosote is removed from the metal surface. It’s better to spend a little extra time on this step than to risk leaving behind any potentially dangerous residue. There is no shortcut when it comes to creosote removal. It’s important to do it right.
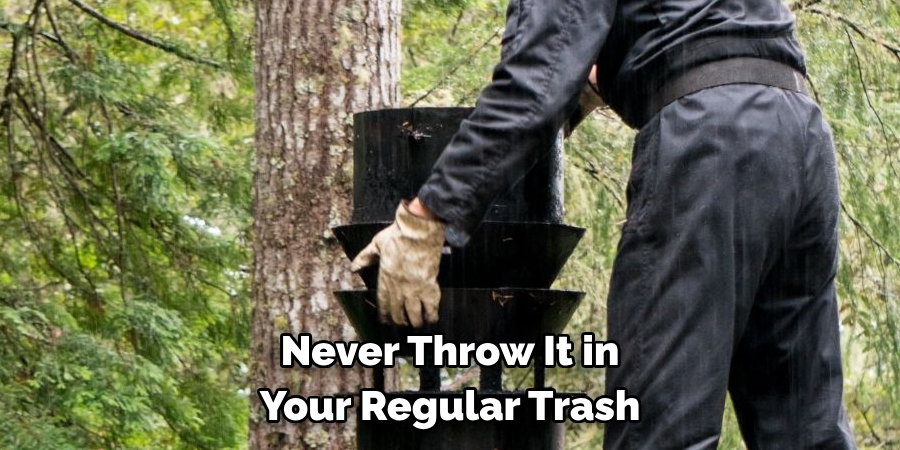
Step 9: Dispose of Creosote Properly
Once you’ve completed the removal process, be sure to properly dispose of the creosote. Never throw it in your regular trash as it can still pose a fire hazard. Instead, seal it in a plastic bag and take it to a designated hazardous waste disposal facility. You can also check with your local municipality for specific guidelines on how to dispose of creosote in your area. It’s always best to err on the side of caution when dealing with hazardous materials.
Step 10: Regular Maintenance
To prevent excessive creosote buildup in the future, it’s important to perform regular maintenance on your chimney. This includes annual inspections and cleanings by a professional chimney sweep, as well as practicing proper burning techniques. Burning only dry, seasoned wood can help reduce creosote buildup and prolong the life of your chimney. You should also avoid burning any materials that produce excessive smoke, such as cardboard or plastics.
Step 11: Consider Installing Creosote Inhibitors
For added protection, consider installing a creosote inhibitor in your chimney. These products are designed to reduce the formation of creosote and help prevent dangerous chimney fires. However, it’s important to note that these inhibitors should not be seen as a substitute for regular maintenance and cleaning. They can simply serve as an added precaution to keep your chimney clean and safe from creosote buildup.
Following these step-by-step guides on how to remove creosote from metal will not only help keep your chimney clean and safe, but it will also prolong its lifespan. Remember to always protect yourself with proper gear and take the necessary precautions when dealing with this potentially hazardous substance. Regular maintenance and cleaning are key to preventing excess creosote buildup and ensuring a safe home environment.
Frequently Asked Questions
Q: Can I Use Any Type of Brush to Remove Creosote?
A: It is recommended to use a chimney brush specifically designed for cleaning chimneys to effectively remove creosote buildup. It’s important to choose a brush with the right diameter for your chimney flue size. Using a brush that is too small may not be as effective while using one that is too large can cause damage to the metal surface.
Q: How Often Should I Clean My Chimney?
A: It’s recommended to have your chimney inspected and cleaned by a professional chimney sweep at least once a year. However, if you notice any signs of excessive creosote buildup or notice any issues with your chimney, it’s best to have it cleaned immediately.
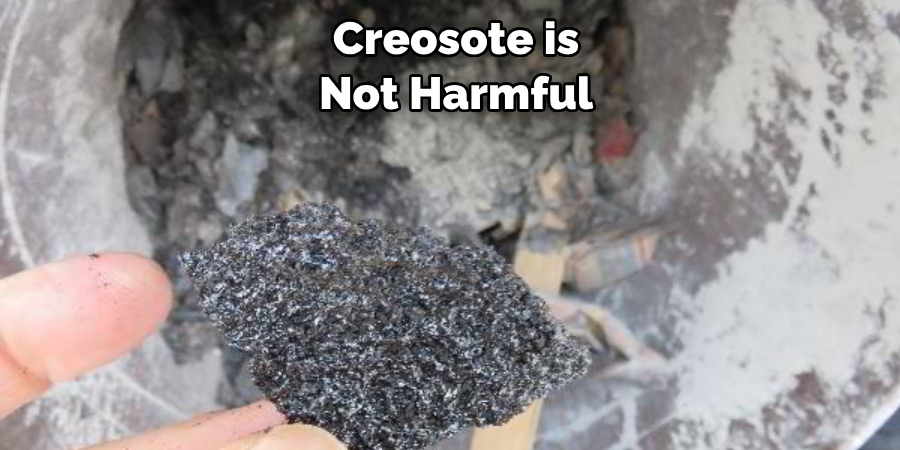
Q: Is Creosote Harmful to My Health?
A: In its solid form, creosote is not harmful. However, when it is heated and released as smoke, it can be hazardous to your health if inhaled or ingested. It’s important to always
Conclusion
In conclusion on how to remove creosote from metal, creosote can be a destructive force on metal surfaces if it is not properly treated. With the right precautions and techniques, you can successfully clean off any evidence of creosote. Start by wearing protective clothing and use an approved chemical to remove creosote, such as sulfuric acid, hydrochloric acid or trisodium phosphate (TSP). Be sure to test your methods on a smaller area before proceeding and always wear protective gear. Remember to dispose of the chemicals safely once you’re finished working with them.
Taking the time to prepare for a successful de-creosoting effort will go a long way in maintaining your metal surfaces free from damage caused by this corrosive material. If all else fails, call in a professional – they’ll have the best equipment and experience necessary for large-scale cleanup efforts. Now get out there – take adequate safety measures – and start de-crossing those metal surfaces!
Edmund Sumlin is a skilled author for Metal Fixes, bringing 6 years of expertise in crafting a wide range of metal fixtures. With a strong background in metalwork, Edmund’s knowledge spans various types of fixtures, from decorative pieces to functional hardware, blending precision with creativity. His passion for metalworking and design has made him a trusted resource in the industry.
Professional Focus:
- Expert in Metal Fixtures : Edmund aesthetic specializes in creating durable and innovative metal fixtures, offering both appeal and functionality. His work reflects a deep understanding of metalworking techniques and materials.
- Sustainability Advocate : He is dedicated to using sustainable practices, ensuring that every fixture is crafted with eco-friendly methods while maintaining high-quality standards.
In his writing for Metal Fixes, Edmund provides valuable insights into the latest trends, techniques, and practical advice for those passionate about metal fixtures, whether they are professionals or DIY enthusiasts. His focus on combining artistry with engineering helps others discover the true potential of metal in design.